
- Which currency to charge in
- Which payment methods to show (Stripe, PayPal, Cash on Delivery)
- Which delivery options are available and at what price
- Which tax rules apply
You need at least one enabled zone before customers can complete checkout.
Accessing Zones
- Click on Settings in the sidebar
- Select Zones from the settings menu
Zones settings page
Creating a Zone
To create a new zone:- Click the plus icon button
- Fill in the zone details
- Click Save
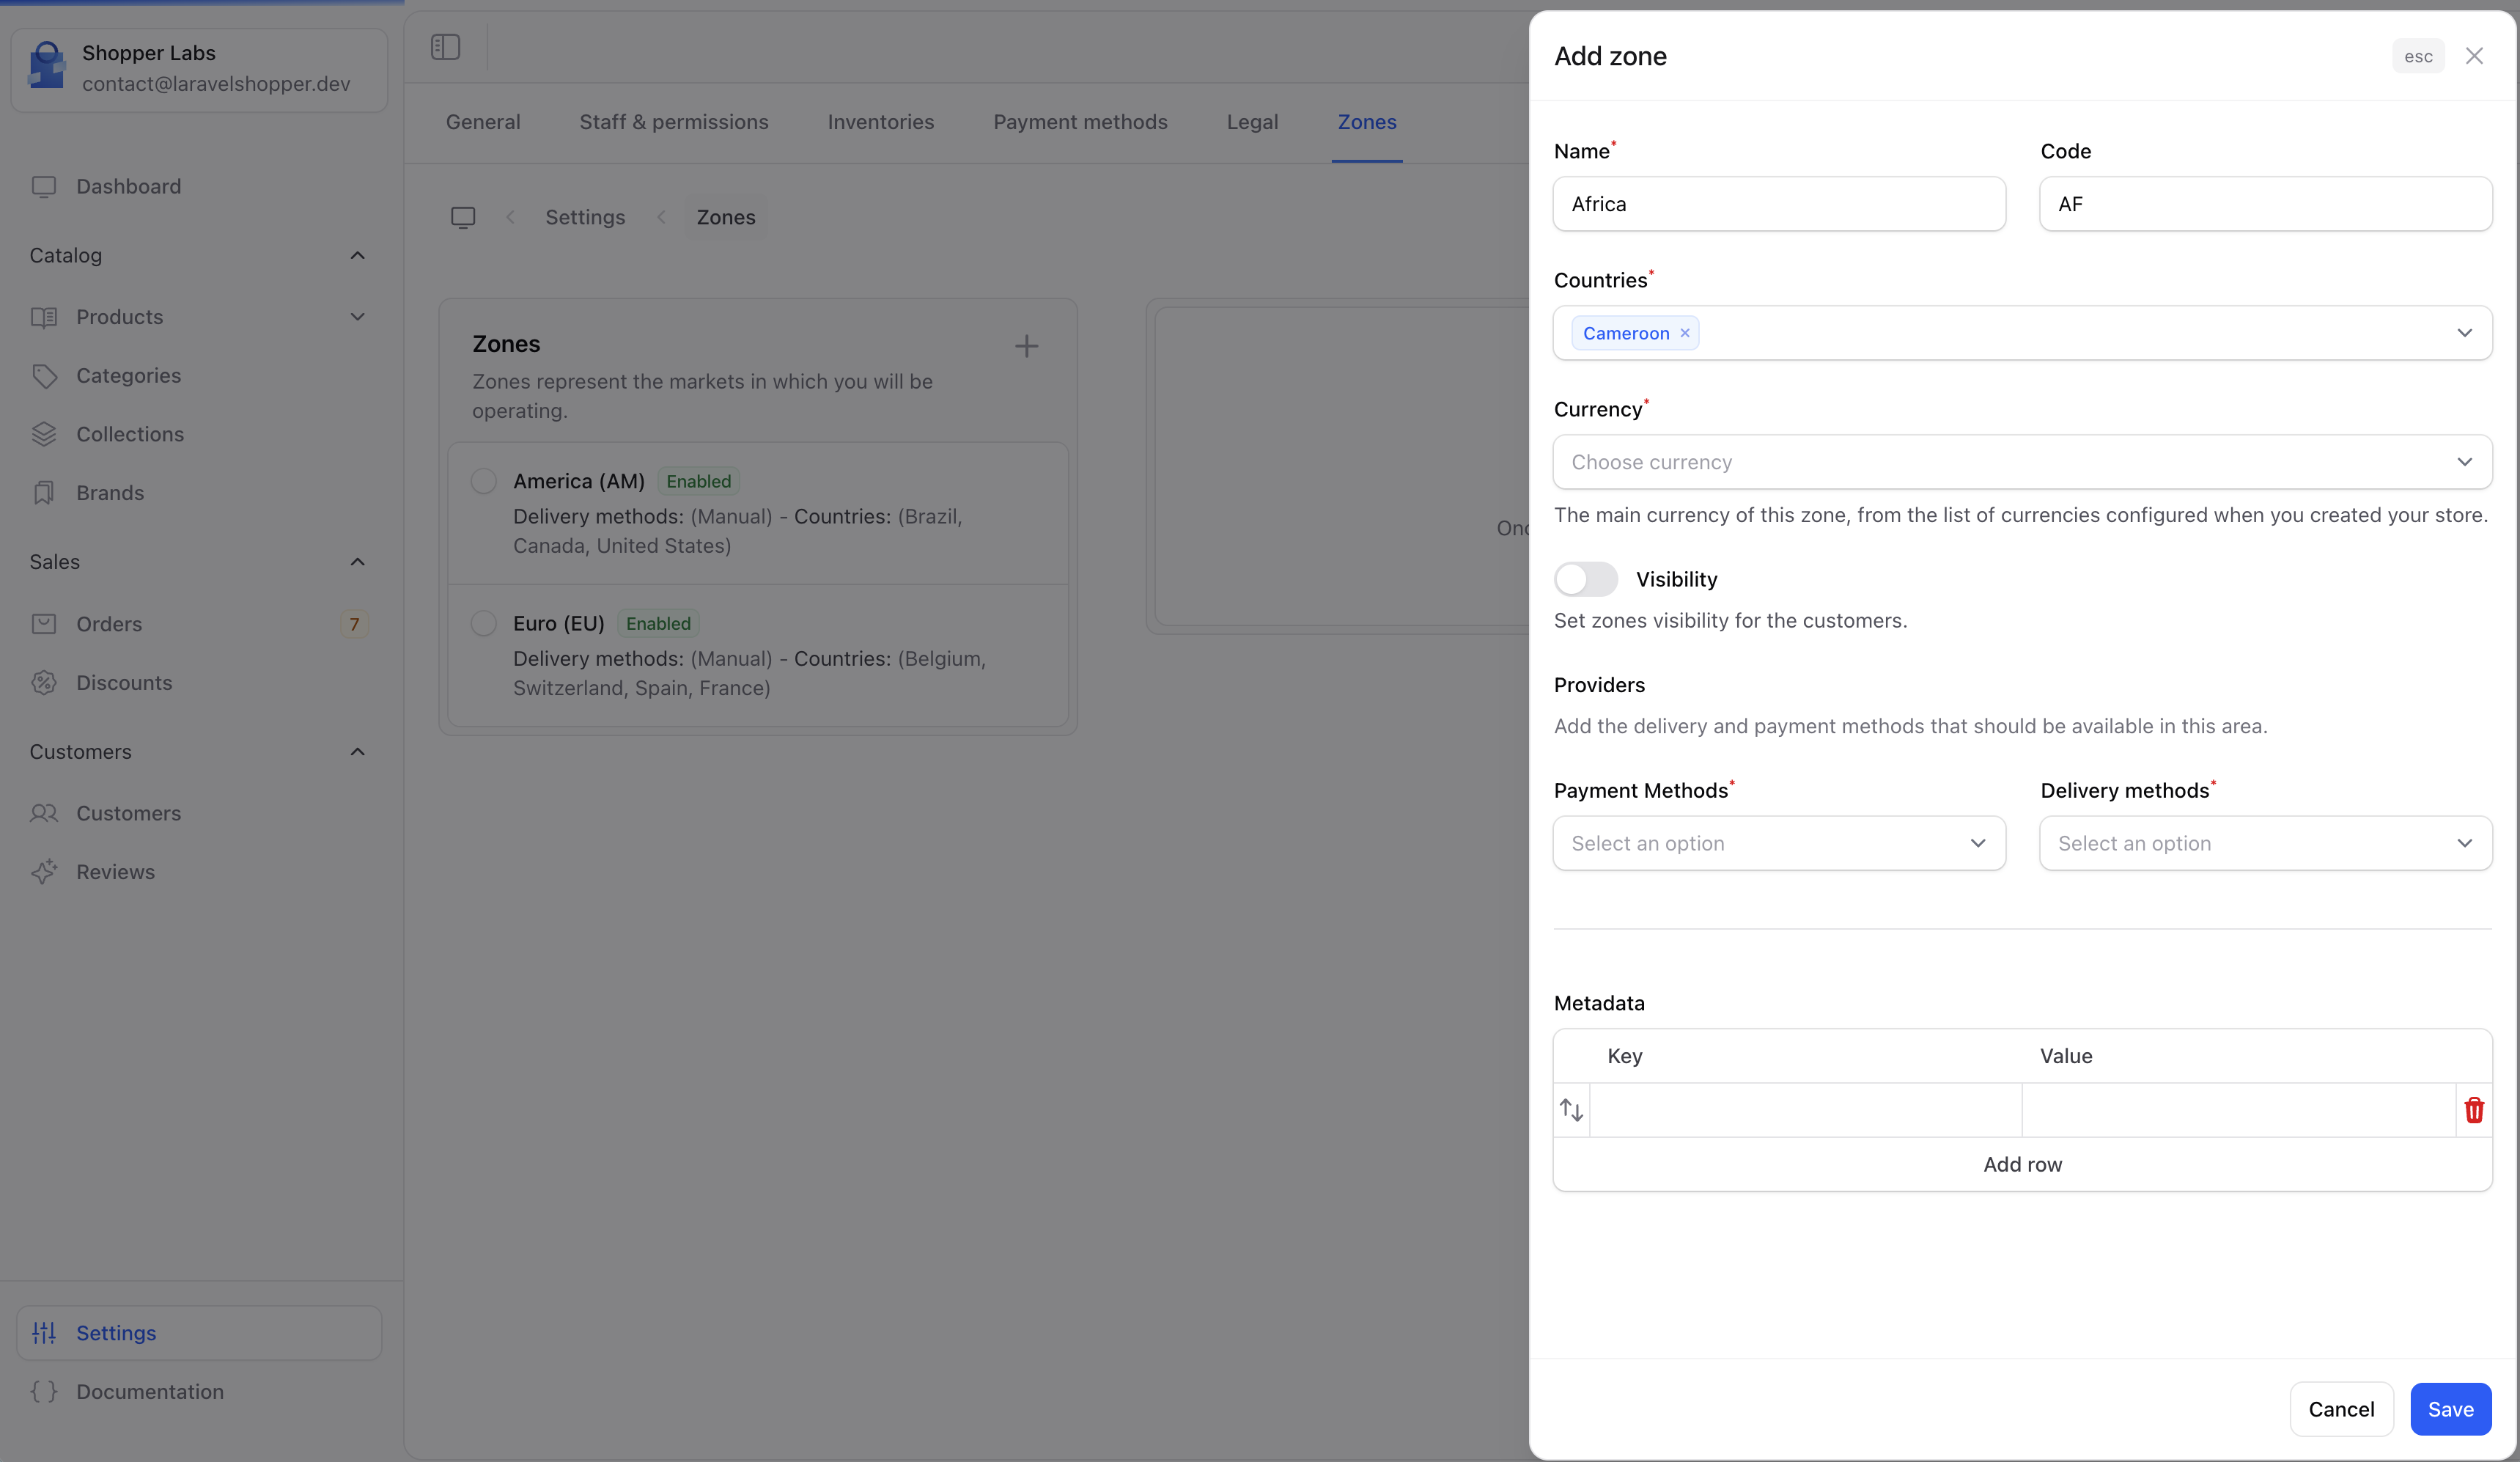
Zone Fields
Zone Detail Page
After creating a zone, click on it to view its detail page. The detail page shows the zone’s configuration and its shipping options.
Editing a Zone
To update a zone’s settings:- Click on the zone from the zones list
- Click the Edit button
- Modify the fields you want to change
- Click Save
What’s Configured Inside a Zone
Each zone connects three things together for a region:Zones in Orders
When viewing orders, you can see which zone applies to each order. This helps you understand which shipping and payment rules were used.
Common Zone Setups
Single-Country Store
If you only sell domestically, create one zone:Multi-Region Store
For stores selling across regions:Global Store with Few Zones
Keep it simple with broad zones:Best Practices
Start Simple
Begin with a domestic zone and expand to international zones as your business grows.
Group by Cost
Countries with similar shipping costs should share a zone to simplify pricing.
One Currency per Zone
Each zone uses one currency. If you sell in EUR and USD, you need separate zones.
Test Checkout
After configuring zones, place test orders from different countries to verify everything works.
Related Pages
Carriers
Set up shipping carriers and configure delivery options.
Currencies
Manage the currencies available in your store.
Zones Documentation
Developer reference for zones, relationships, and configuration.