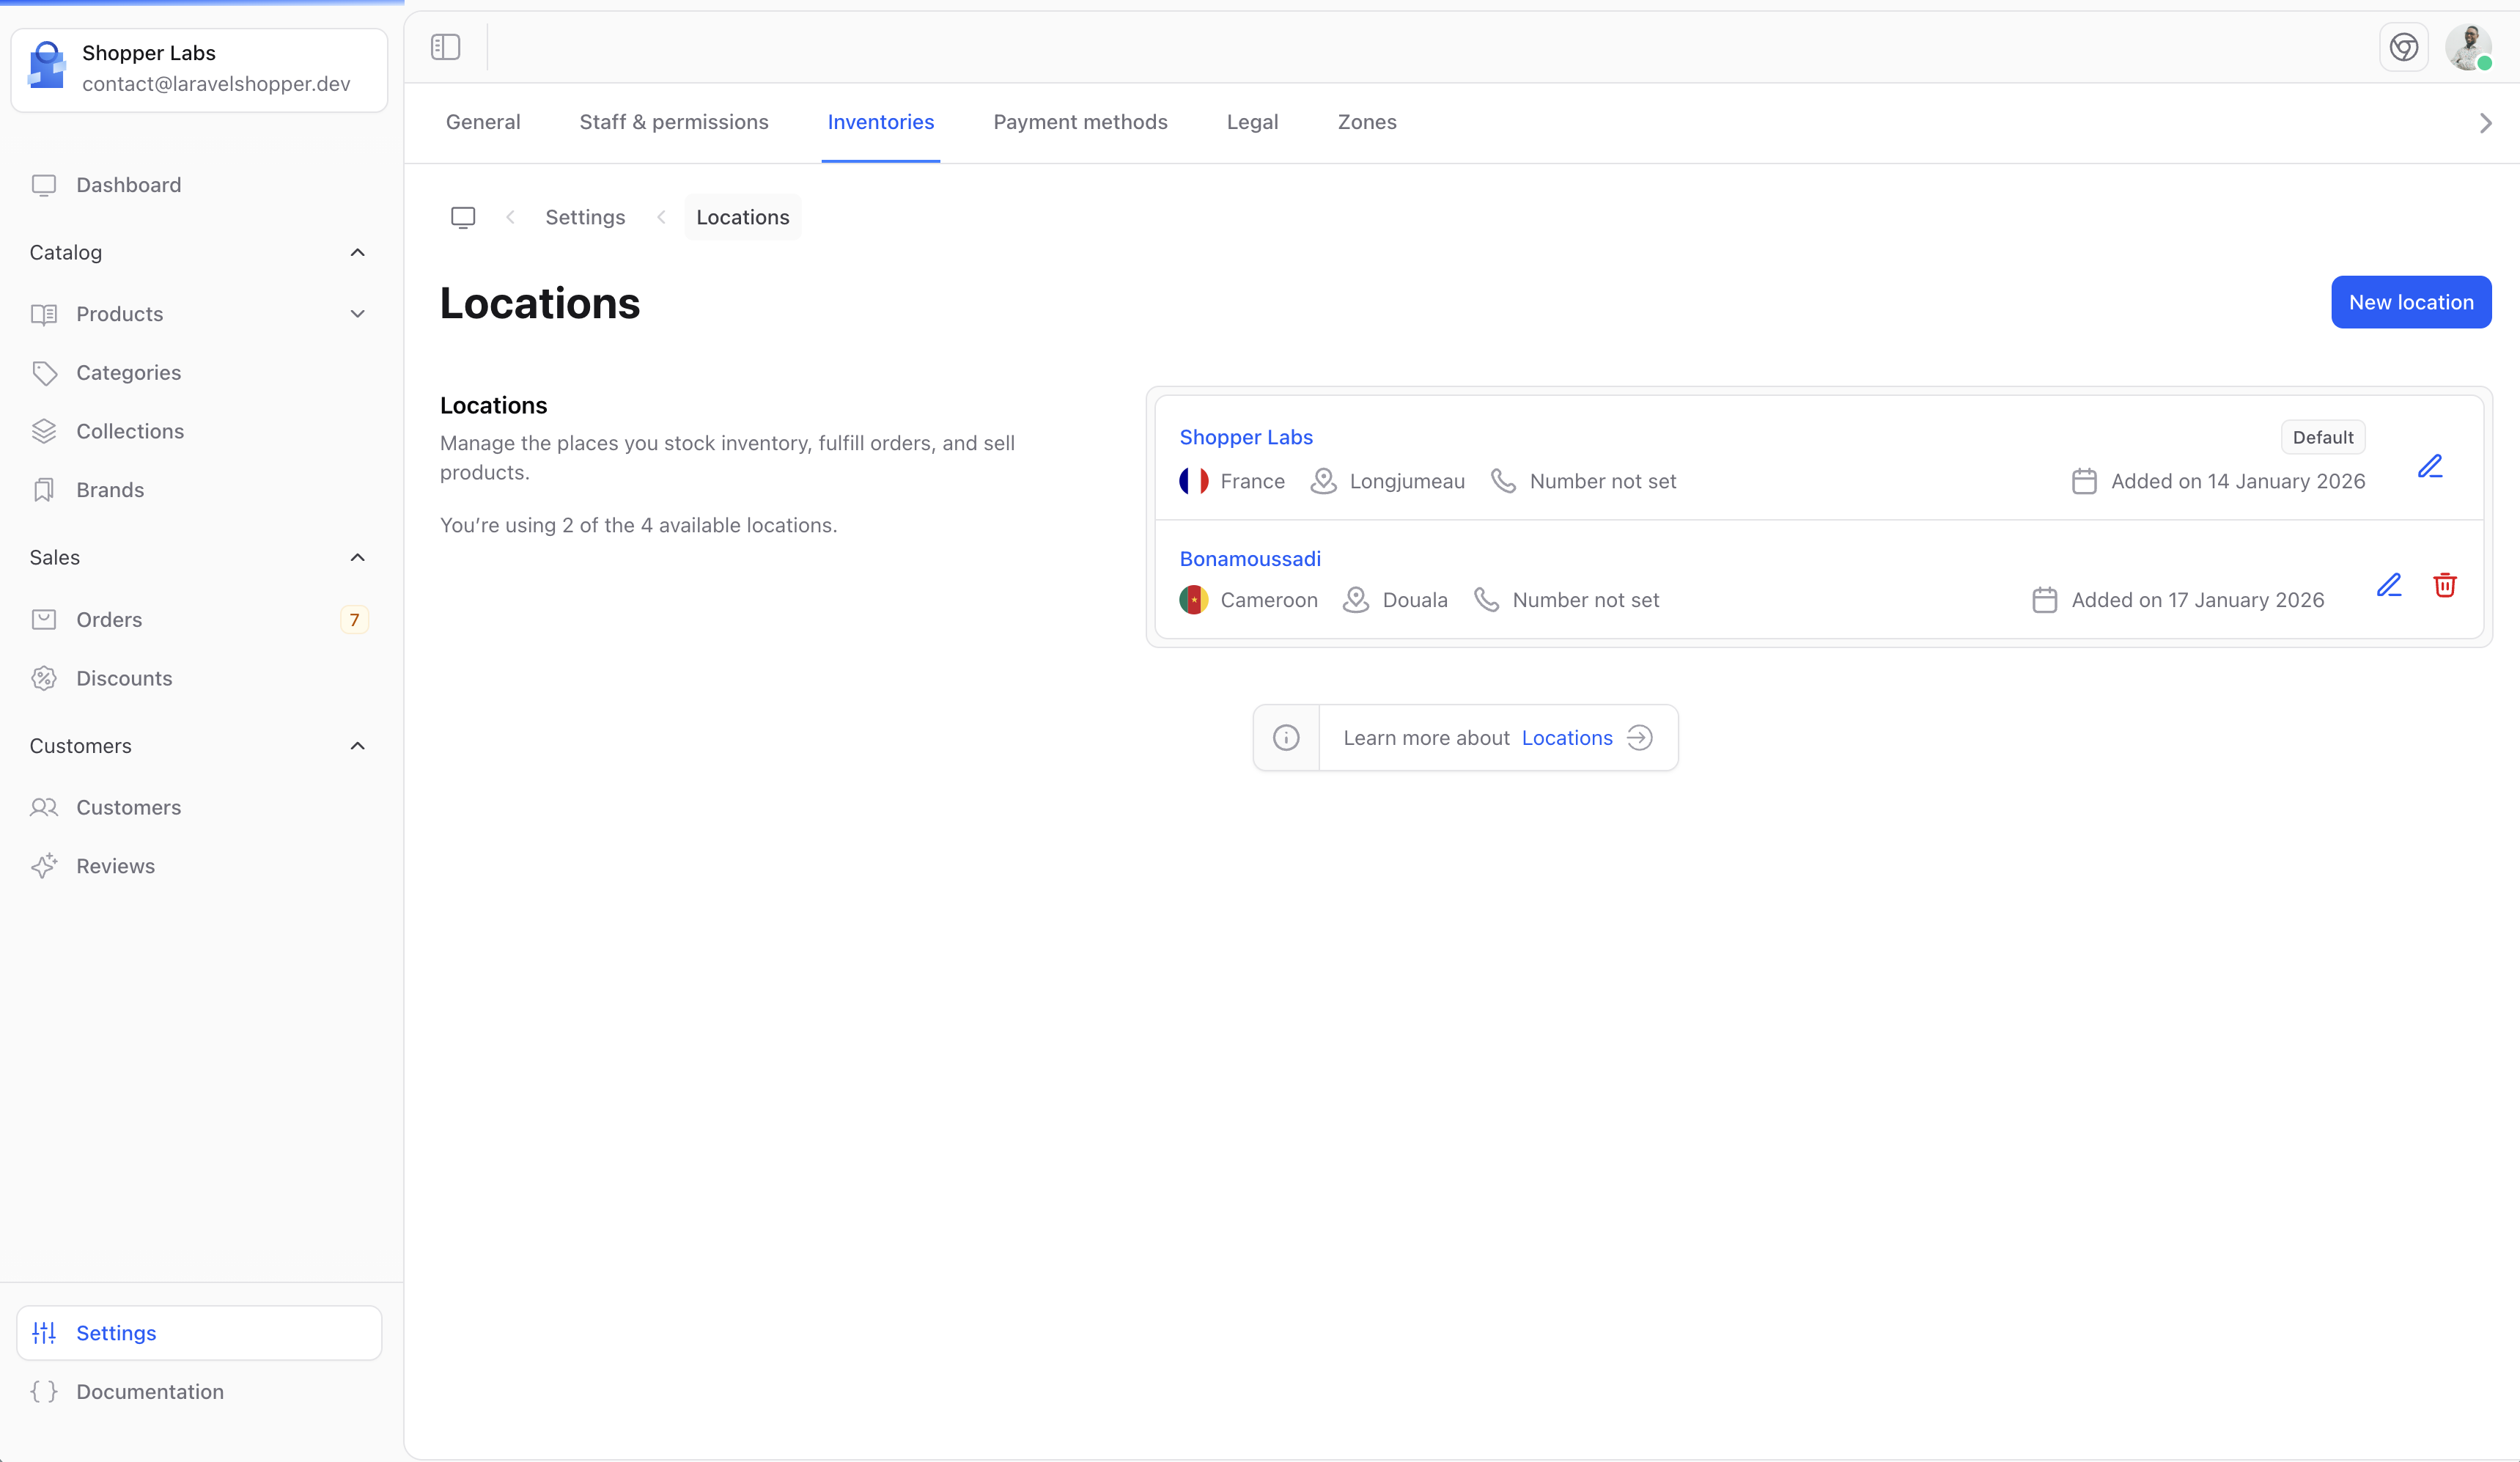
Locations in Shopper represent physical places where you store your inventory. This could be warehouses, retail stores, or any other location where you keep products.
Why Use Multiple Locations?
Managing inventory across multiple locations allows you to:
- Track stock levels at different warehouses
- Fulfill orders from the nearest location
- Manage inventory for physical retail stores
- Keep accurate stock counts across your business
Accessing Locations
- Click on Settings in the sidebar
- Select Inventories from the settings menu
Default Inventory
When you set up Shopper, a default inventory location is created for you. This location is used as the primary inventory source.
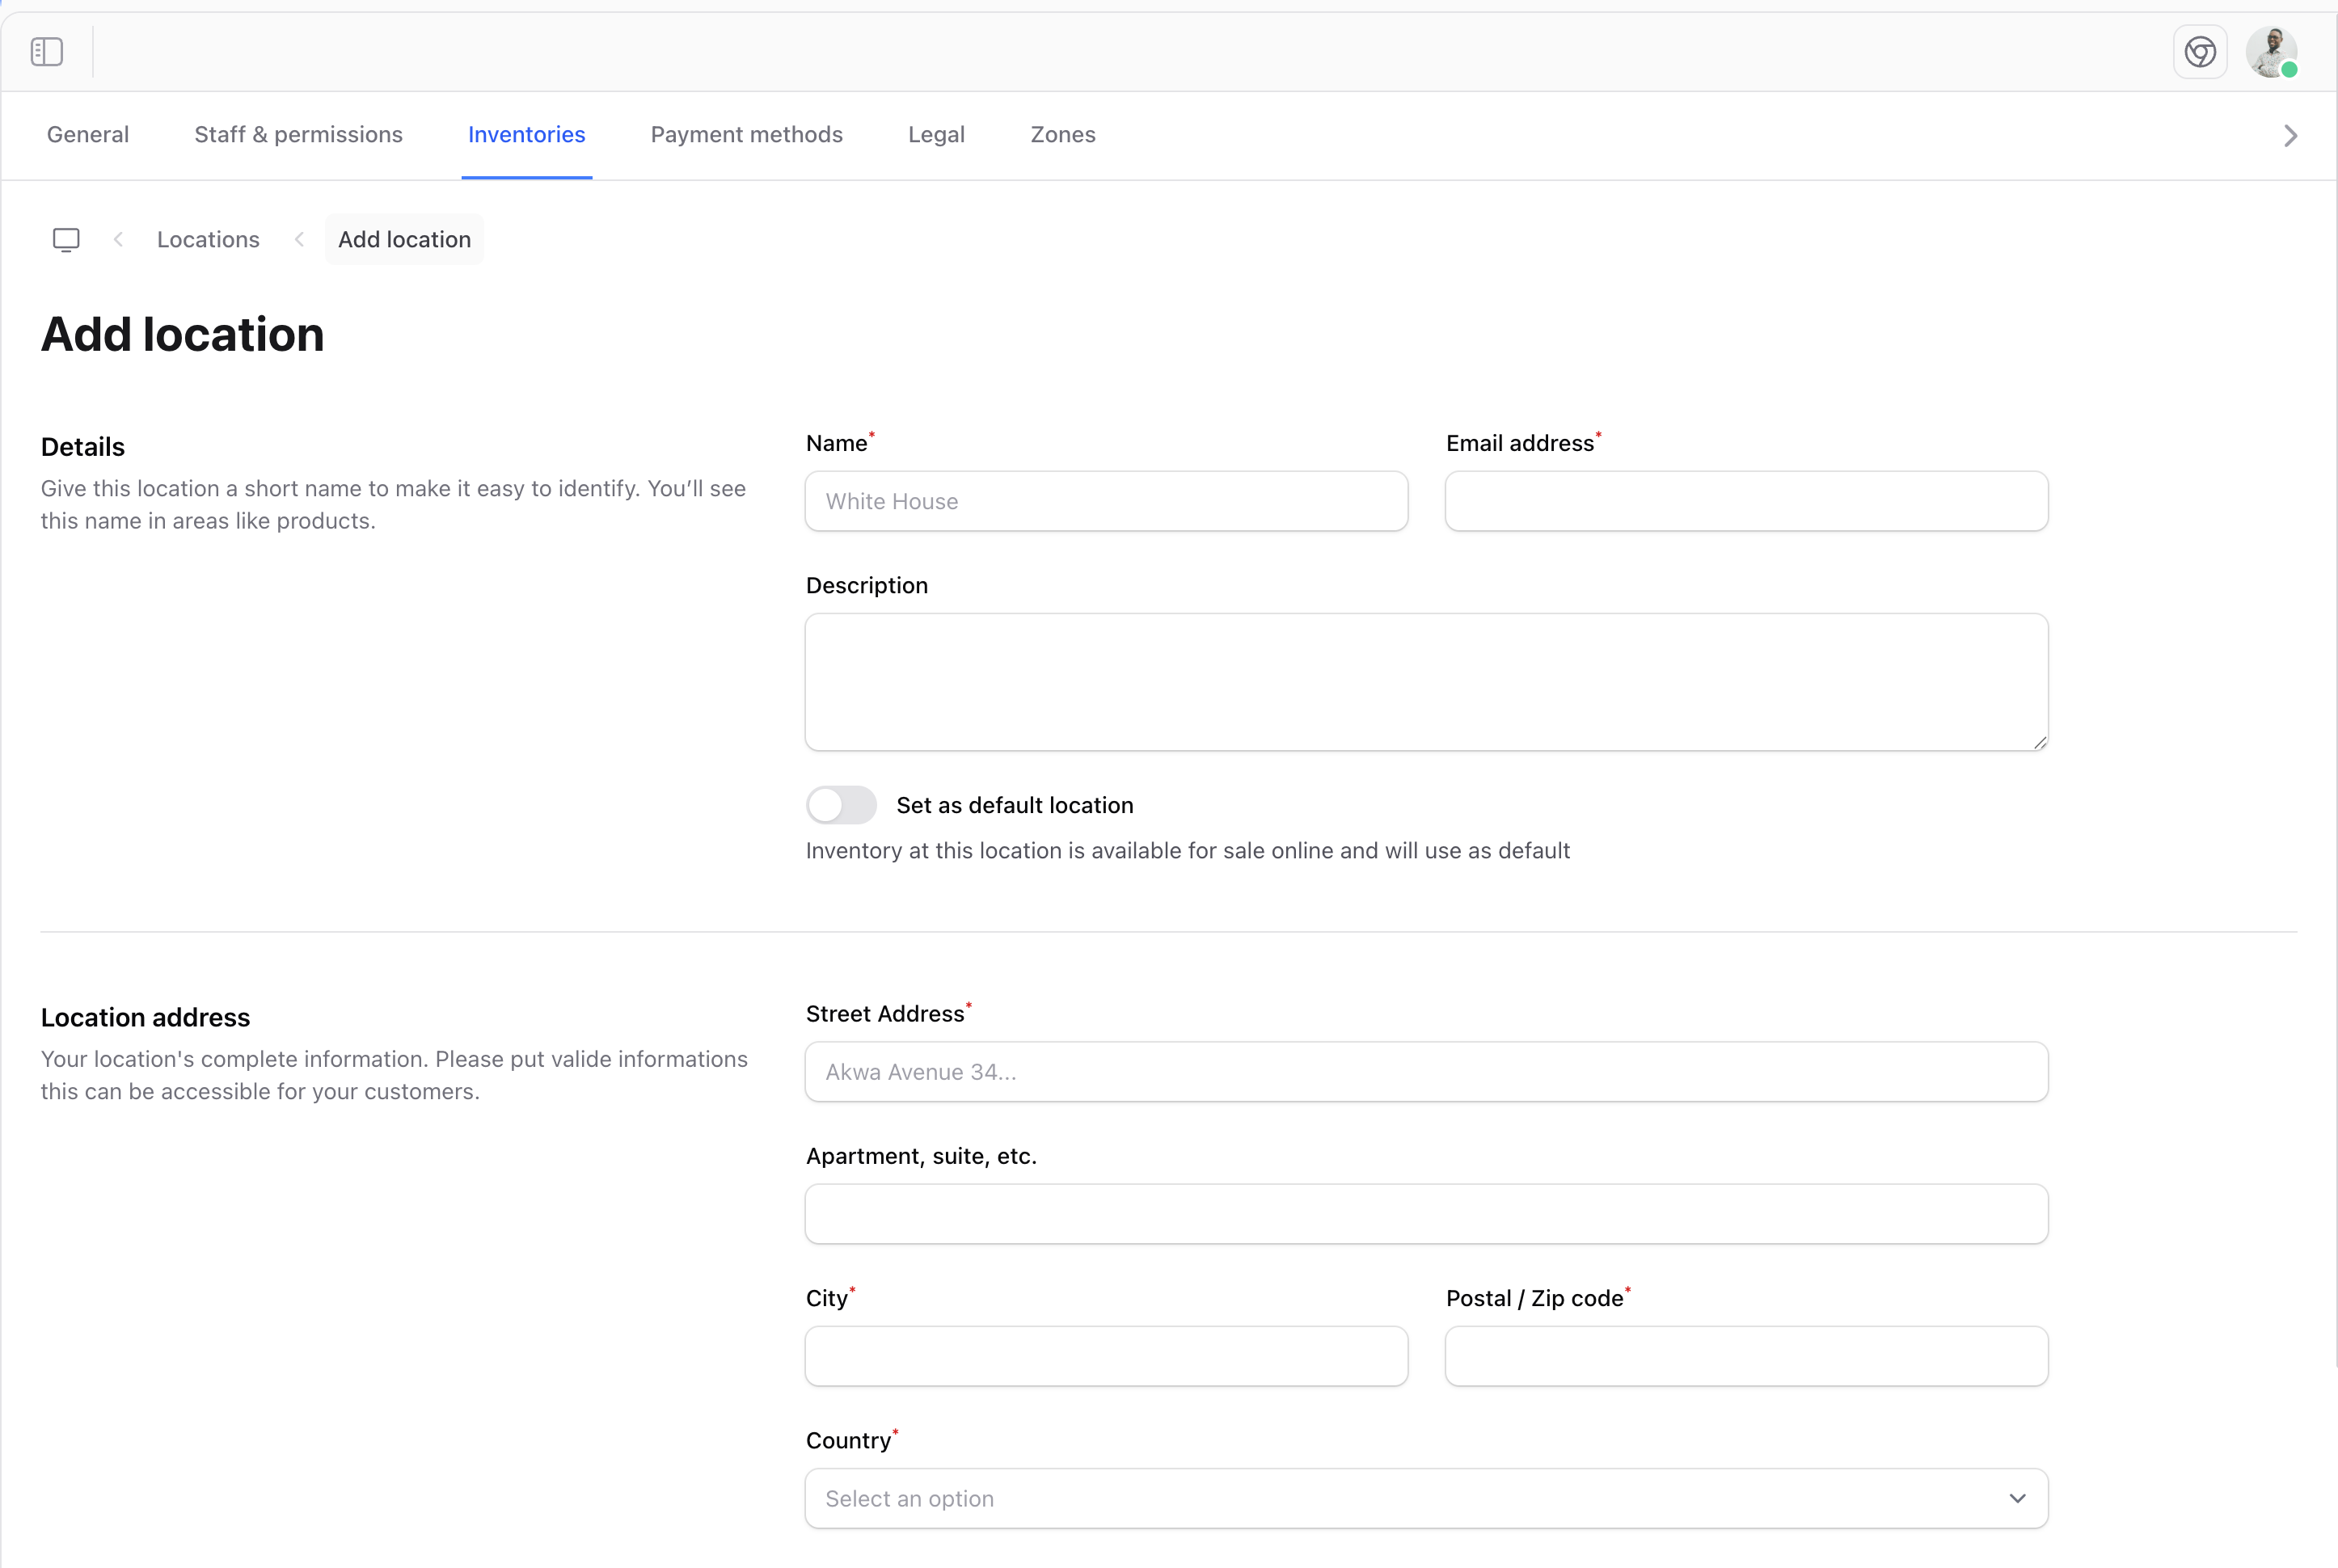
Creating a New Location
To add a new inventory location:
- Click the Create button on the Locations page
- Fill in the inventory details
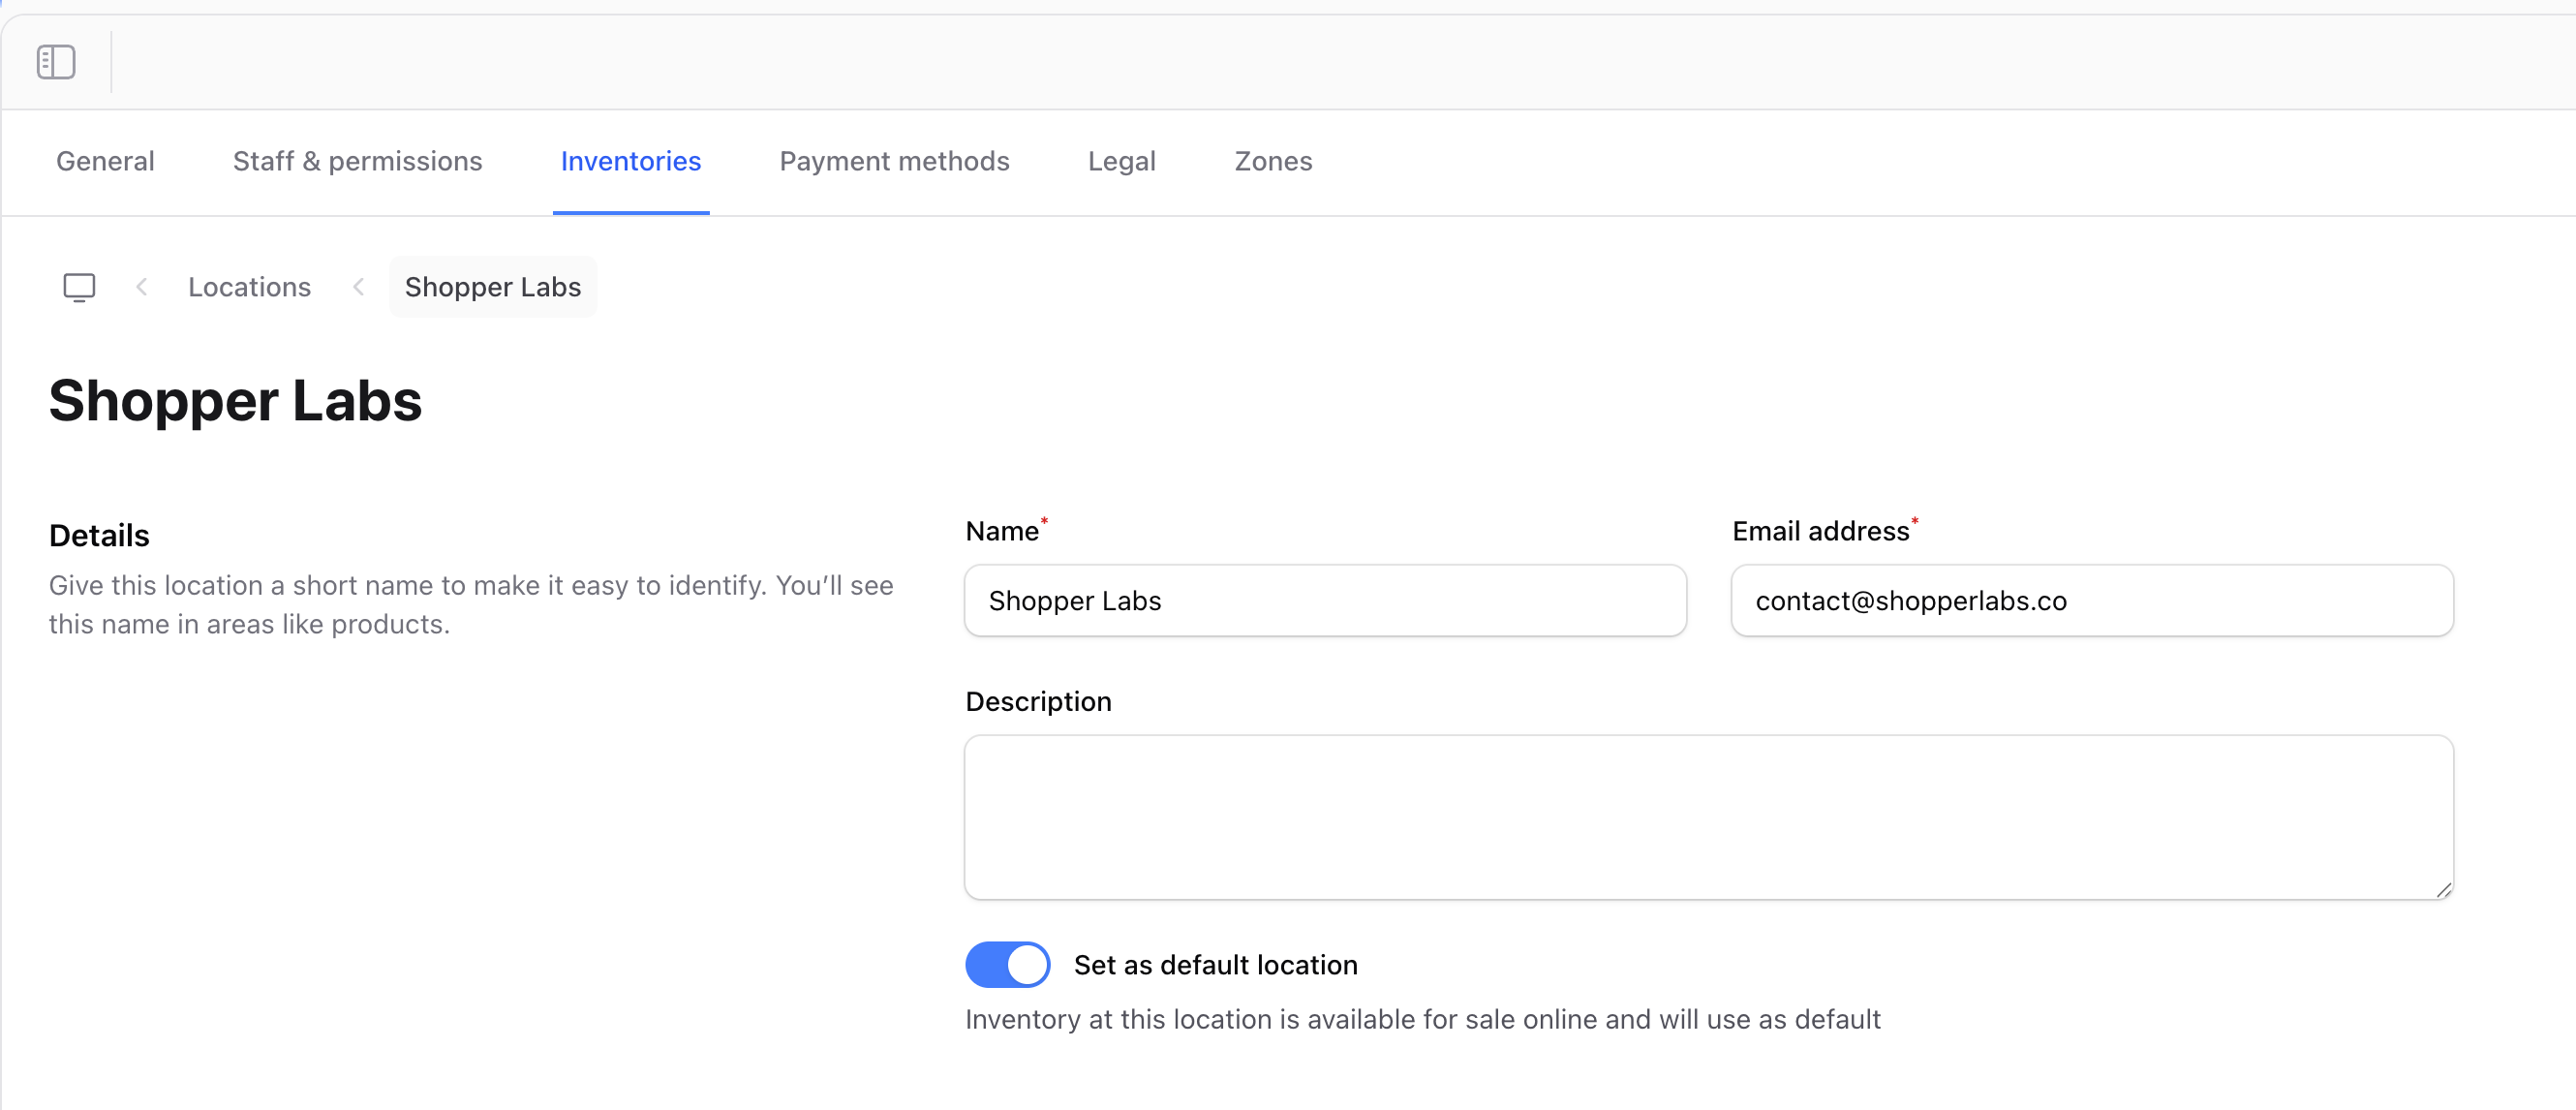
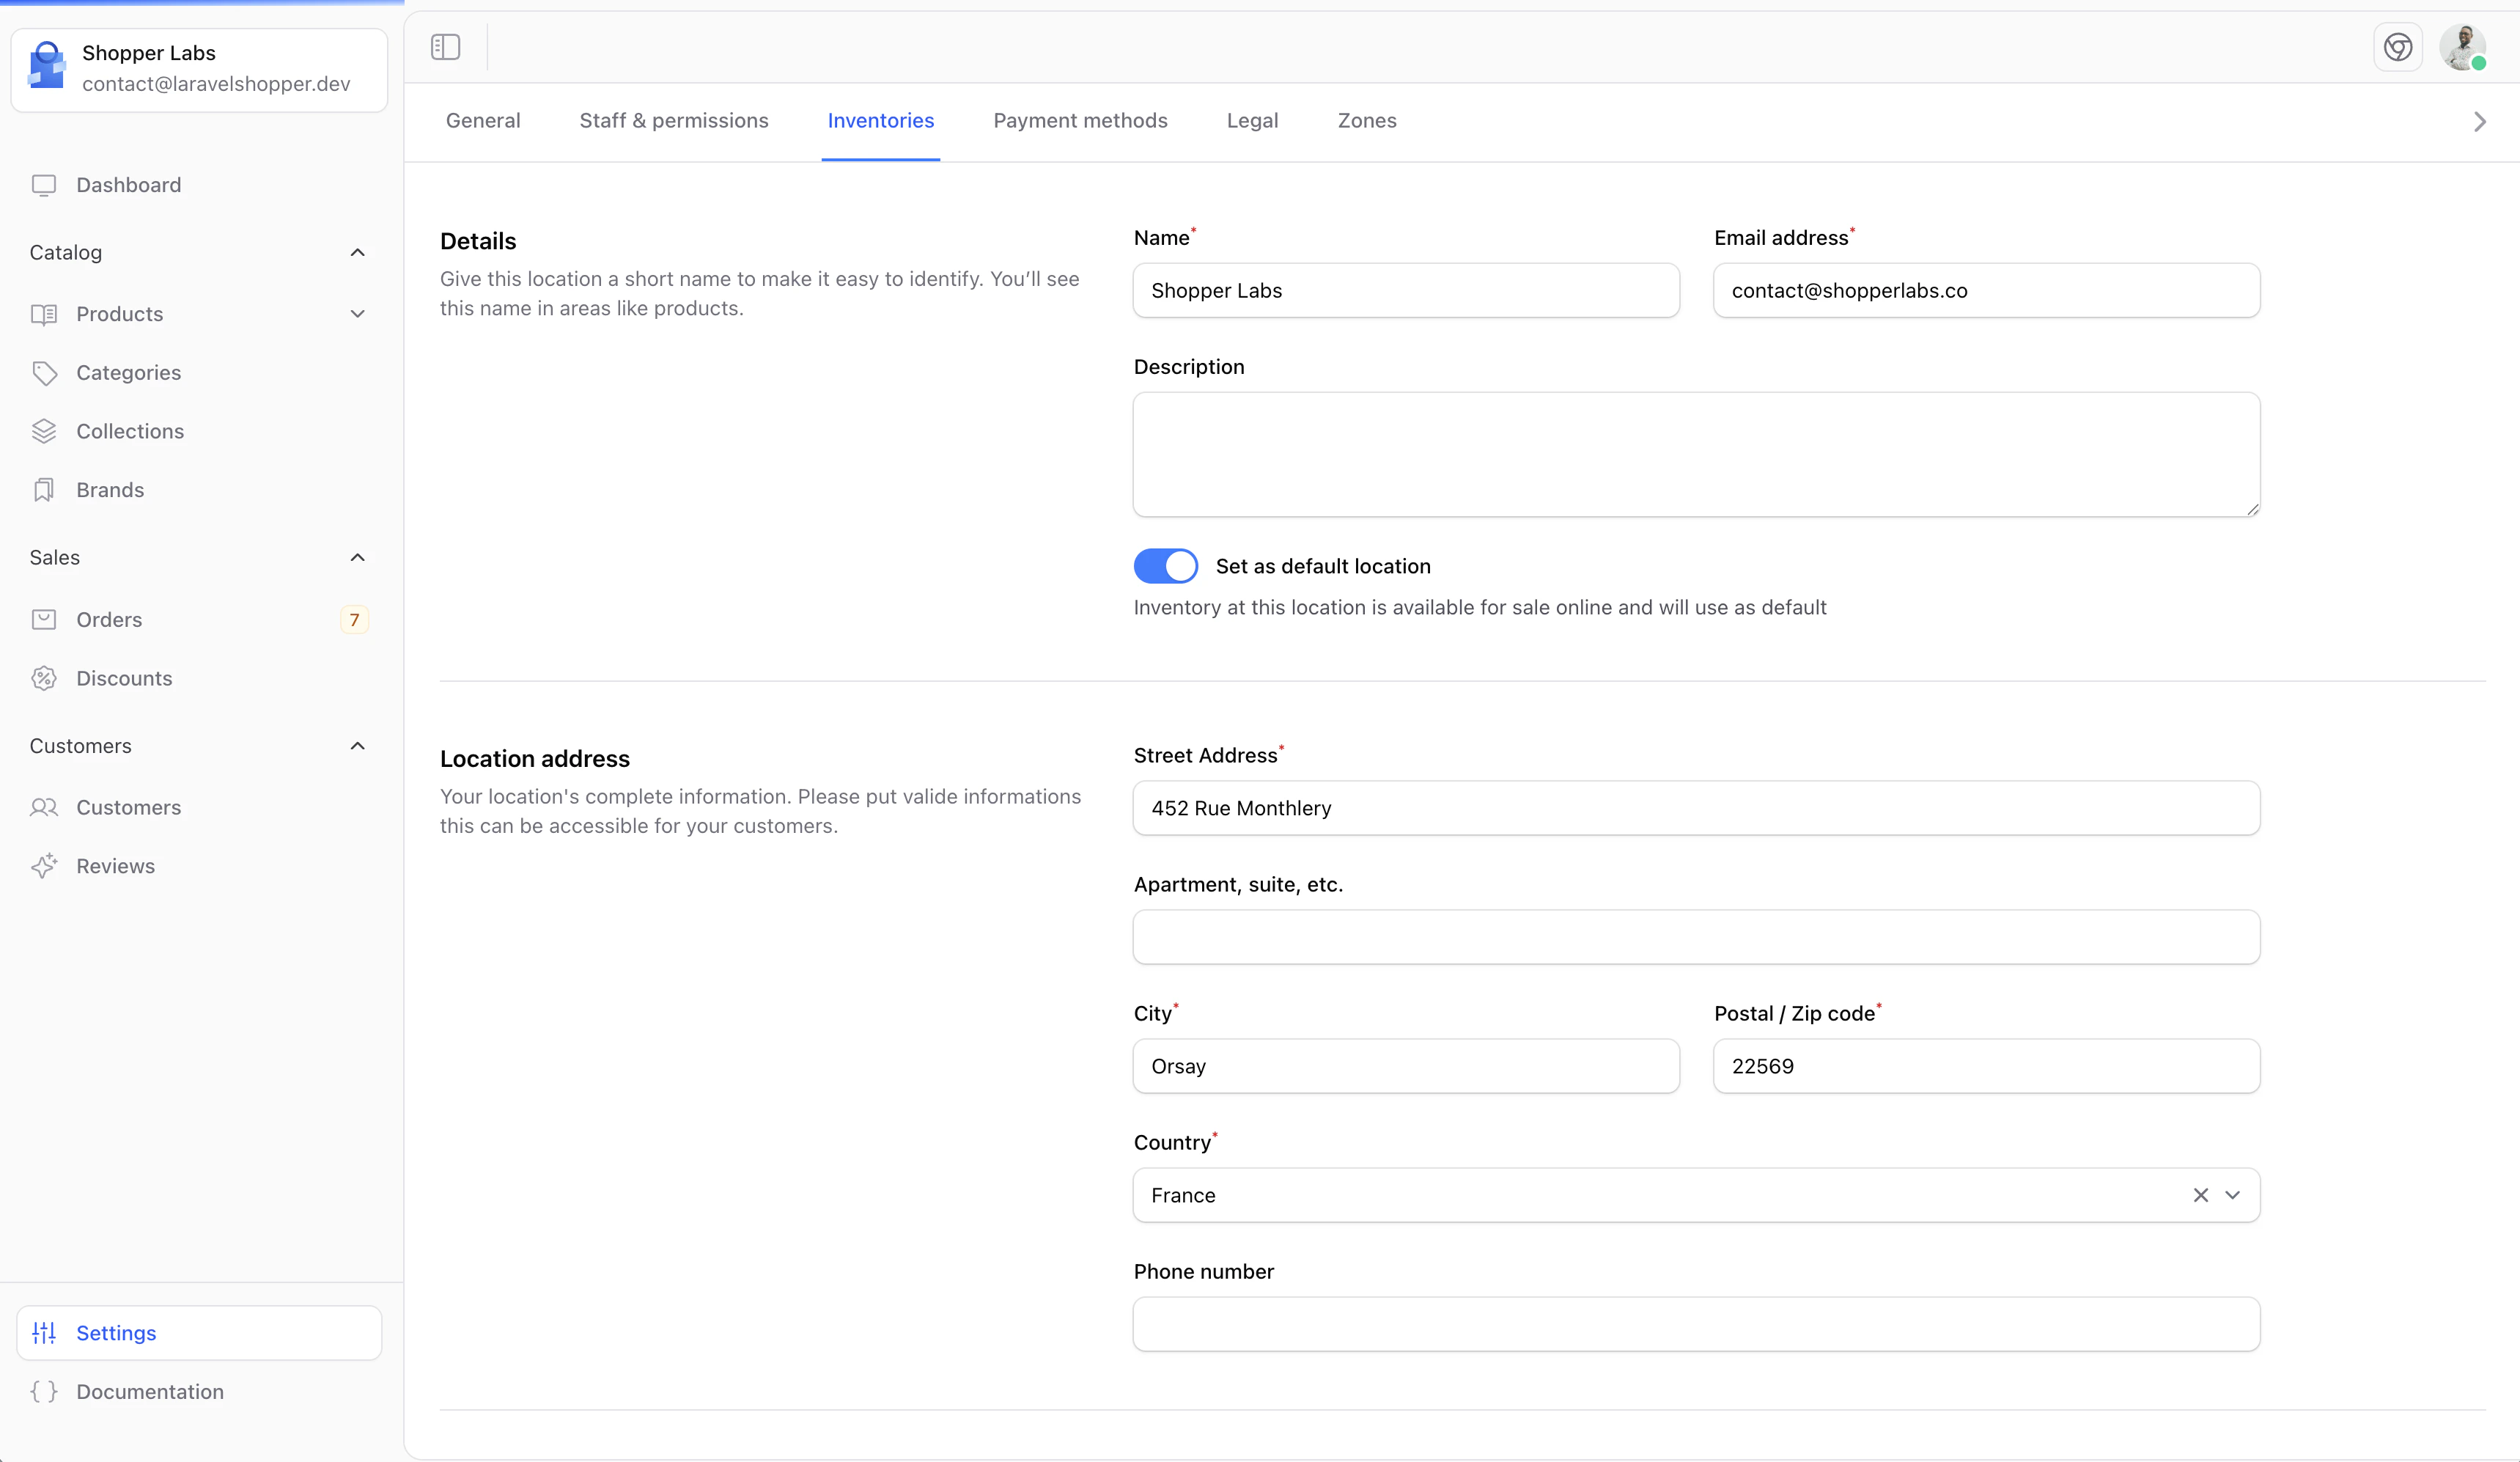
Location Fields
Editing a Location
To modify an existing location:
- Click on the location name in the list
- Update the desired fields
- Click Save to apply changes
Setting a Default Location
One location must be set as the default. This location will be used:
- As the primary inventory source
- For new products when no location is specified
- As the default shipping origin
To change the default location, select a different location and mark it as default in the location settings.
Keep your location information accurate, especially addresses, as they may be used for shipping calculations and customer communications.