> ## Documentation Index
> Fetch the complete documentation index at: https://docs.laravelshopper.dev/llms.txt
> Use this file to discover all available pages before exploring further.
# Standard Product
> Physical products that require shipping and inventory management.
A standard product is the most common product type in e-commerce. It represents a **physical item** that you stock in your warehouse and ship to customers. Examples include clothing, electronics, books, furniture, food items, or any tangible goods.
## When to Use Standard Products
Use the Standard product type when:
* You sell a physical item that needs to be shipped
* The product does not have variations (no size/color options)
* You manage inventory for this product
* The product has weight and dimensions for shipping calculations
If your physical product comes in multiple options (different sizes, colors, materials), use the [Variant Product](/v2/user-guide/catalog/products/variant-product) type instead.
## What Makes Standard Products Unique
After creating a Standard product through the [creation wizard](/v2/user-guide/catalog/products/creating-product), you have access to these additional features:
| Feature | Description |
| -------------- | ----------------------------------------------------------------- |
| **Shipping** | Configure weight and package dimensions for carrier calculations |
| **Attributes** | Add product characteristics (material, care instructions, etc.) |
| **Inventory** | Track stock levels with history and safety stock alerts |
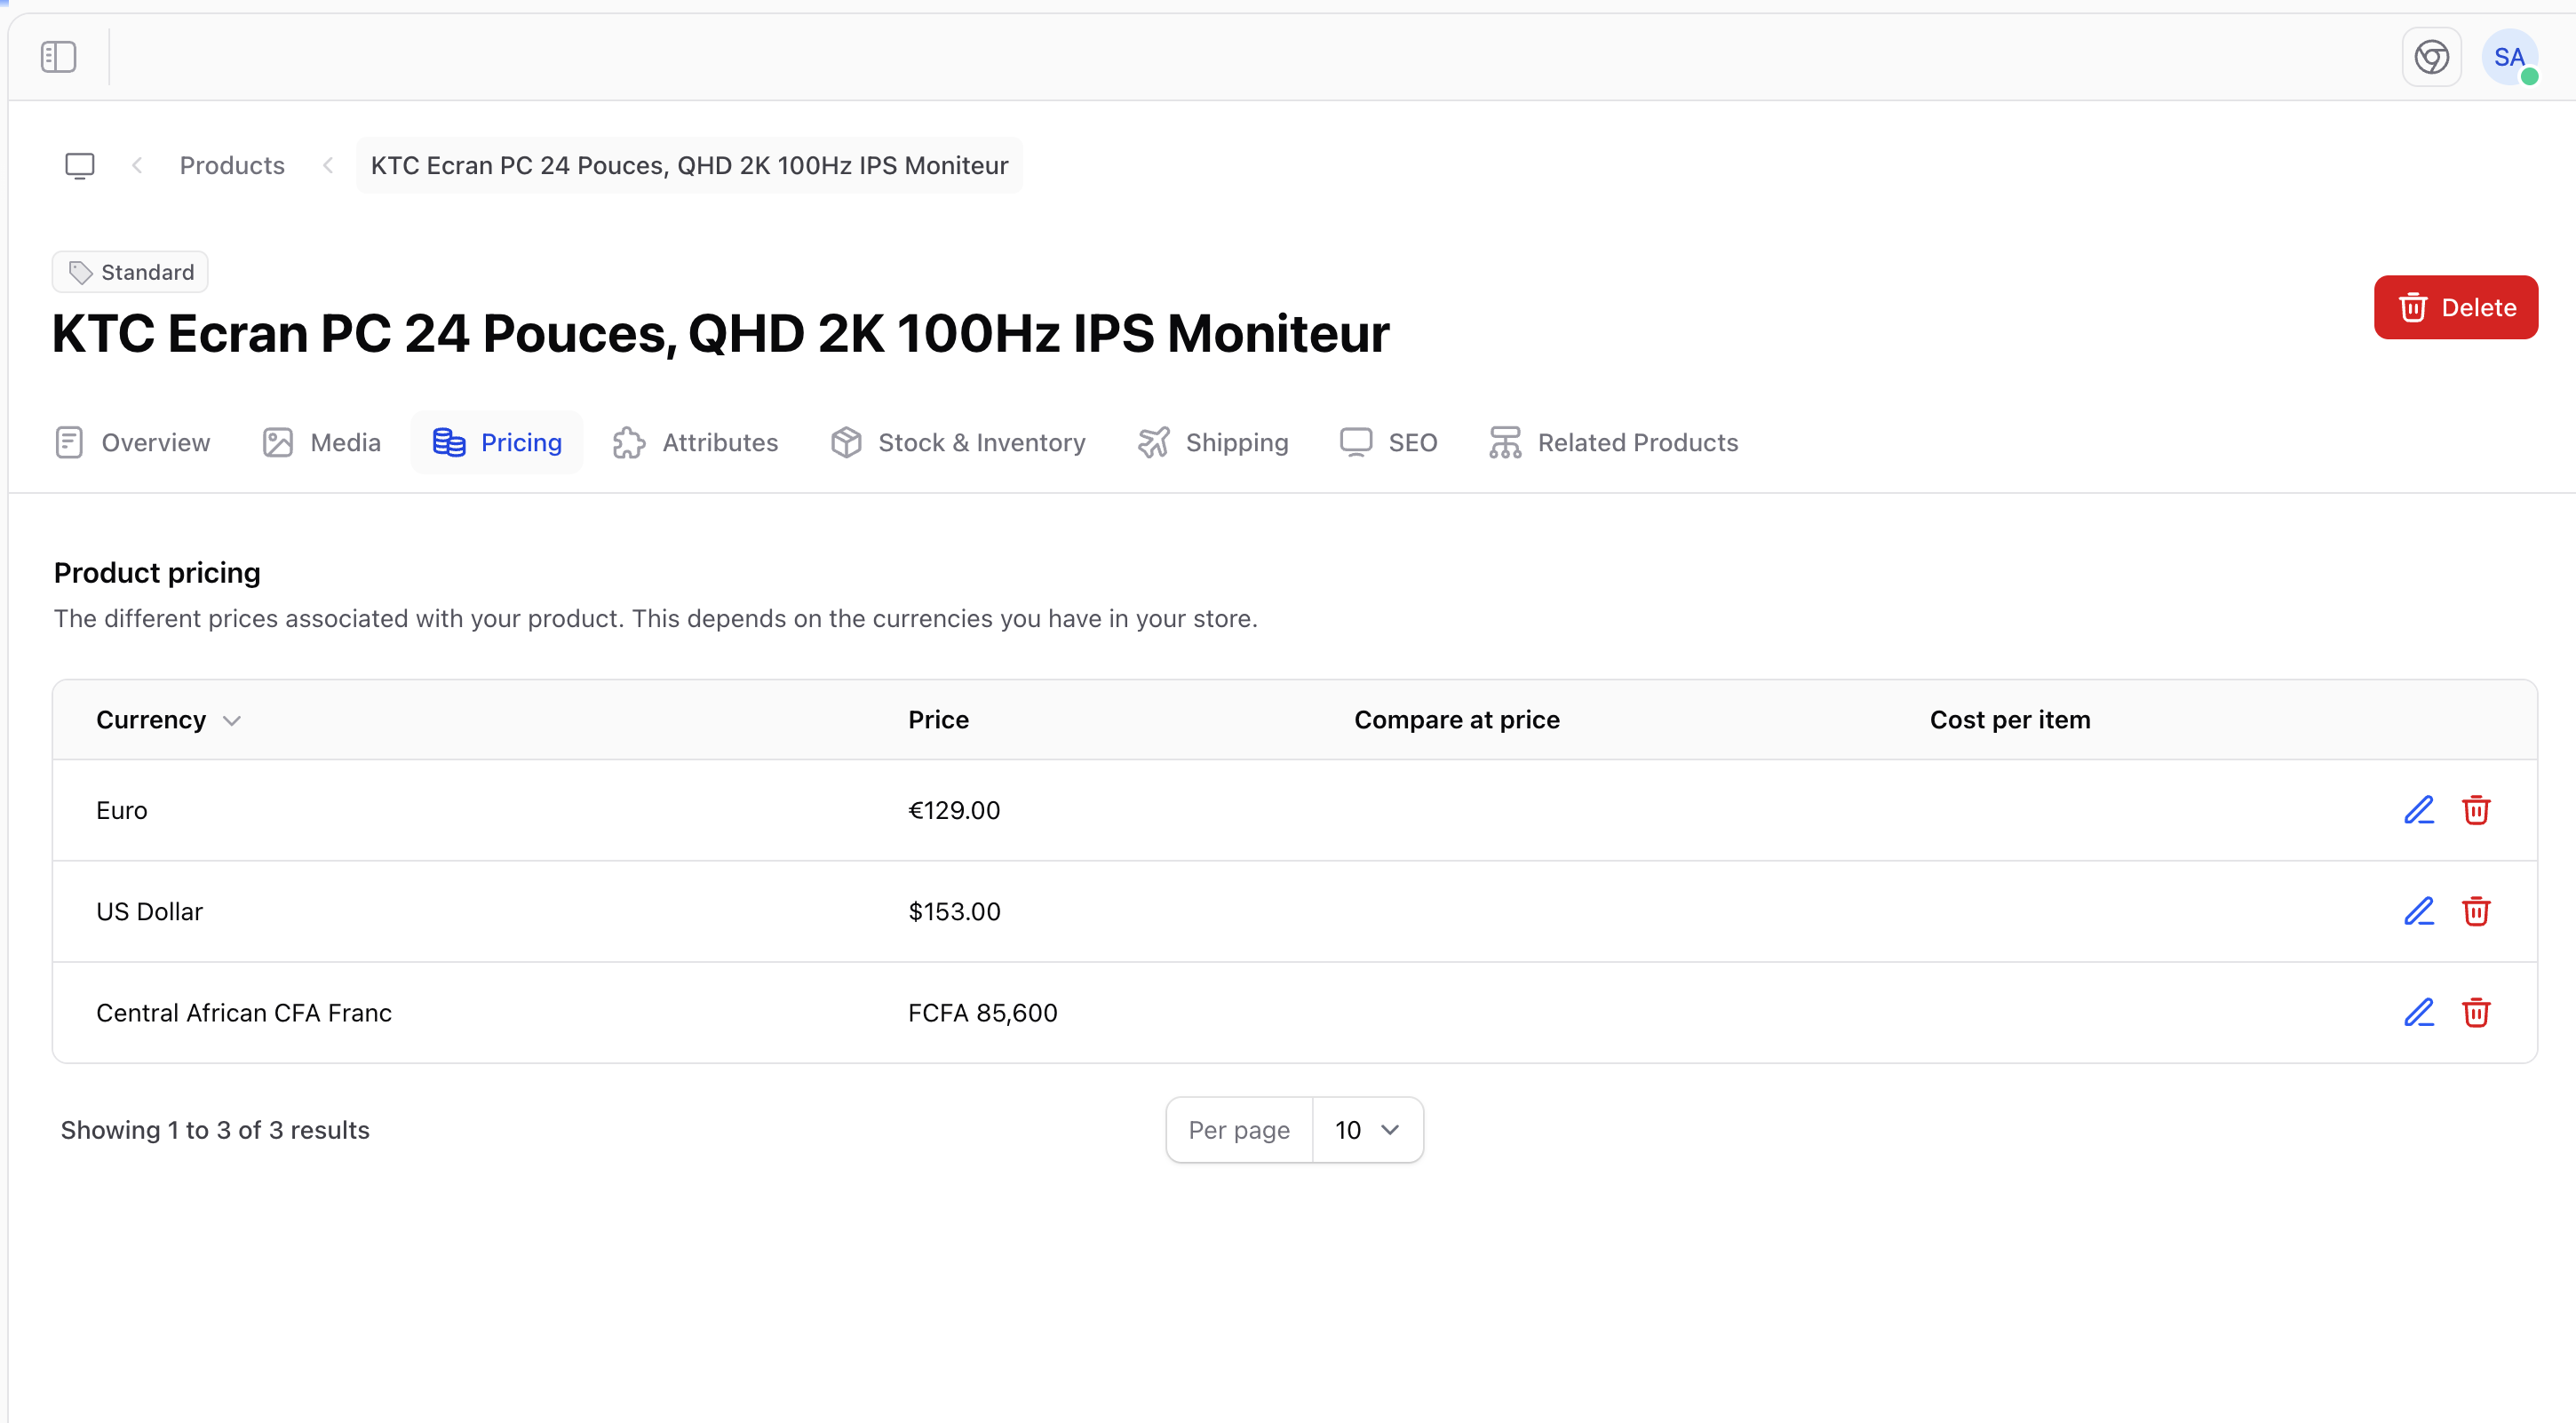
| **Pricing** | Set prices in multiple currencies with compare-at and cost prices |
## Configuring Shipping
The shipping section lets you define the physical characteristics of your product for accurate shipping rate calculations.
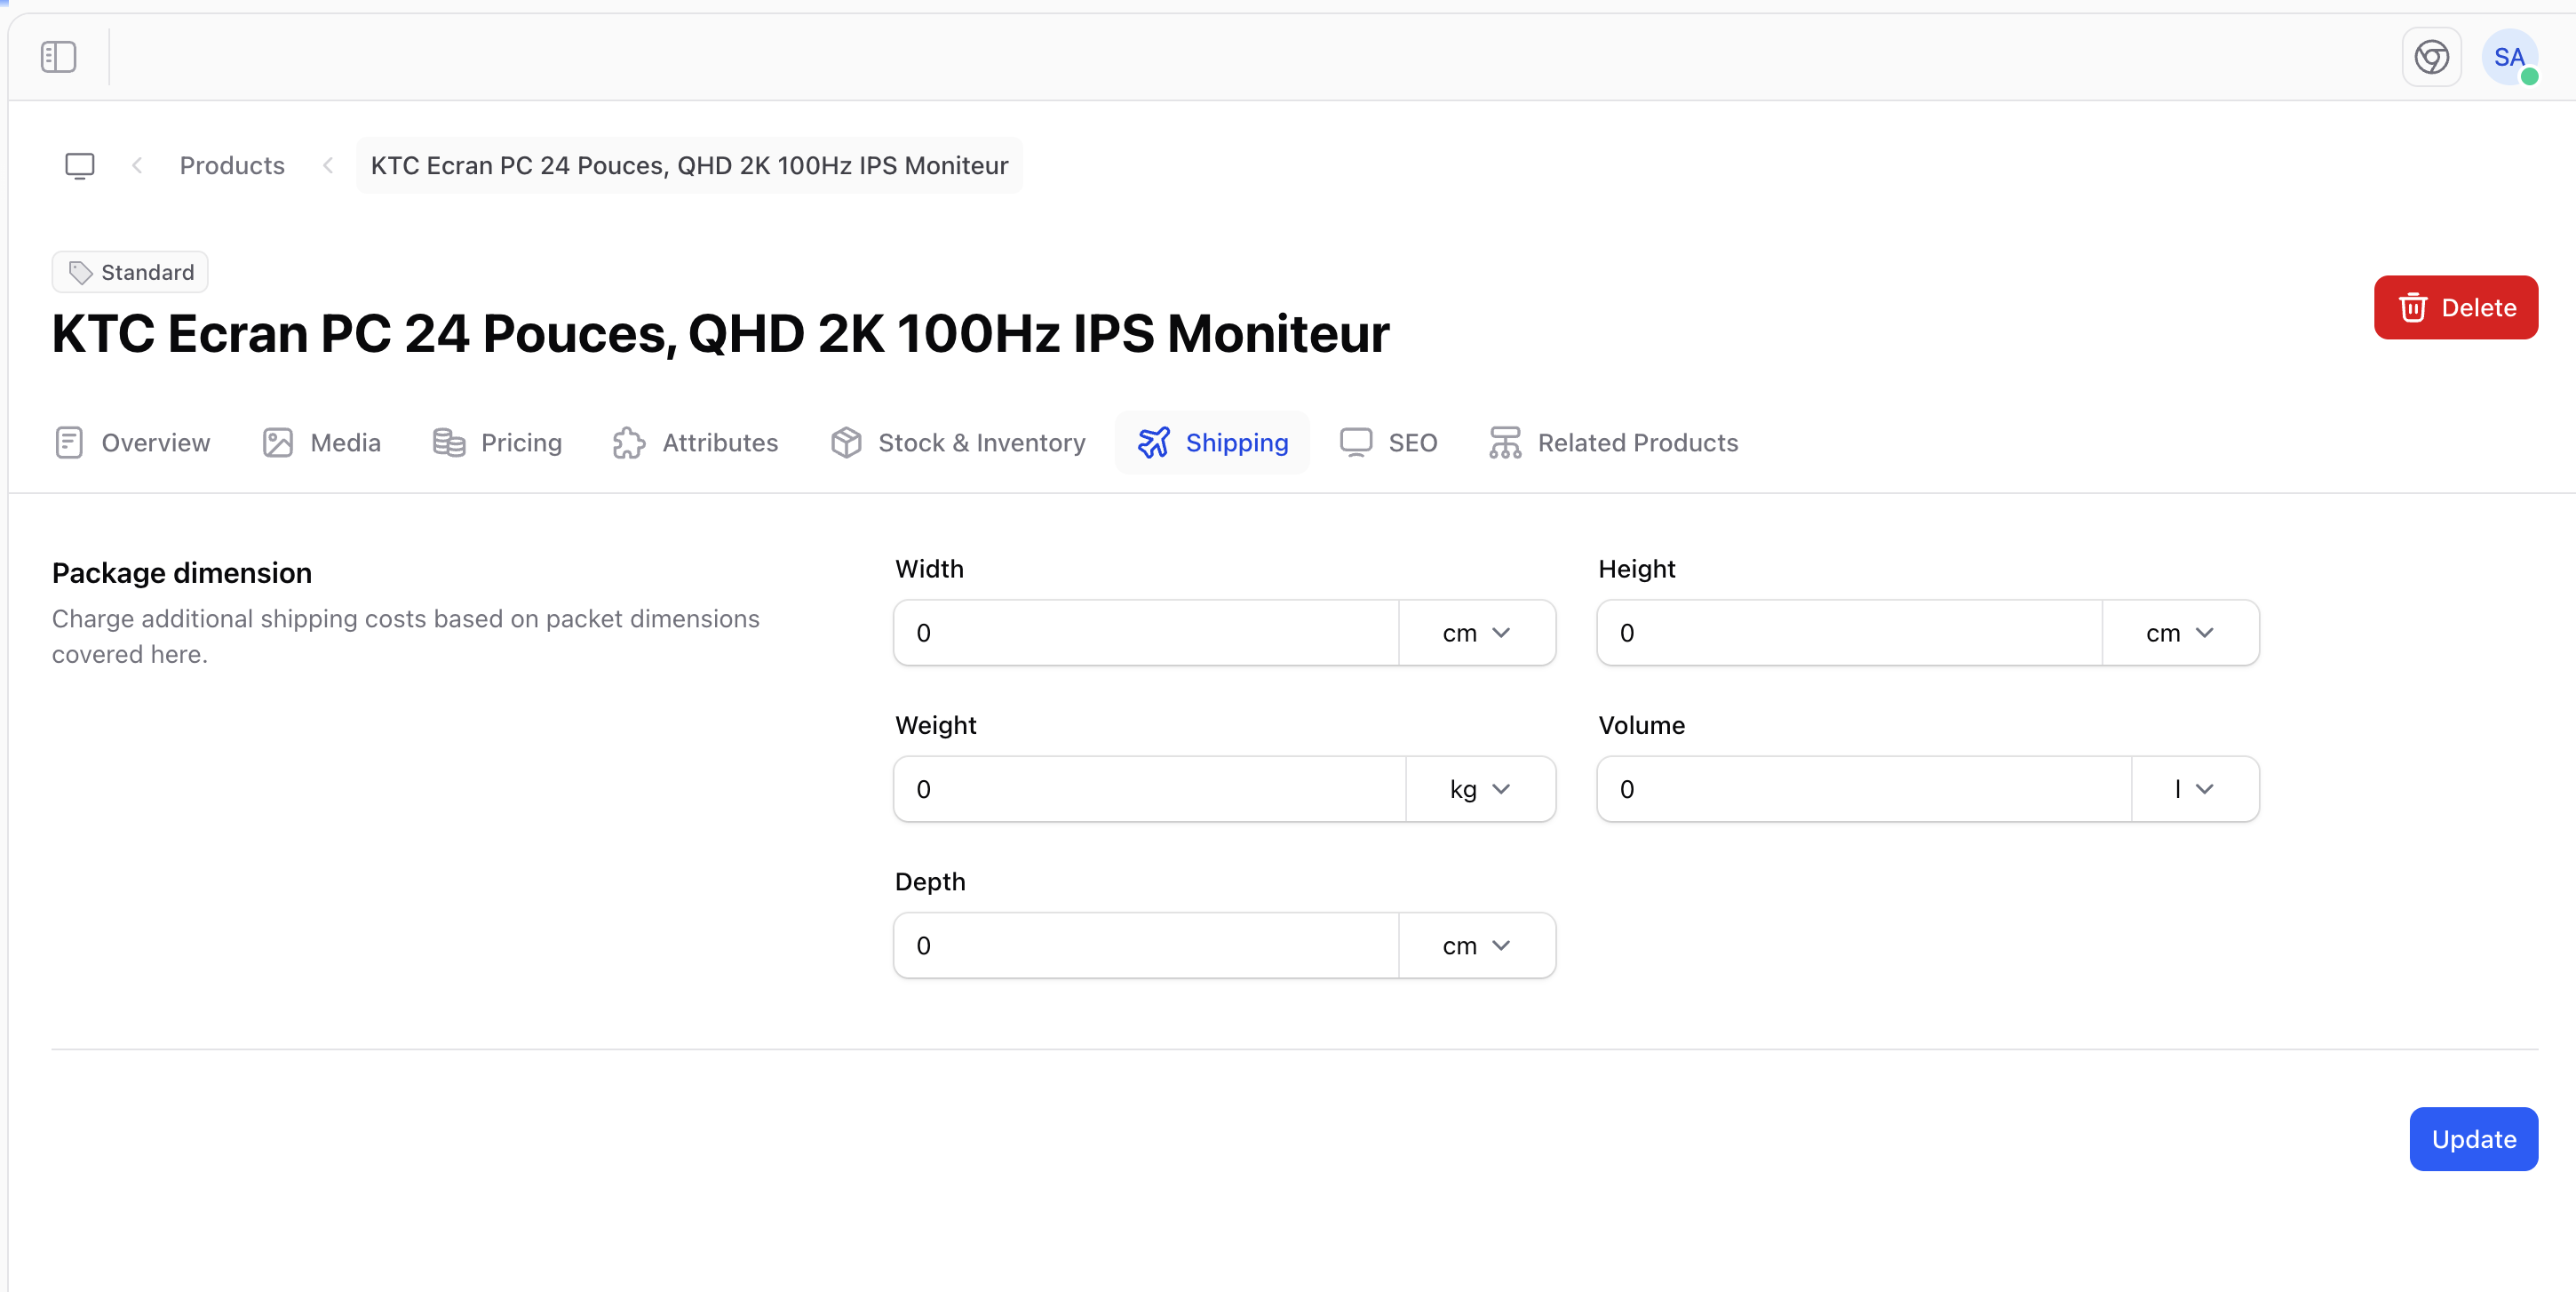 | Field | Description |
| ---------- | ------------------------------------------------------------------------ |
| **Weight** | Product weight with unit selection (kg, g, lb, oz) |
| **Height** | Package height with unit selection (cm, m, in, ft) |
| **Width** | Package width with unit selection |
| **Depth** | Package depth with unit selection |
| **Volume** | Package volume (calculated or manual) with unit selection (l, ml, fl oz) |
Accurate weight and dimensions are essential for calculating shipping costs with carriers. Measure your product when packaged, not just the item alone.
## Managing Attributes
Attributes let you add structured information about your product's characteristics. This is useful for displaying product specs on your storefront or enabling filtering in your catalog.
| Field | Description |
| ---------- | ------------------------------------------------------------------------ |
| **Weight** | Product weight with unit selection (kg, g, lb, oz) |
| **Height** | Package height with unit selection (cm, m, in, ft) |
| **Width** | Package width with unit selection |
| **Depth** | Package depth with unit selection |
| **Volume** | Package volume (calculated or manual) with unit selection (l, ml, fl oz) |
Accurate weight and dimensions are essential for calculating shipping costs with carriers. Measure your product when packaged, not just the item alone.
## Managing Attributes
Attributes let you add structured information about your product's characteristics. This is useful for displaying product specs on your storefront or enabling filtering in your catalog.
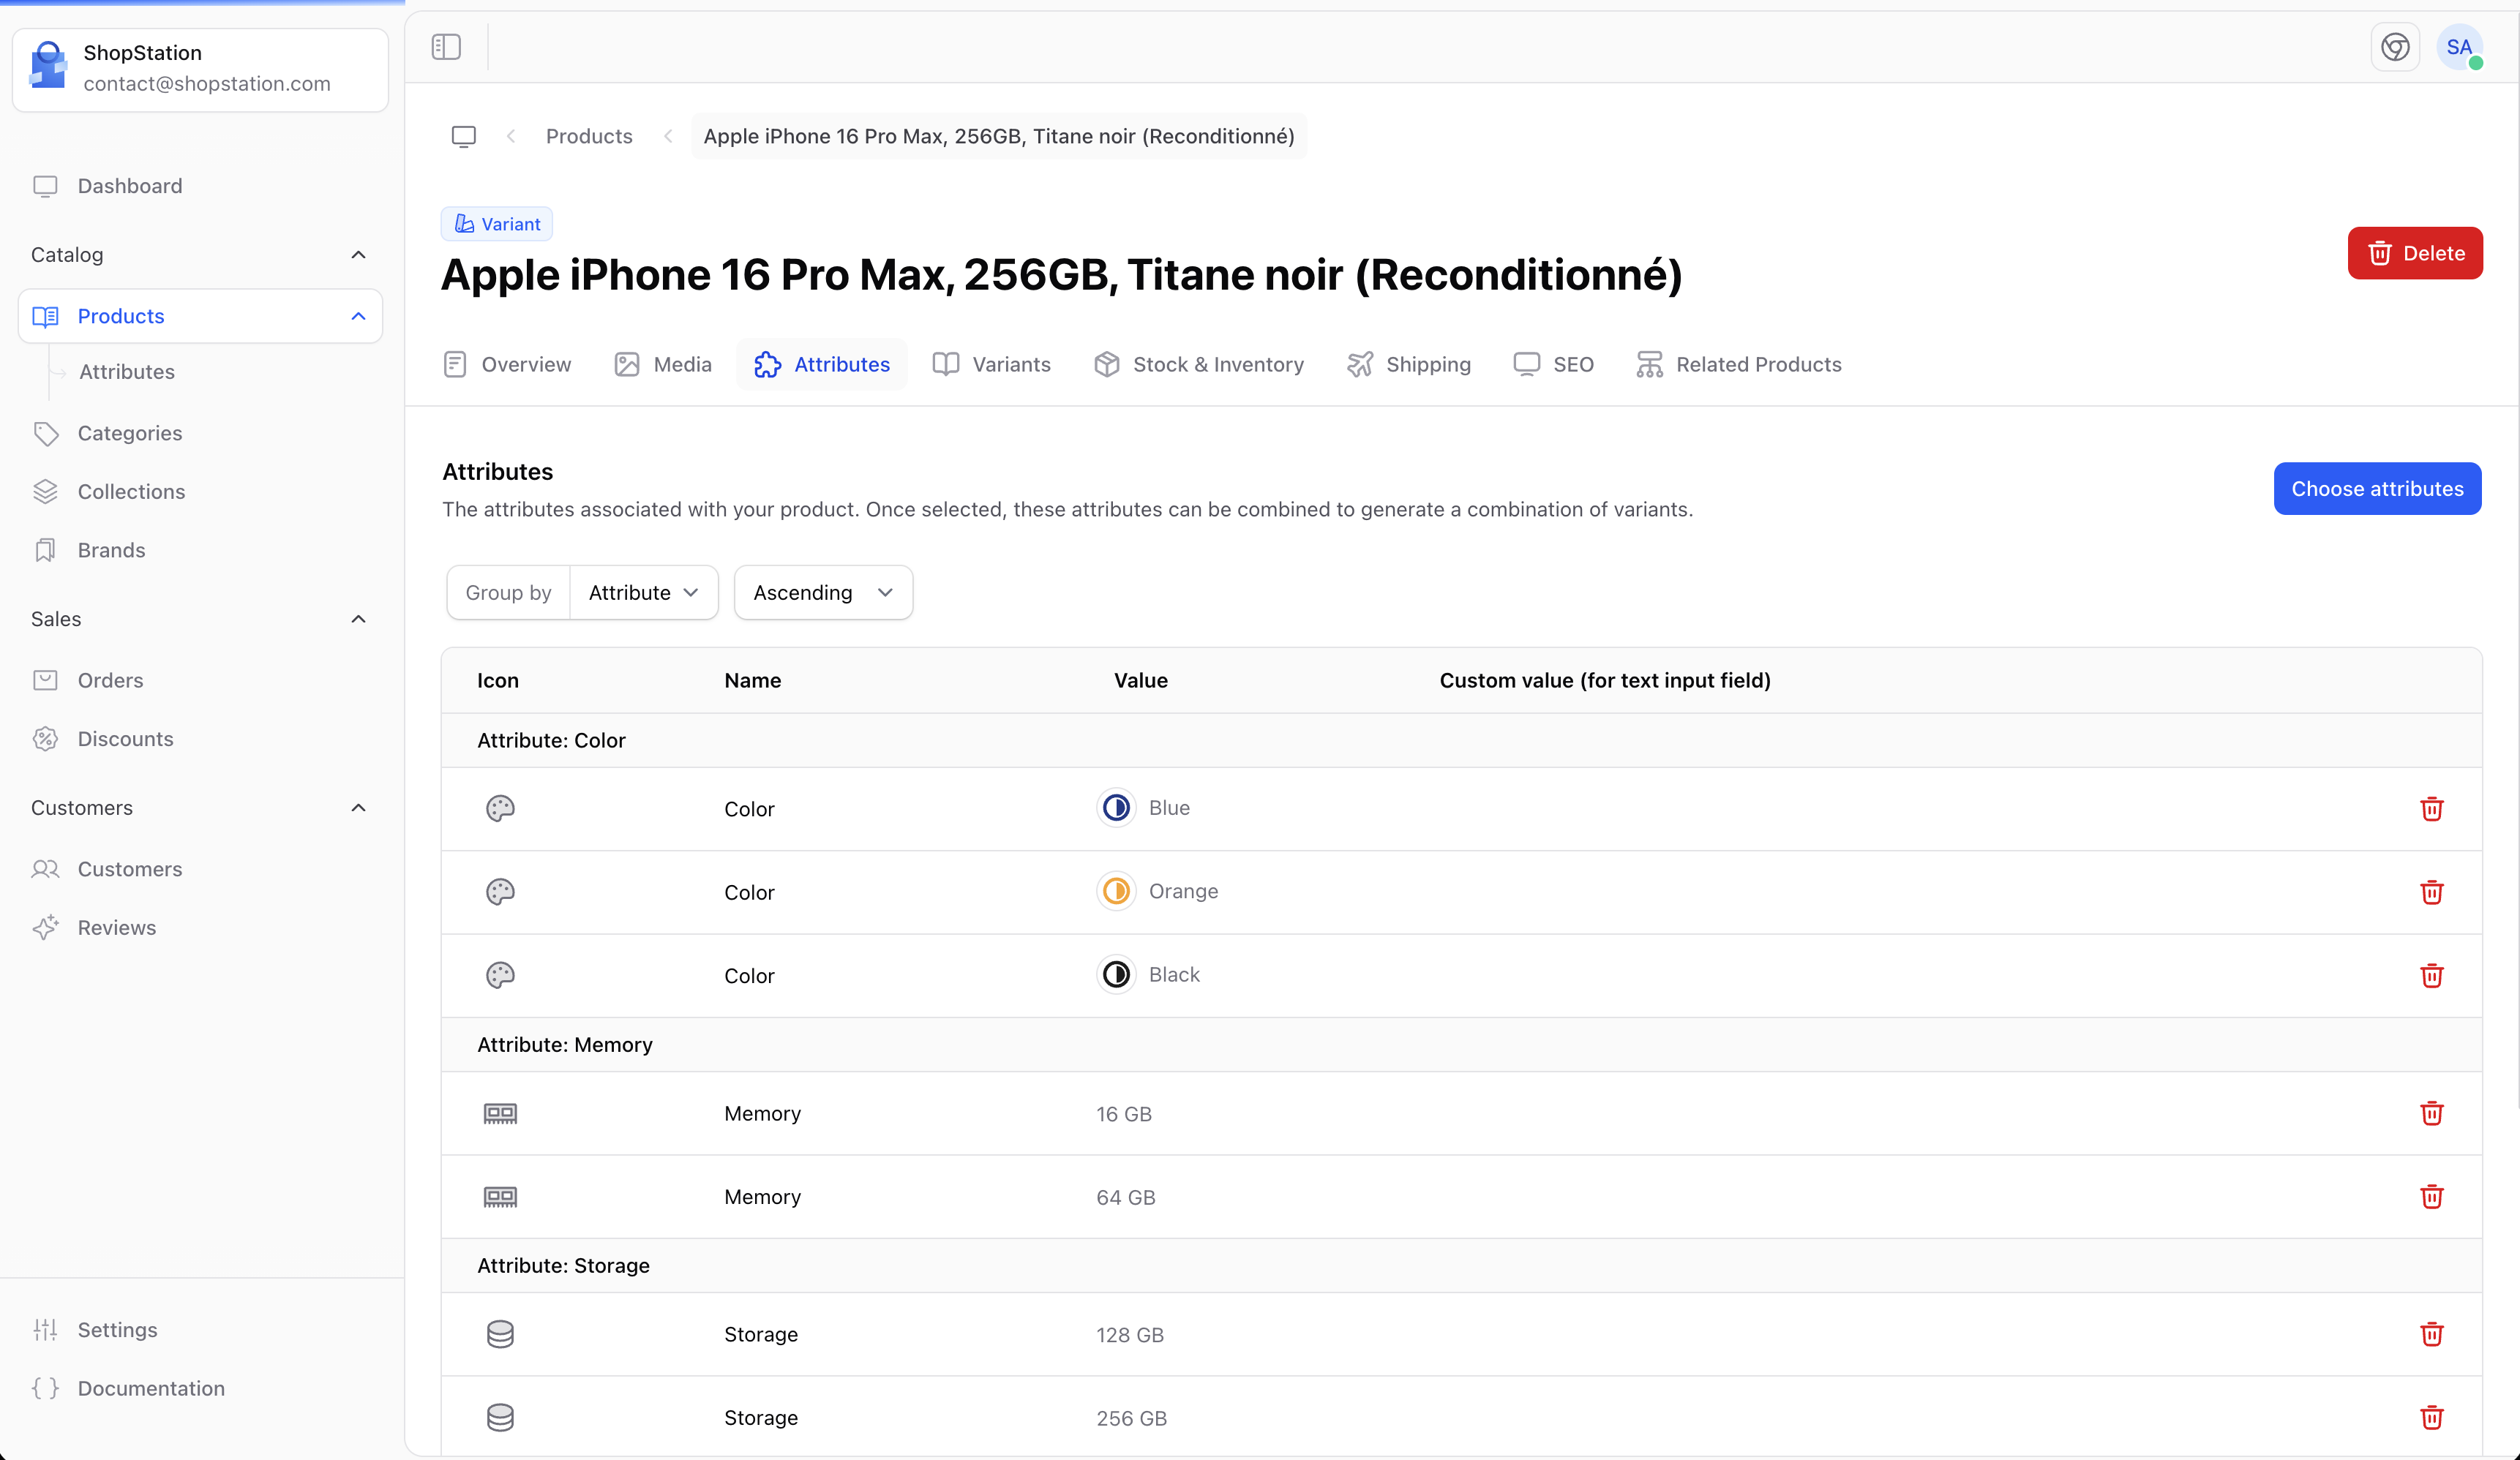 Common attributes for standard products:
* **Material**. Cotton, polyester, leather, wood, metal
* **Color**. When it's a single-color product without variants
* **Care instructions**. Machine washable, hand wash only
* **Country of origin**. Where the product is manufactured
* **Warranty**. Duration and coverage details
To add attributes:
1. Navigate to your product's **Attributes** tab
2. Click **Add attribute**
3. Select an attribute from your attribute library
4. Fill in the value for this product
Common attributes for standard products:
* **Material**. Cotton, polyester, leather, wood, metal
* **Color**. When it's a single-color product without variants
* **Care instructions**. Machine washable, hand wash only
* **Country of origin**. Where the product is manufactured
* **Warranty**. Duration and coverage details
To add attributes:
1. Navigate to your product's **Attributes** tab
2. Click **Add attribute**
3. Select an attribute from your attribute library
4. Fill in the value for this product
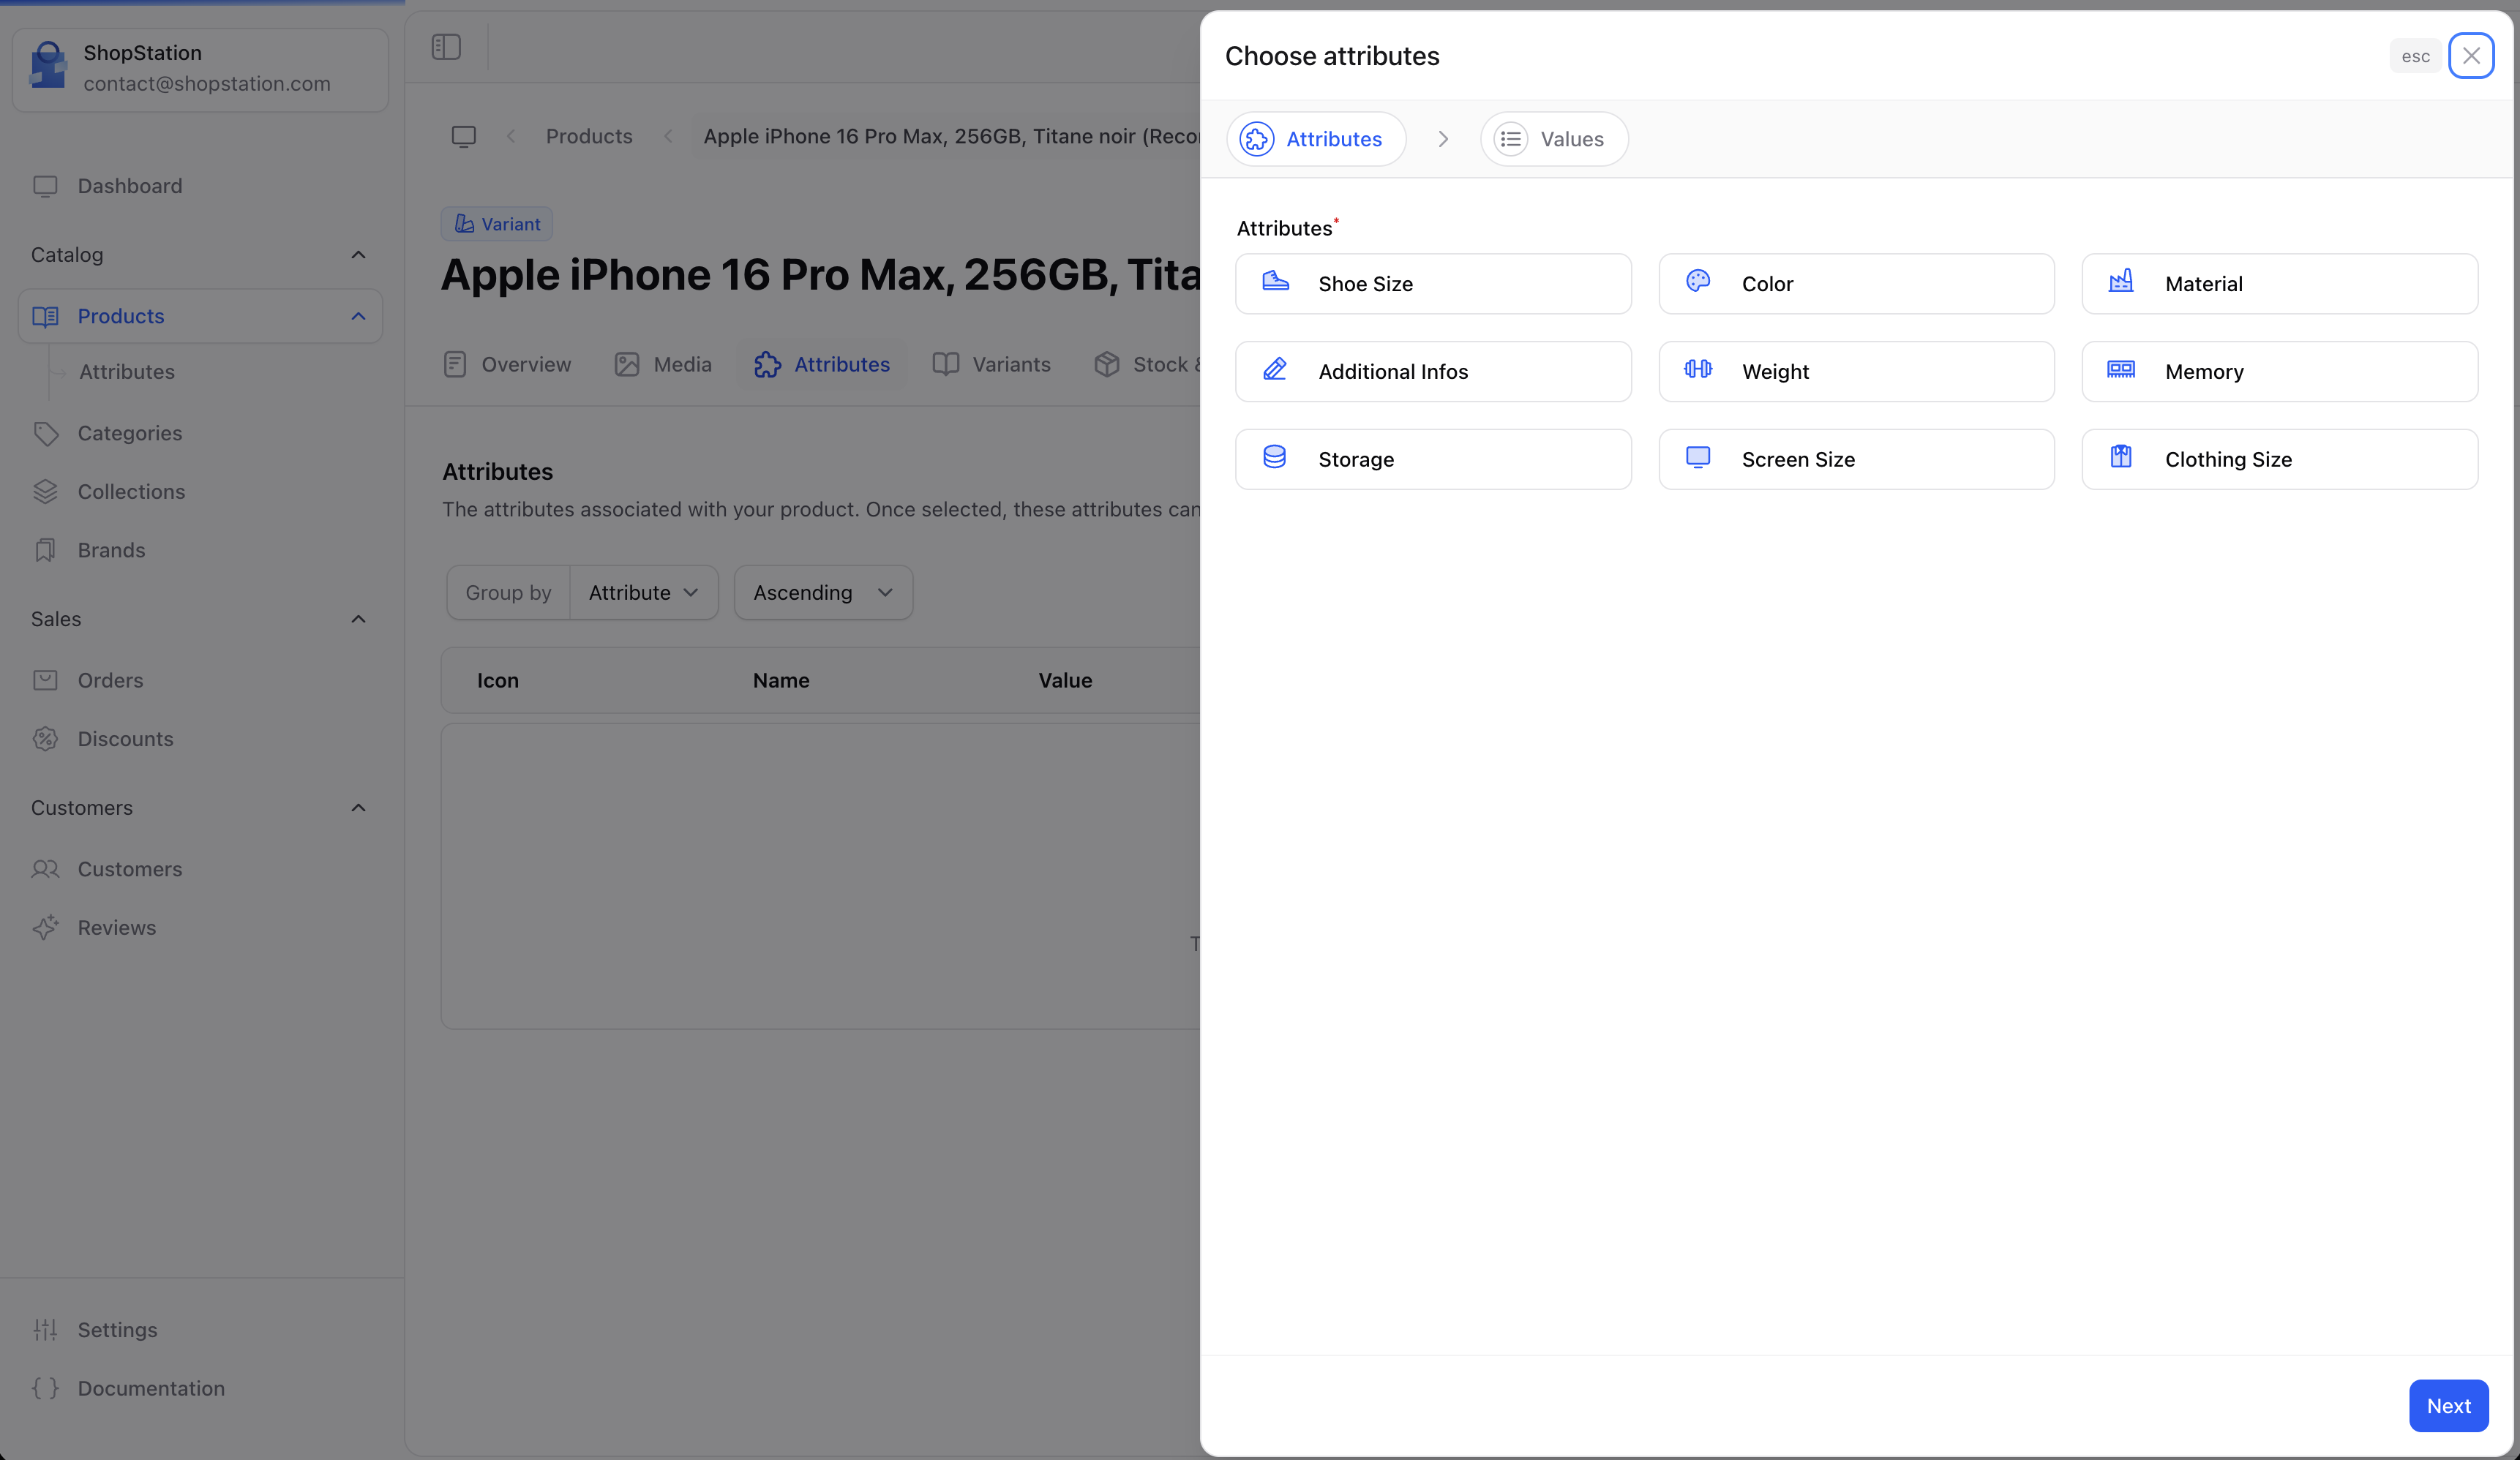 Attributes must be created first in the [Attributes](/v2/user-guide/catalog/attributes) section before they can be assigned to products.
## Inventory Management
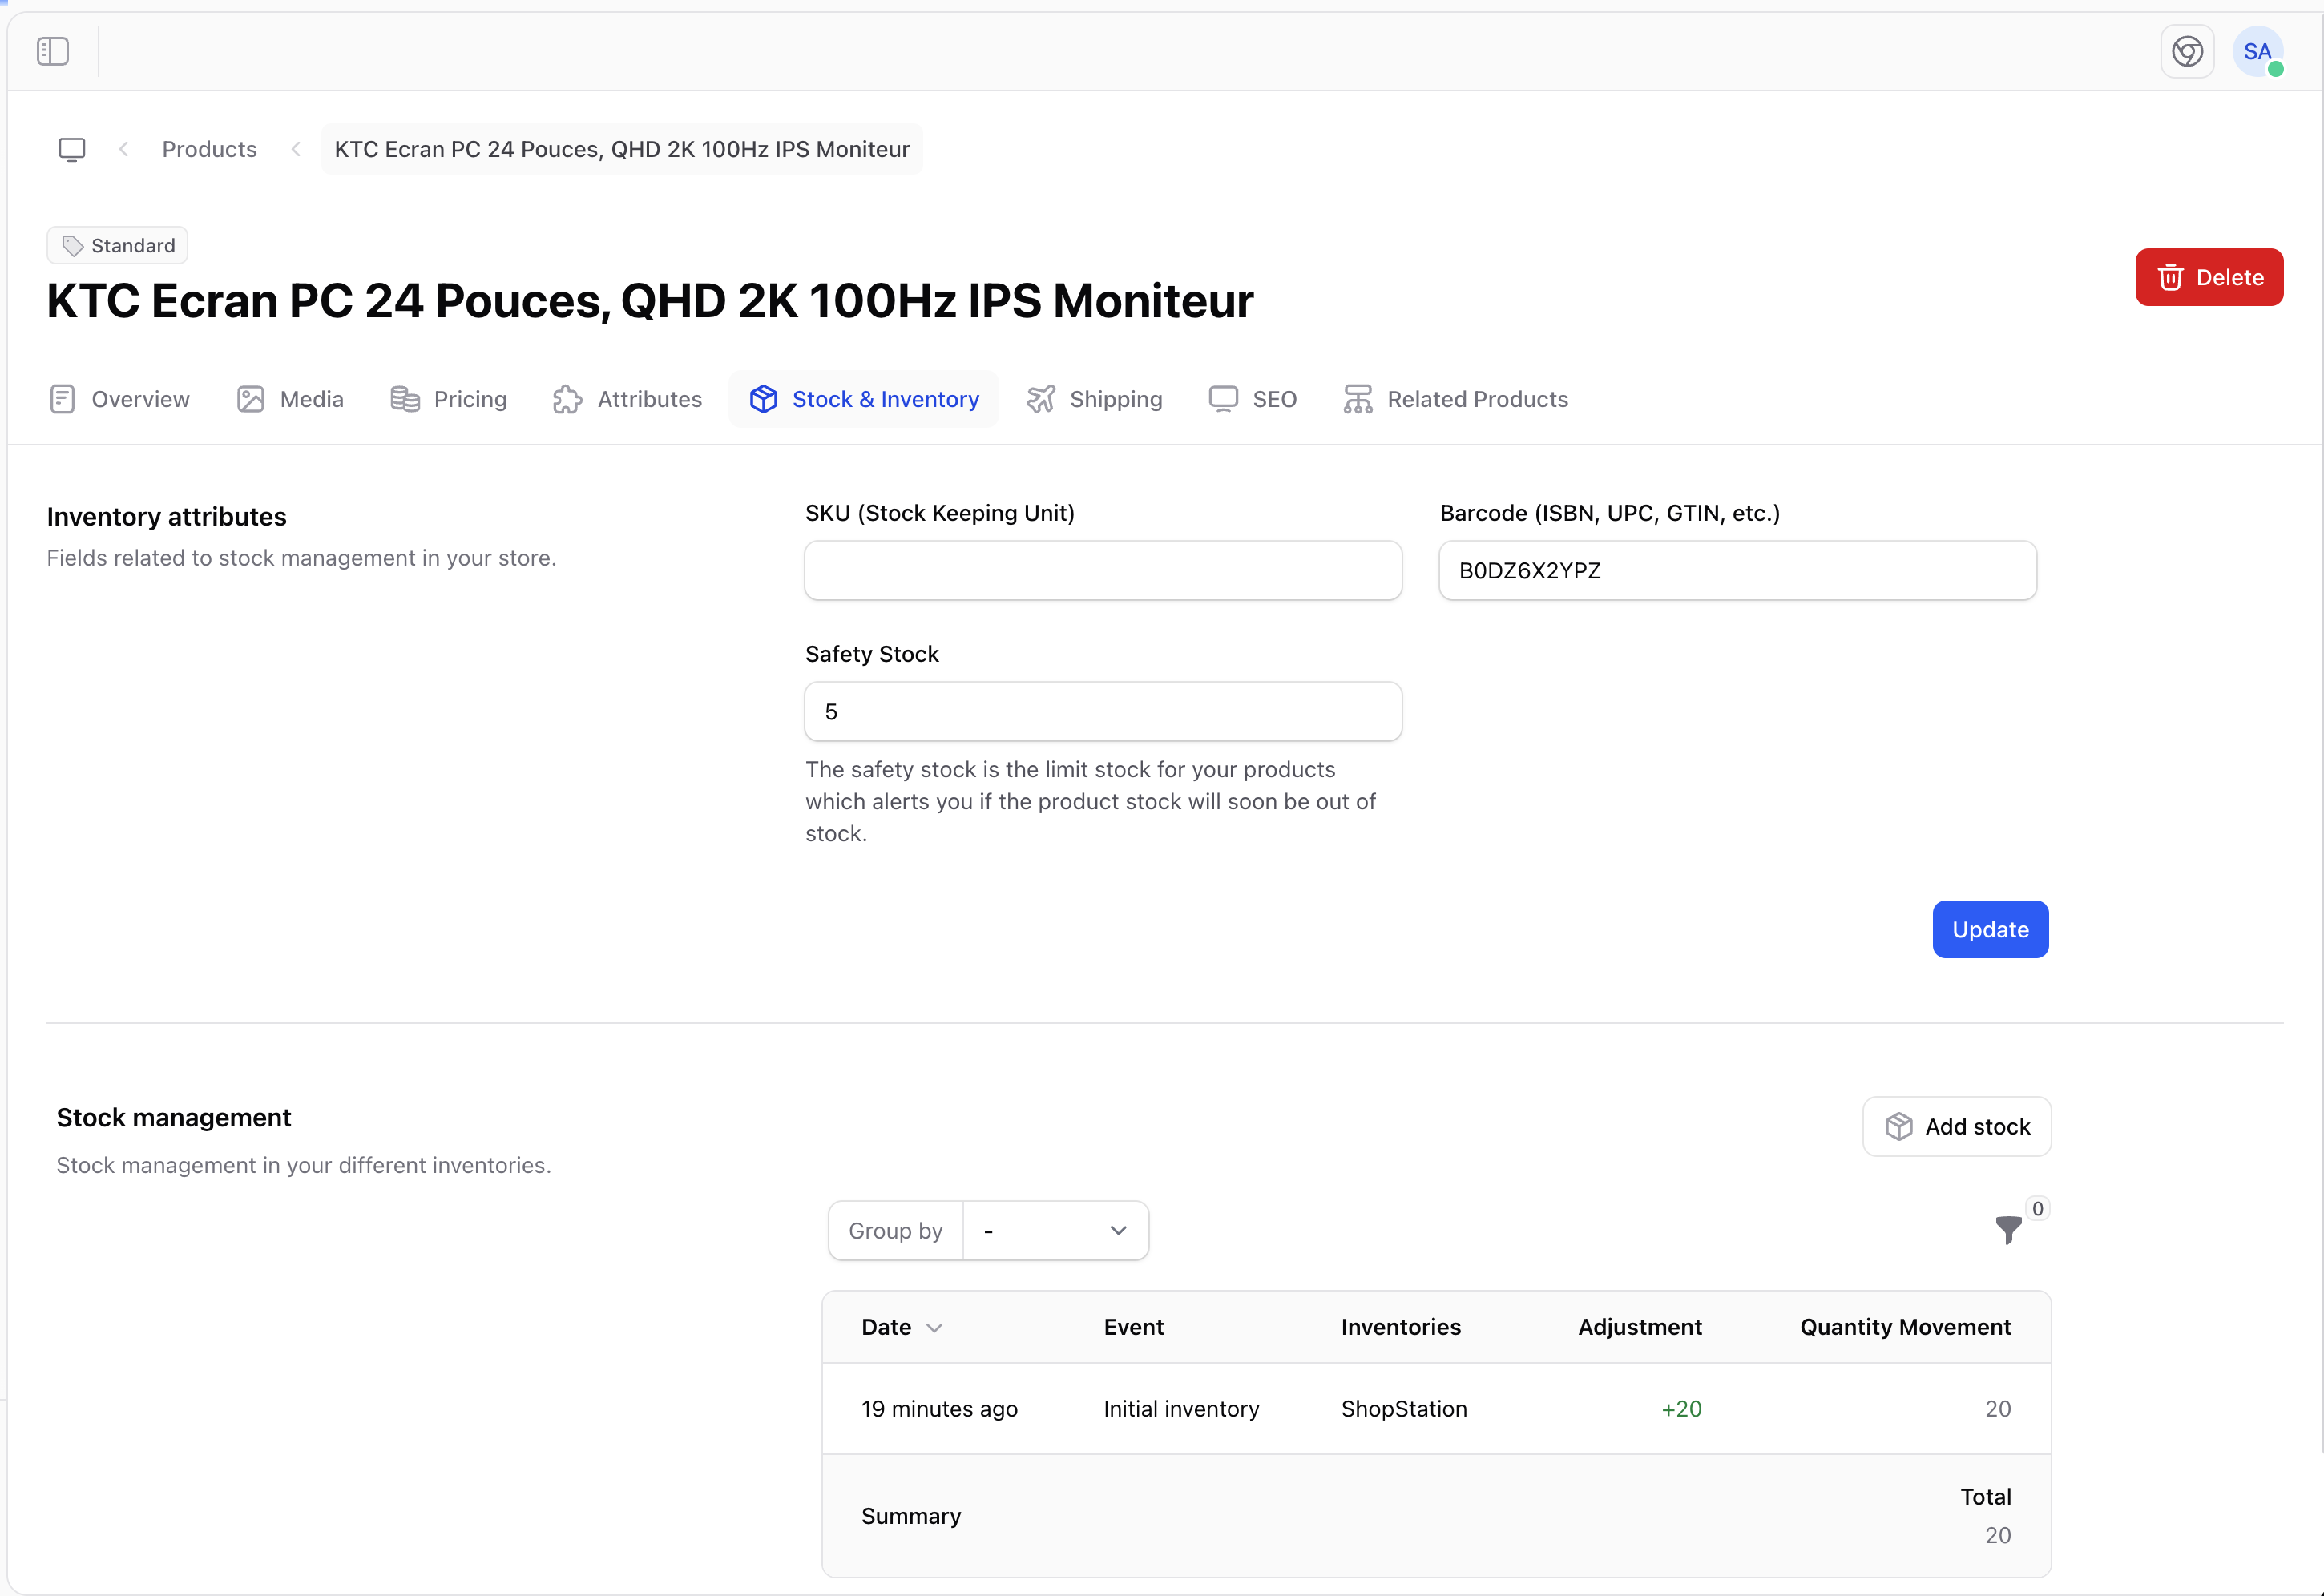
The inventory section shows your current stock levels and provides a complete history of stock movements.
Attributes must be created first in the [Attributes](/v2/user-guide/catalog/attributes) section before they can be assigned to products.
## Inventory Management
The inventory section shows your current stock levels and provides a complete history of stock movements.
 ### Stock Information
| Field | Description |
| ----------------- | ------------------------------------------------------------- |
| **Current stock** | The total available quantity across all locations |
| **SKU** | Your internal stock keeping unit identifier |
| **Barcode** | Product barcode for scanning (UPC, EAN, ISBN) |
| **Safety stock** | The minimum stock level before a low-stock alert is triggered |
### Adding Inventory
You can manually adjust stock levels by adding or removing inventory:
### Stock Information
| Field | Description |
| ----------------- | ------------------------------------------------------------- |
| **Current stock** | The total available quantity across all locations |
| **SKU** | Your internal stock keeping unit identifier |
| **Barcode** | Product barcode for scanning (UPC, EAN, ISBN) |
| **Safety stock** | The minimum stock level before a low-stock alert is triggered |
### Adding Inventory
You can manually adjust stock levels by adding or removing inventory:
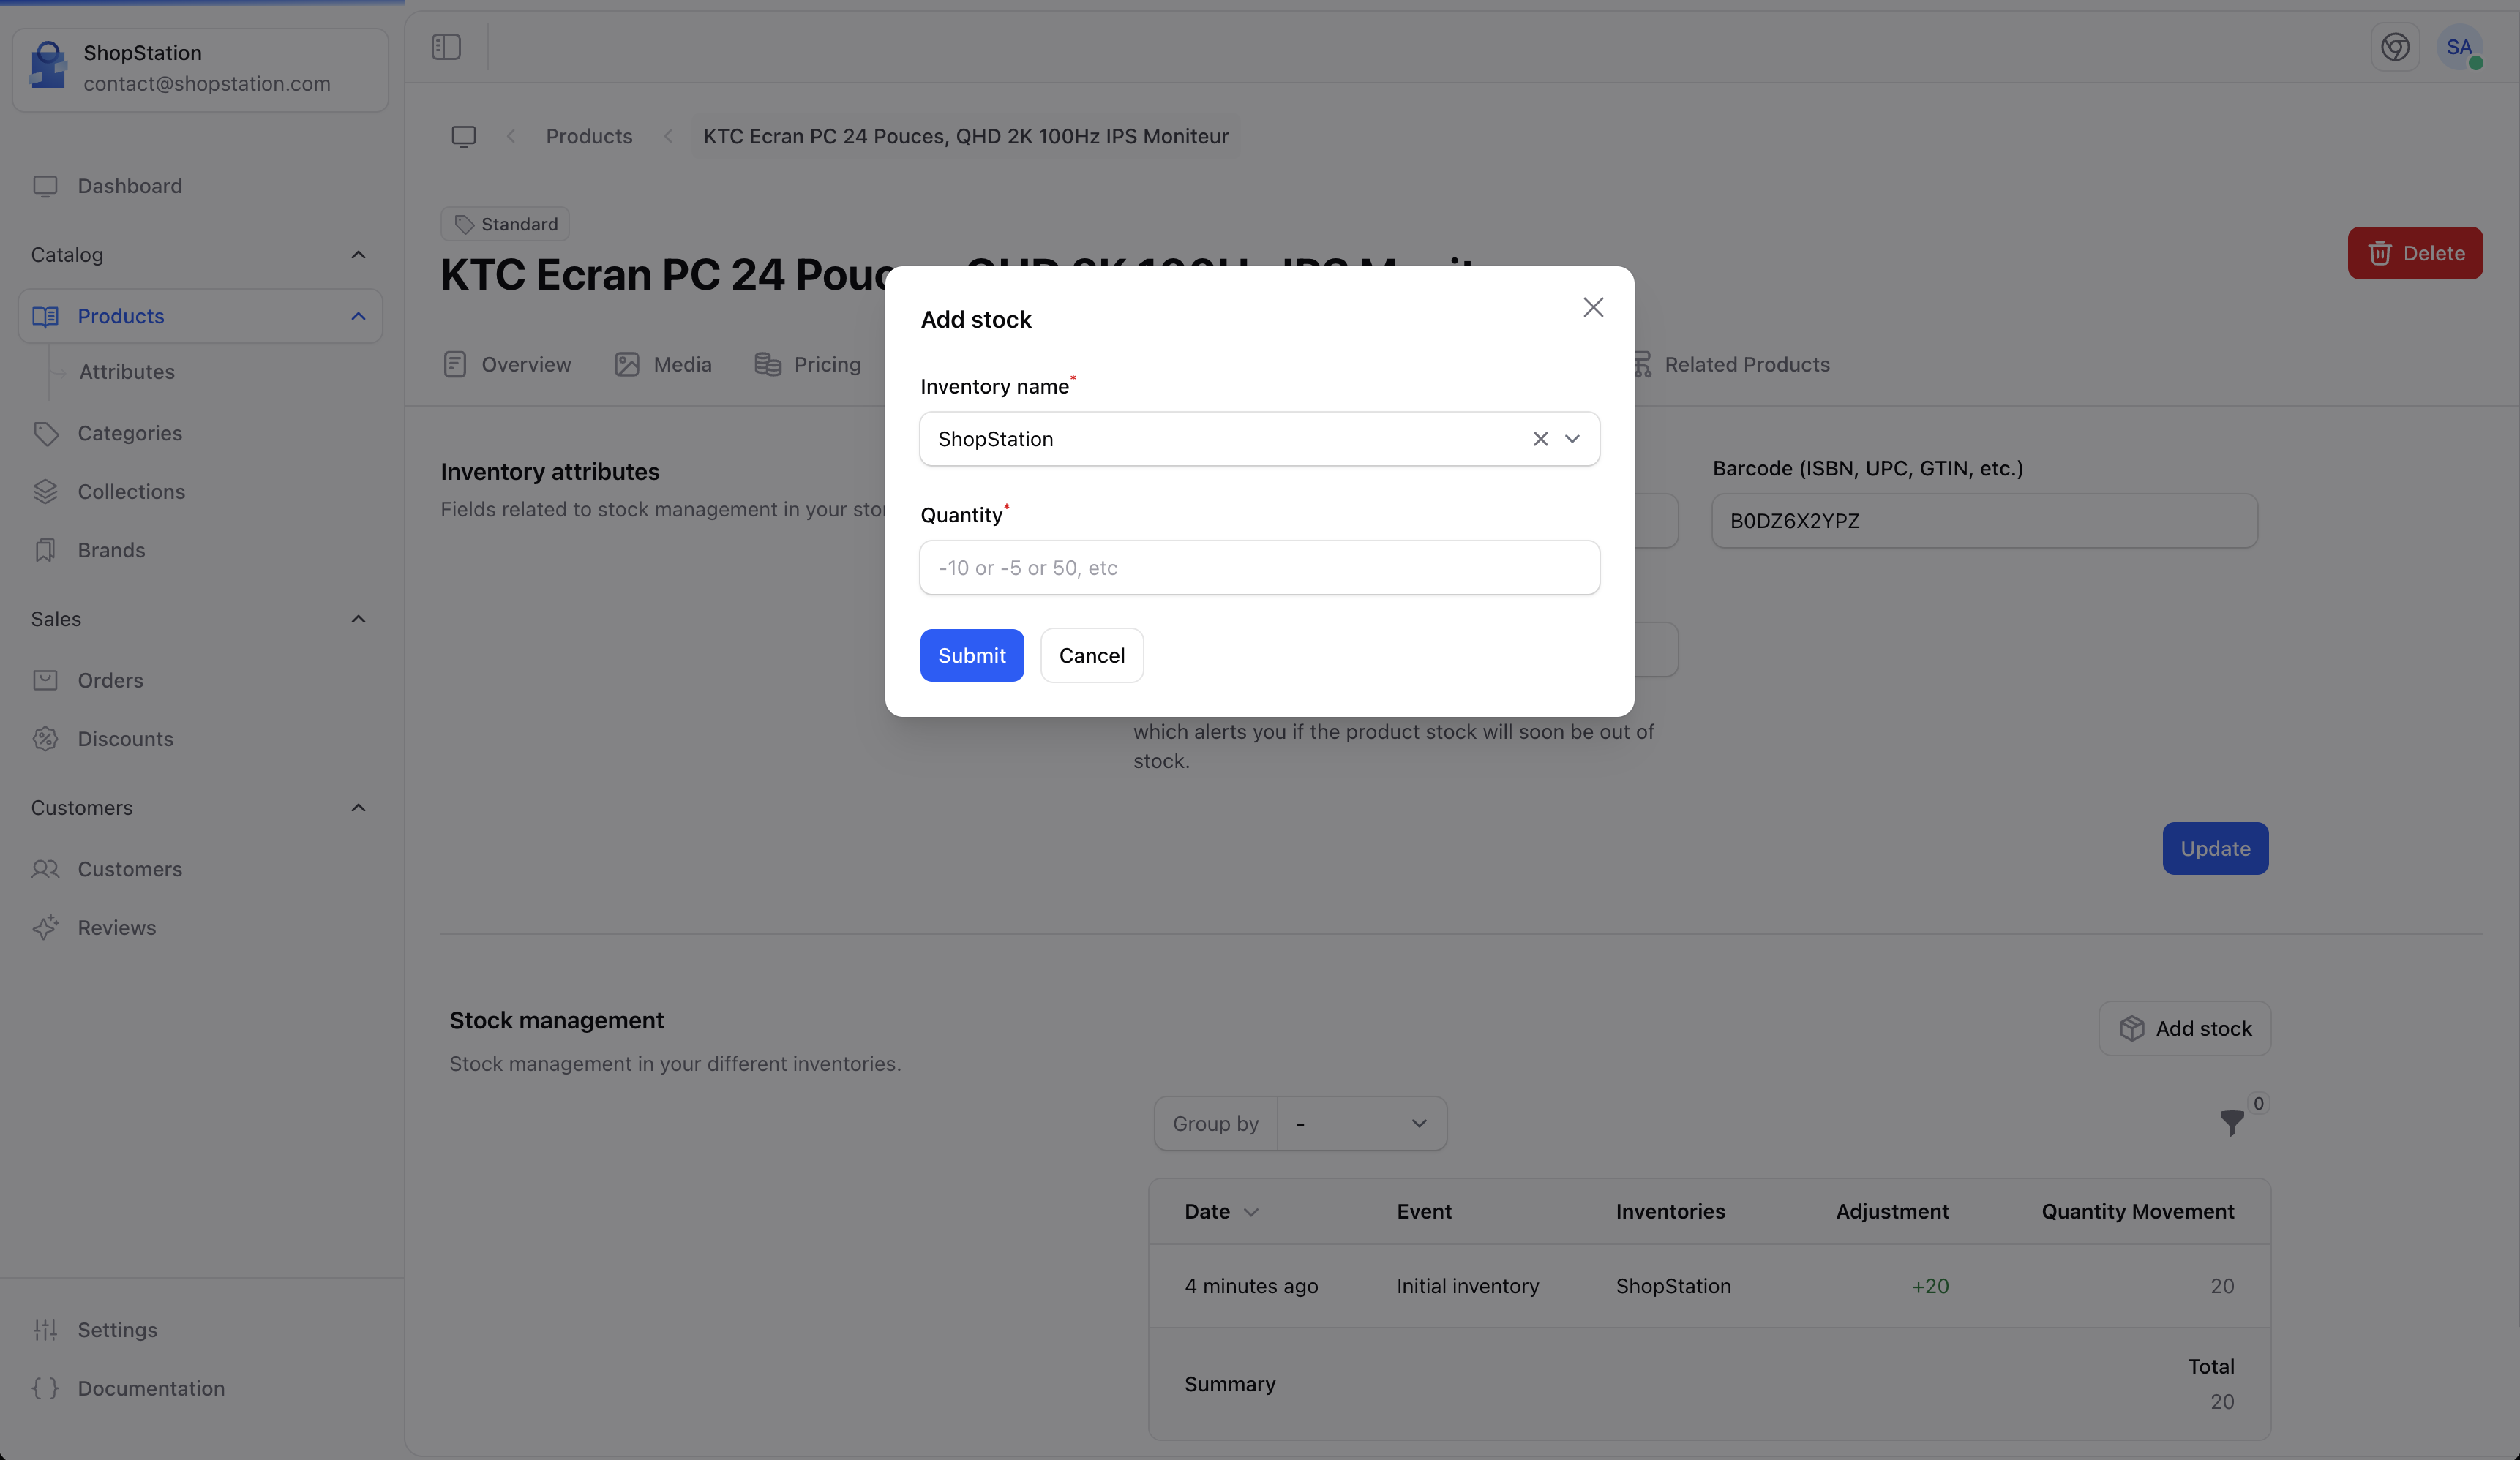 1. Click **Add stock** in the inventory section
2. Select the inventory location
3. Enter the quantity to add (positive) or remove (negative)
4. The stock history will record this adjustment with a timestamp
### Stock History
Every stock movement is recorded with:
* The date and time of the change
* The quantity adjusted (added or removed)
* The user who made the change
* The reference (manual adjustment, order, etc.)
## Pricing
Configure how much your product costs. See [Managing Products](/v2/user-guide/catalog/products/managing-products) for detailed pricing configuration.
1. Click **Add stock** in the inventory section
2. Select the inventory location
3. Enter the quantity to add (positive) or remove (negative)
4. The stock history will record this adjustment with a timestamp
### Stock History
Every stock movement is recorded with:
* The date and time of the change
* The quantity adjusted (added or removed)
* The user who made the change
* The reference (manual adjustment, order, etc.)
## Pricing
Configure how much your product costs. See [Managing Products](/v2/user-guide/catalog/products/managing-products) for detailed pricing configuration.
 ## Example: Creating a Standard Product
Let's walk through creating a "Leather Messenger Bag":
1. **Type**: Select "Standard Product"
2. **General info**: Name it "Leather Messenger Bag", add a description highlighting the craftsmanship and features
3. **Associations**: Assign to brand "Heritage Craft", category "Bags > Messenger Bags", collection "New Arrivals"
4. **Media**: Upload photos from multiple angles (front, back, inside, strap detail)
5. **Stock**: SKU `BAG-LEATH-001`, initial quantity 50, safety stock 10
After creation:
* **Shipping**: Weight 1.2 kg, dimensions 40x30x10 cm
* **Attributes**: Material "Full grain leather", Color "Brown", Origin "Italy"
* **Pricing**: $189.00, compare at $229.00, cost \$85.00
* **SEO**: Title "Leather Messenger Bag - Heritage Craft", description with keywords
## Best Practices
Always measure packed products for accurate shipping calculations.
Set safety stock levels to avoid selling items you can't fulfill.
Add relevant attributes to help customers make informed decisions.
Show your product from every angle. Customers can't touch it online.
## Example: Creating a Standard Product
Let's walk through creating a "Leather Messenger Bag":
1. **Type**: Select "Standard Product"
2. **General info**: Name it "Leather Messenger Bag", add a description highlighting the craftsmanship and features
3. **Associations**: Assign to brand "Heritage Craft", category "Bags > Messenger Bags", collection "New Arrivals"
4. **Media**: Upload photos from multiple angles (front, back, inside, strap detail)
5. **Stock**: SKU `BAG-LEATH-001`, initial quantity 50, safety stock 10
After creation:
* **Shipping**: Weight 1.2 kg, dimensions 40x30x10 cm
* **Attributes**: Material "Full grain leather", Color "Brown", Origin "Italy"
* **Pricing**: $189.00, compare at $229.00, cost \$85.00
* **SEO**: Title "Leather Messenger Bag - Heritage Craft", description with keywords
## Best Practices
Always measure packed products for accurate shipping calculations.
Set safety stock levels to avoid selling items you can't fulfill.
Add relevant attributes to help customers make informed decisions.
Show your product from every angle. Customers can't touch it online.