> ## Documentation Index
> Fetch the complete documentation index at: https://docs.laravelshopper.dev/llms.txt
> Use this file to discover all available pages before exploring further.
# Managing Products
> Edit pricing, SEO, media, and other settings after product creation.
After creating a product, you can manage all its details from the product edit page. This guide covers the common management tasks available for all product types.
## Product Edit Page
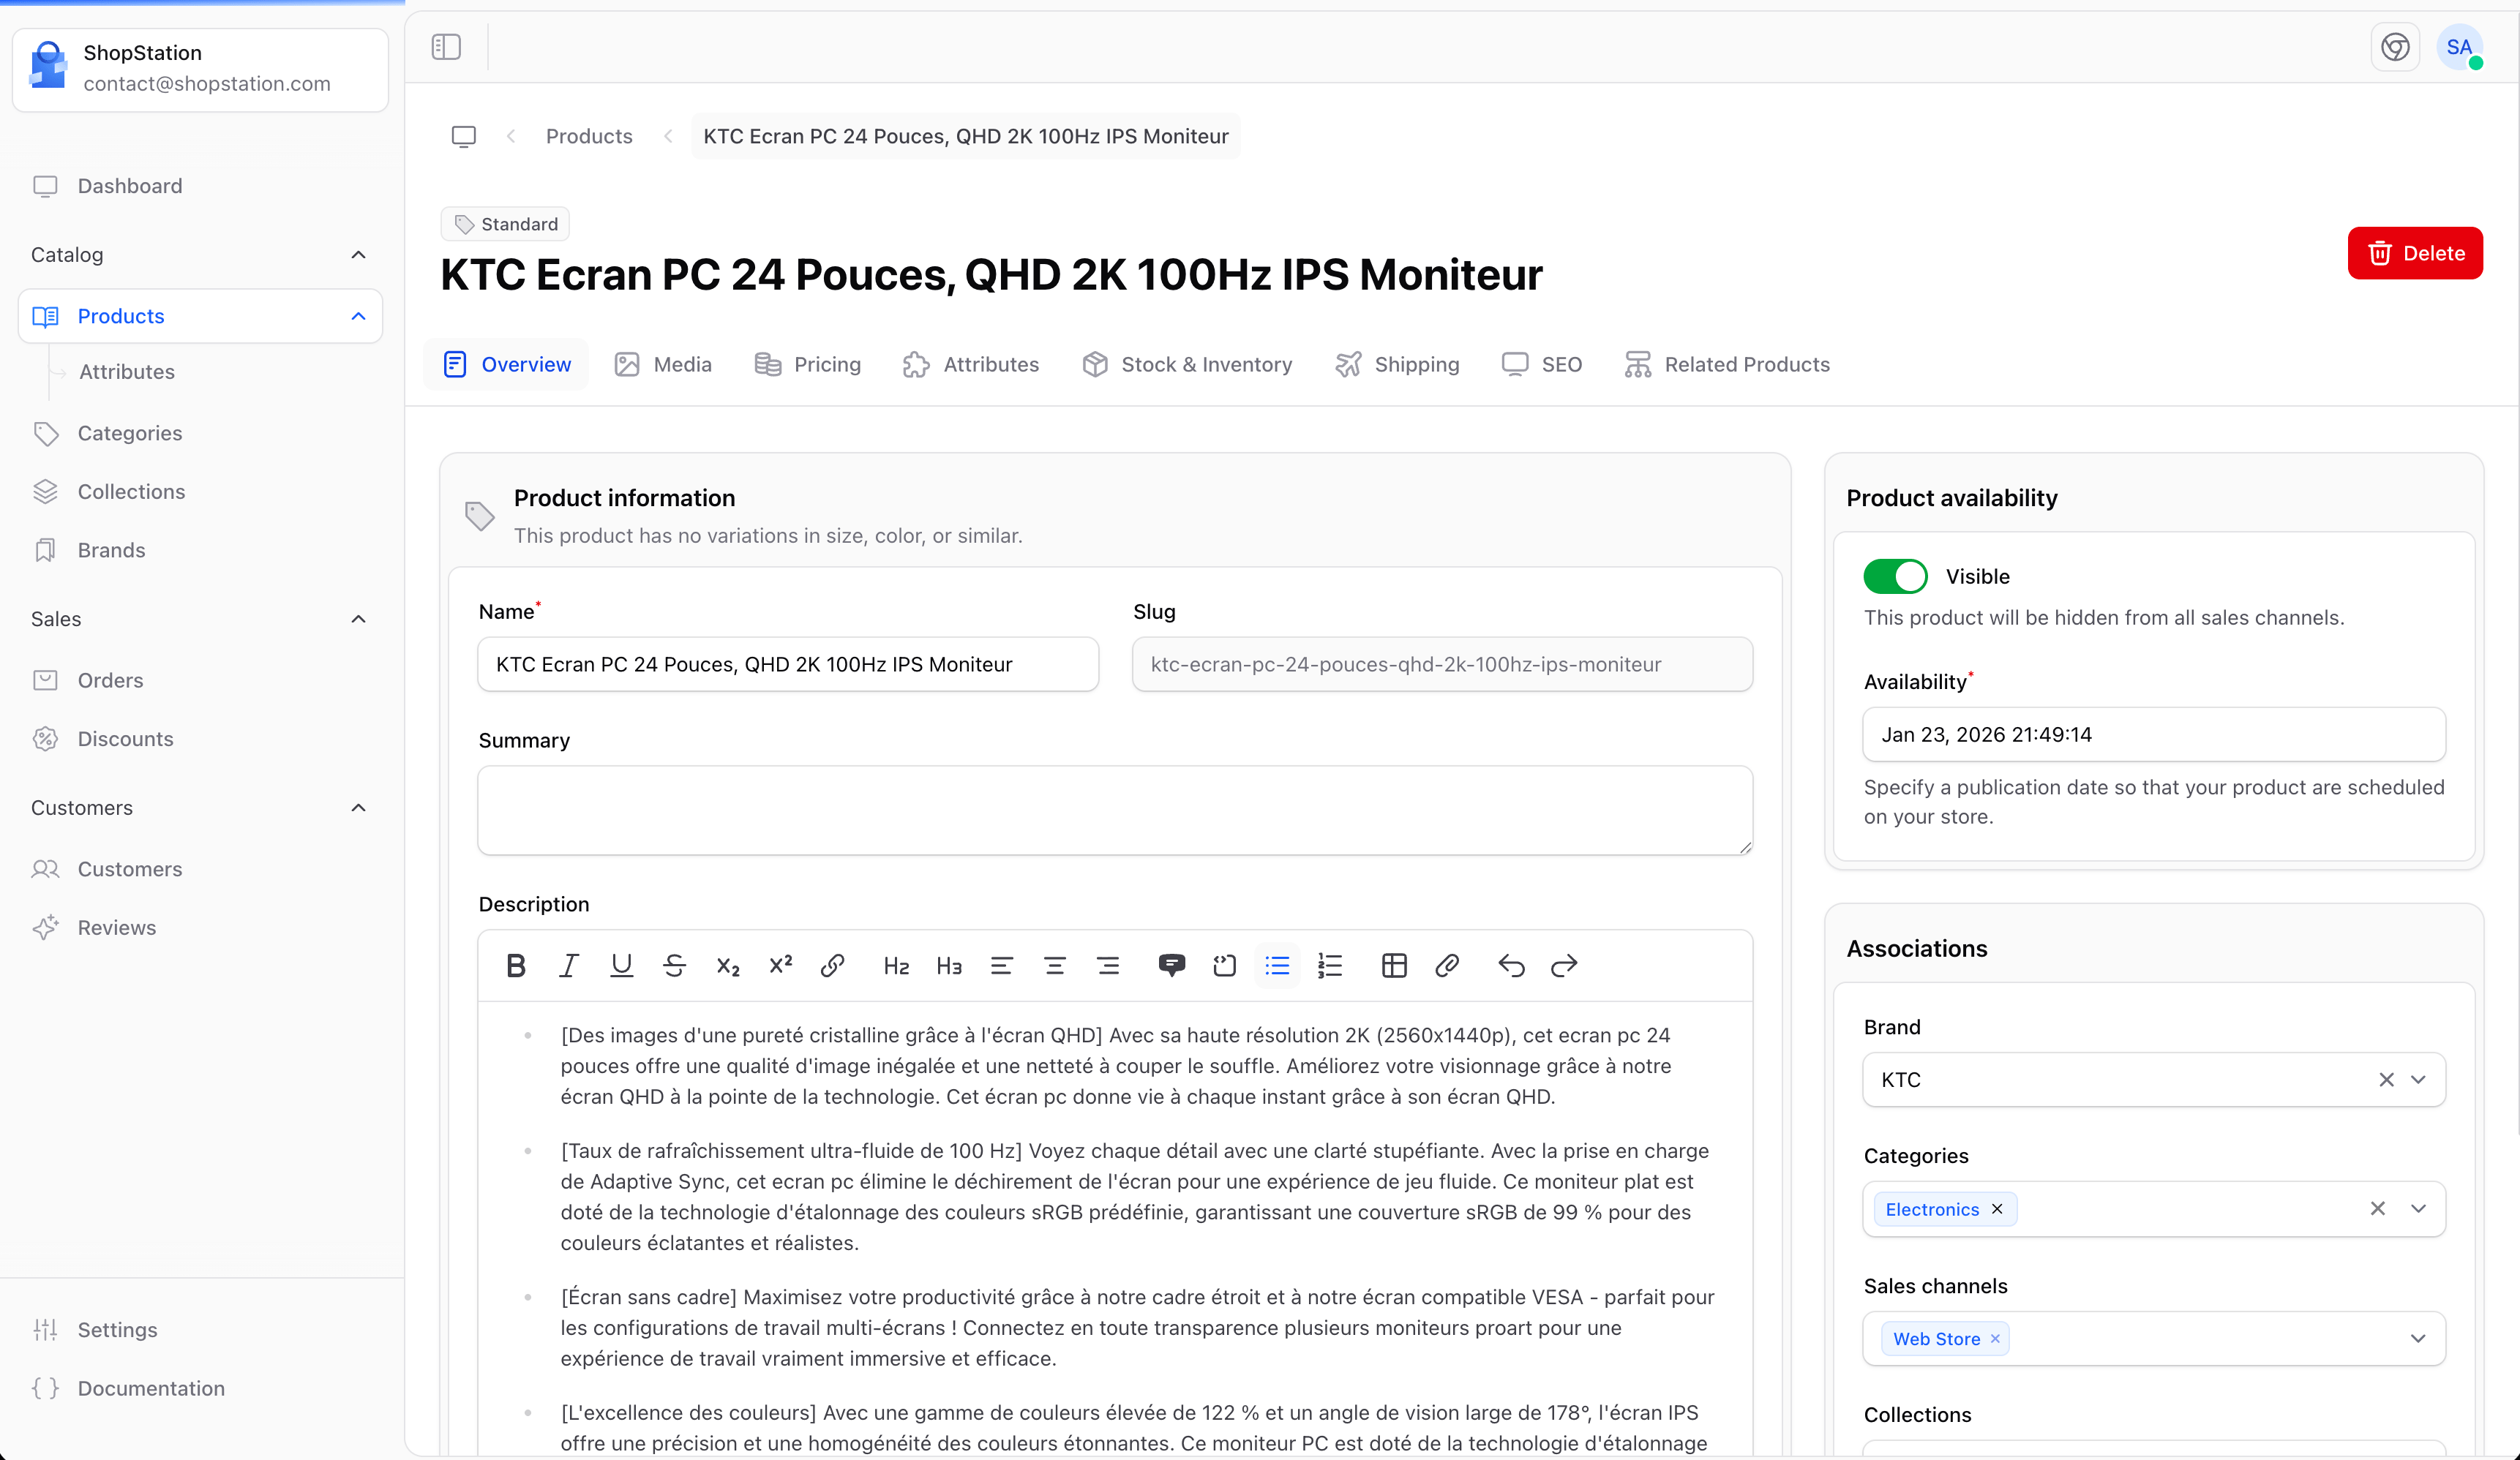
Click on any product from the products list to open its edit page. The page is organized into tabs based on your product type:
 ## Pricing
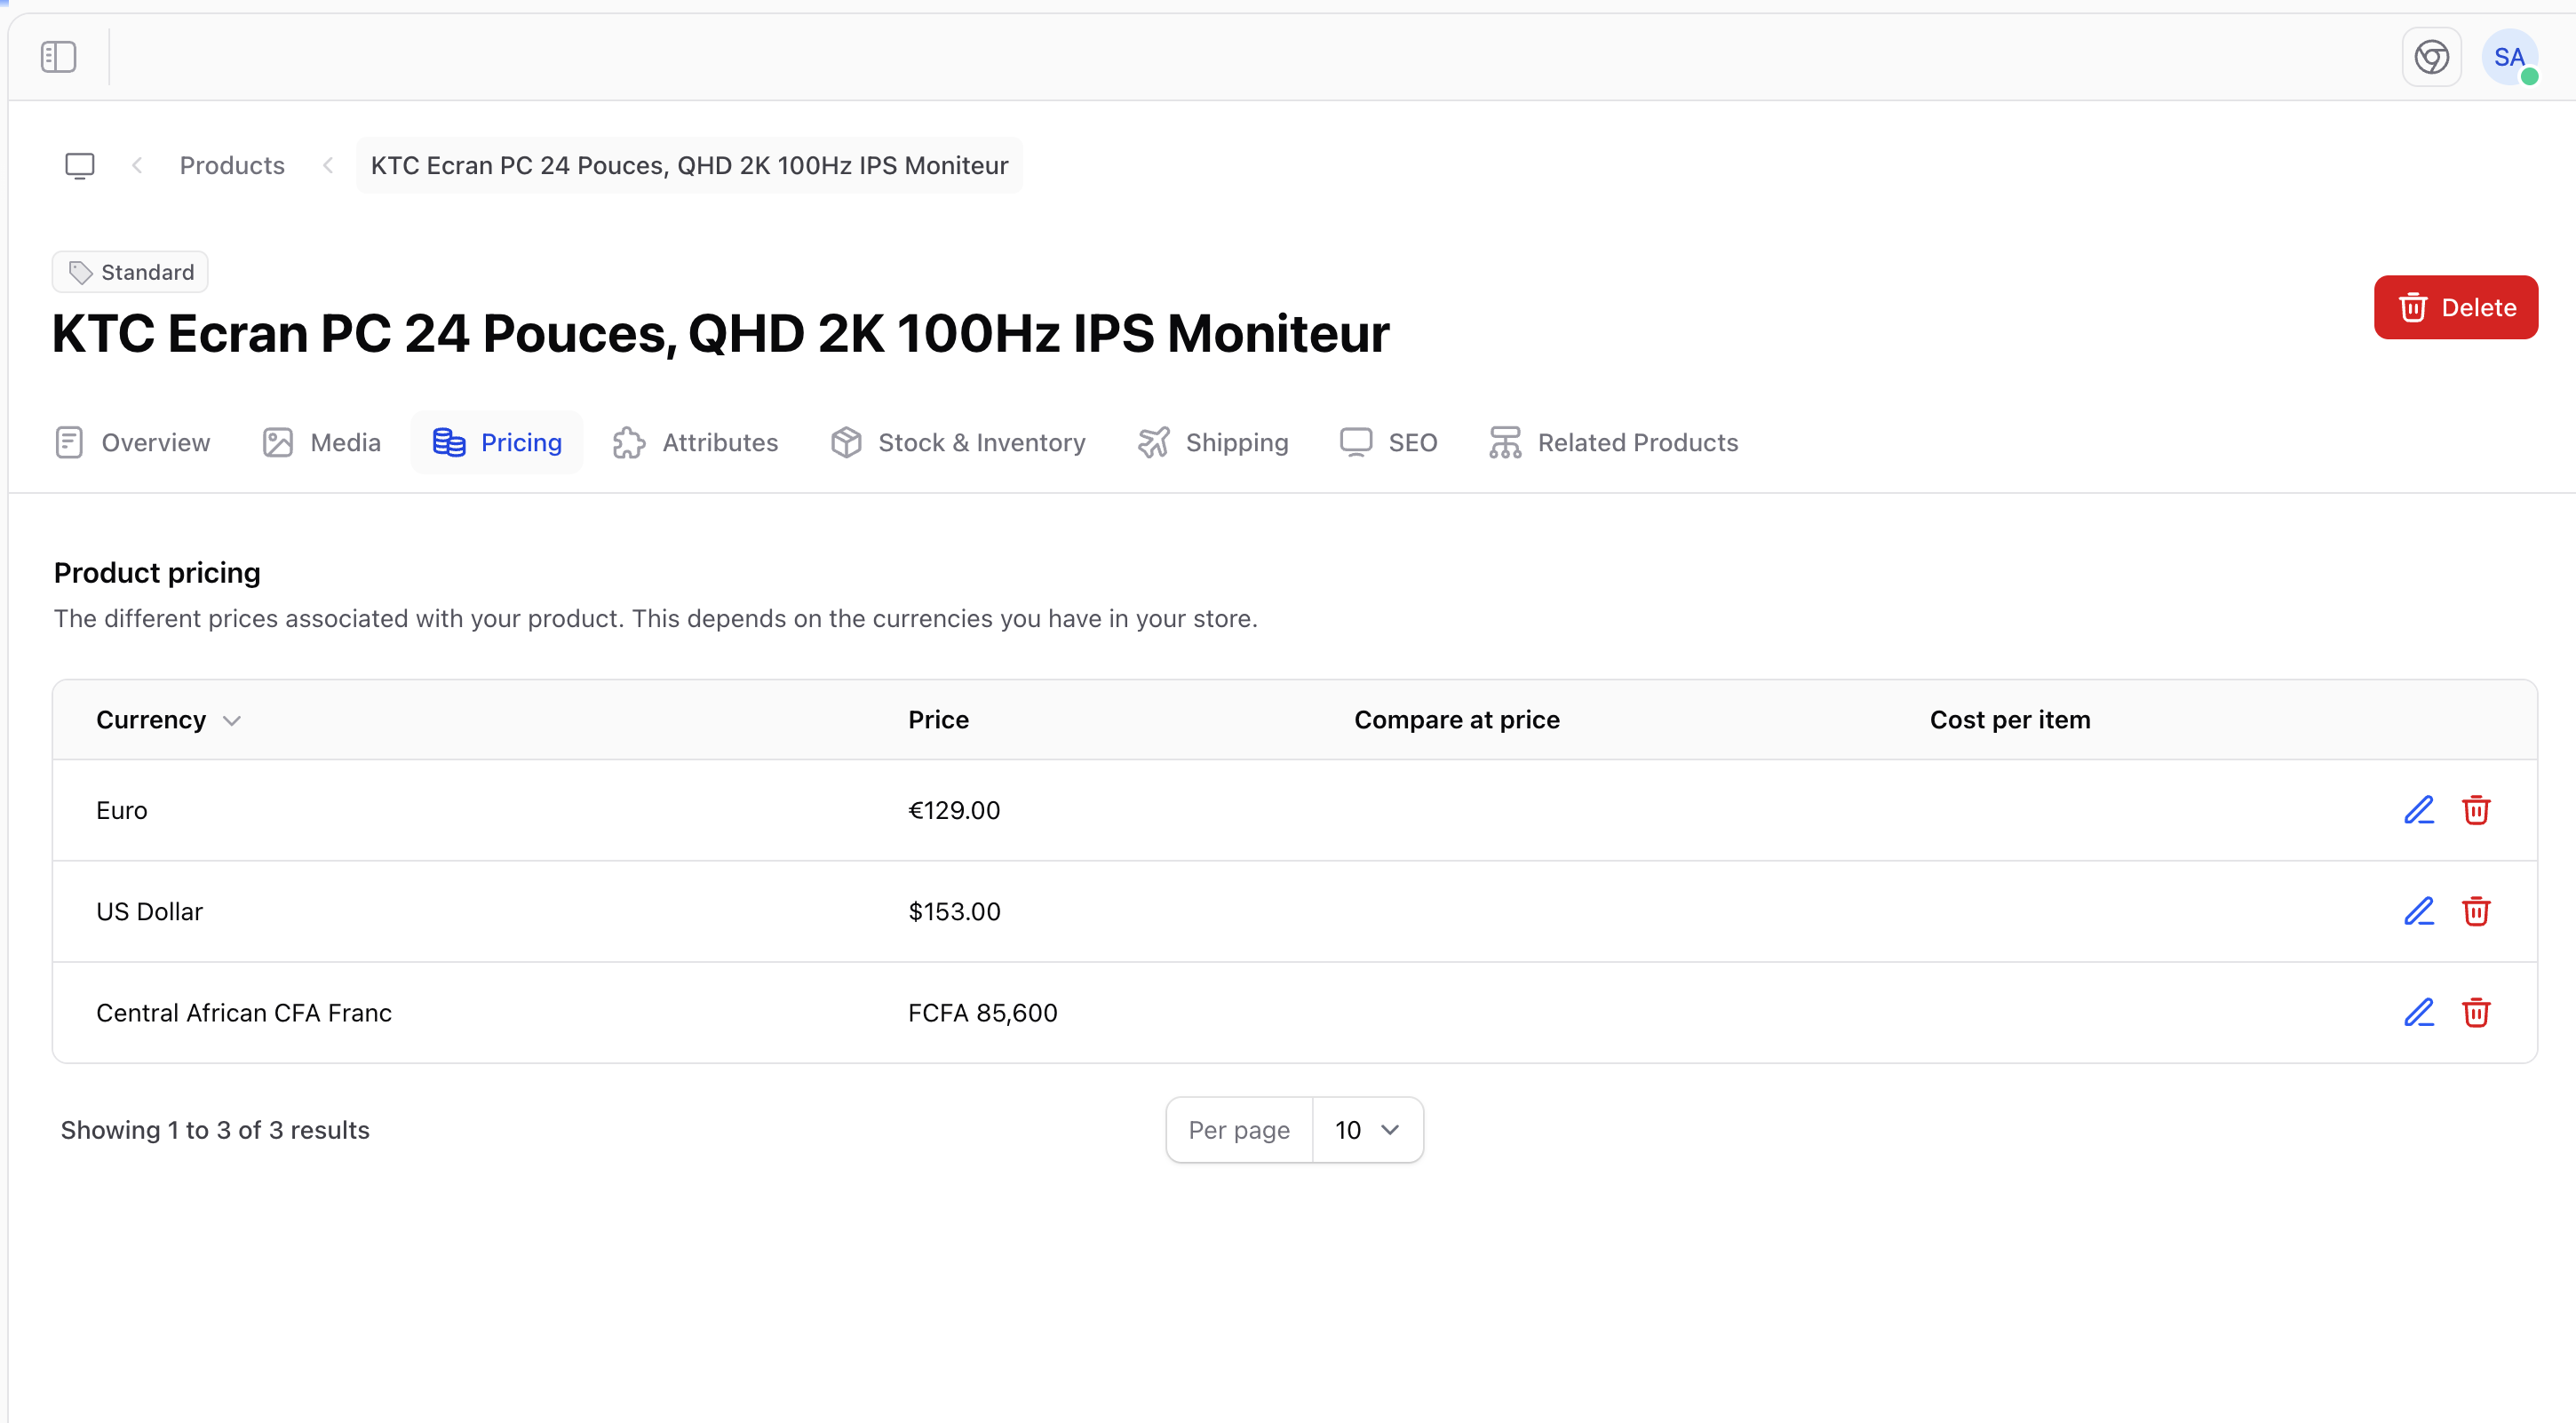
The pricing section lets you configure your product's price, comparison price, and cost. If your store supports multiple currencies, you can set prices in each currency.
## Pricing
The pricing section lets you configure your product's price, comparison price, and cost. If your store supports multiple currencies, you can set prices in each currency.
 | Field | Description |
| -------------------- | -------------------------------------------------------------------------------------------------------------------- |
| **Price** | The regular selling price shown to customers |
| **Compare at price** | The original price displayed with a strikethrough to indicate a discount. Leave empty if the product is not on sale. |
| **Cost per item** | Your cost to acquire or produce the item. Used for profit margin calculations and not visible to customers. |
### Multi-Currency Pricing
If you have multiple currencies configured in your store:
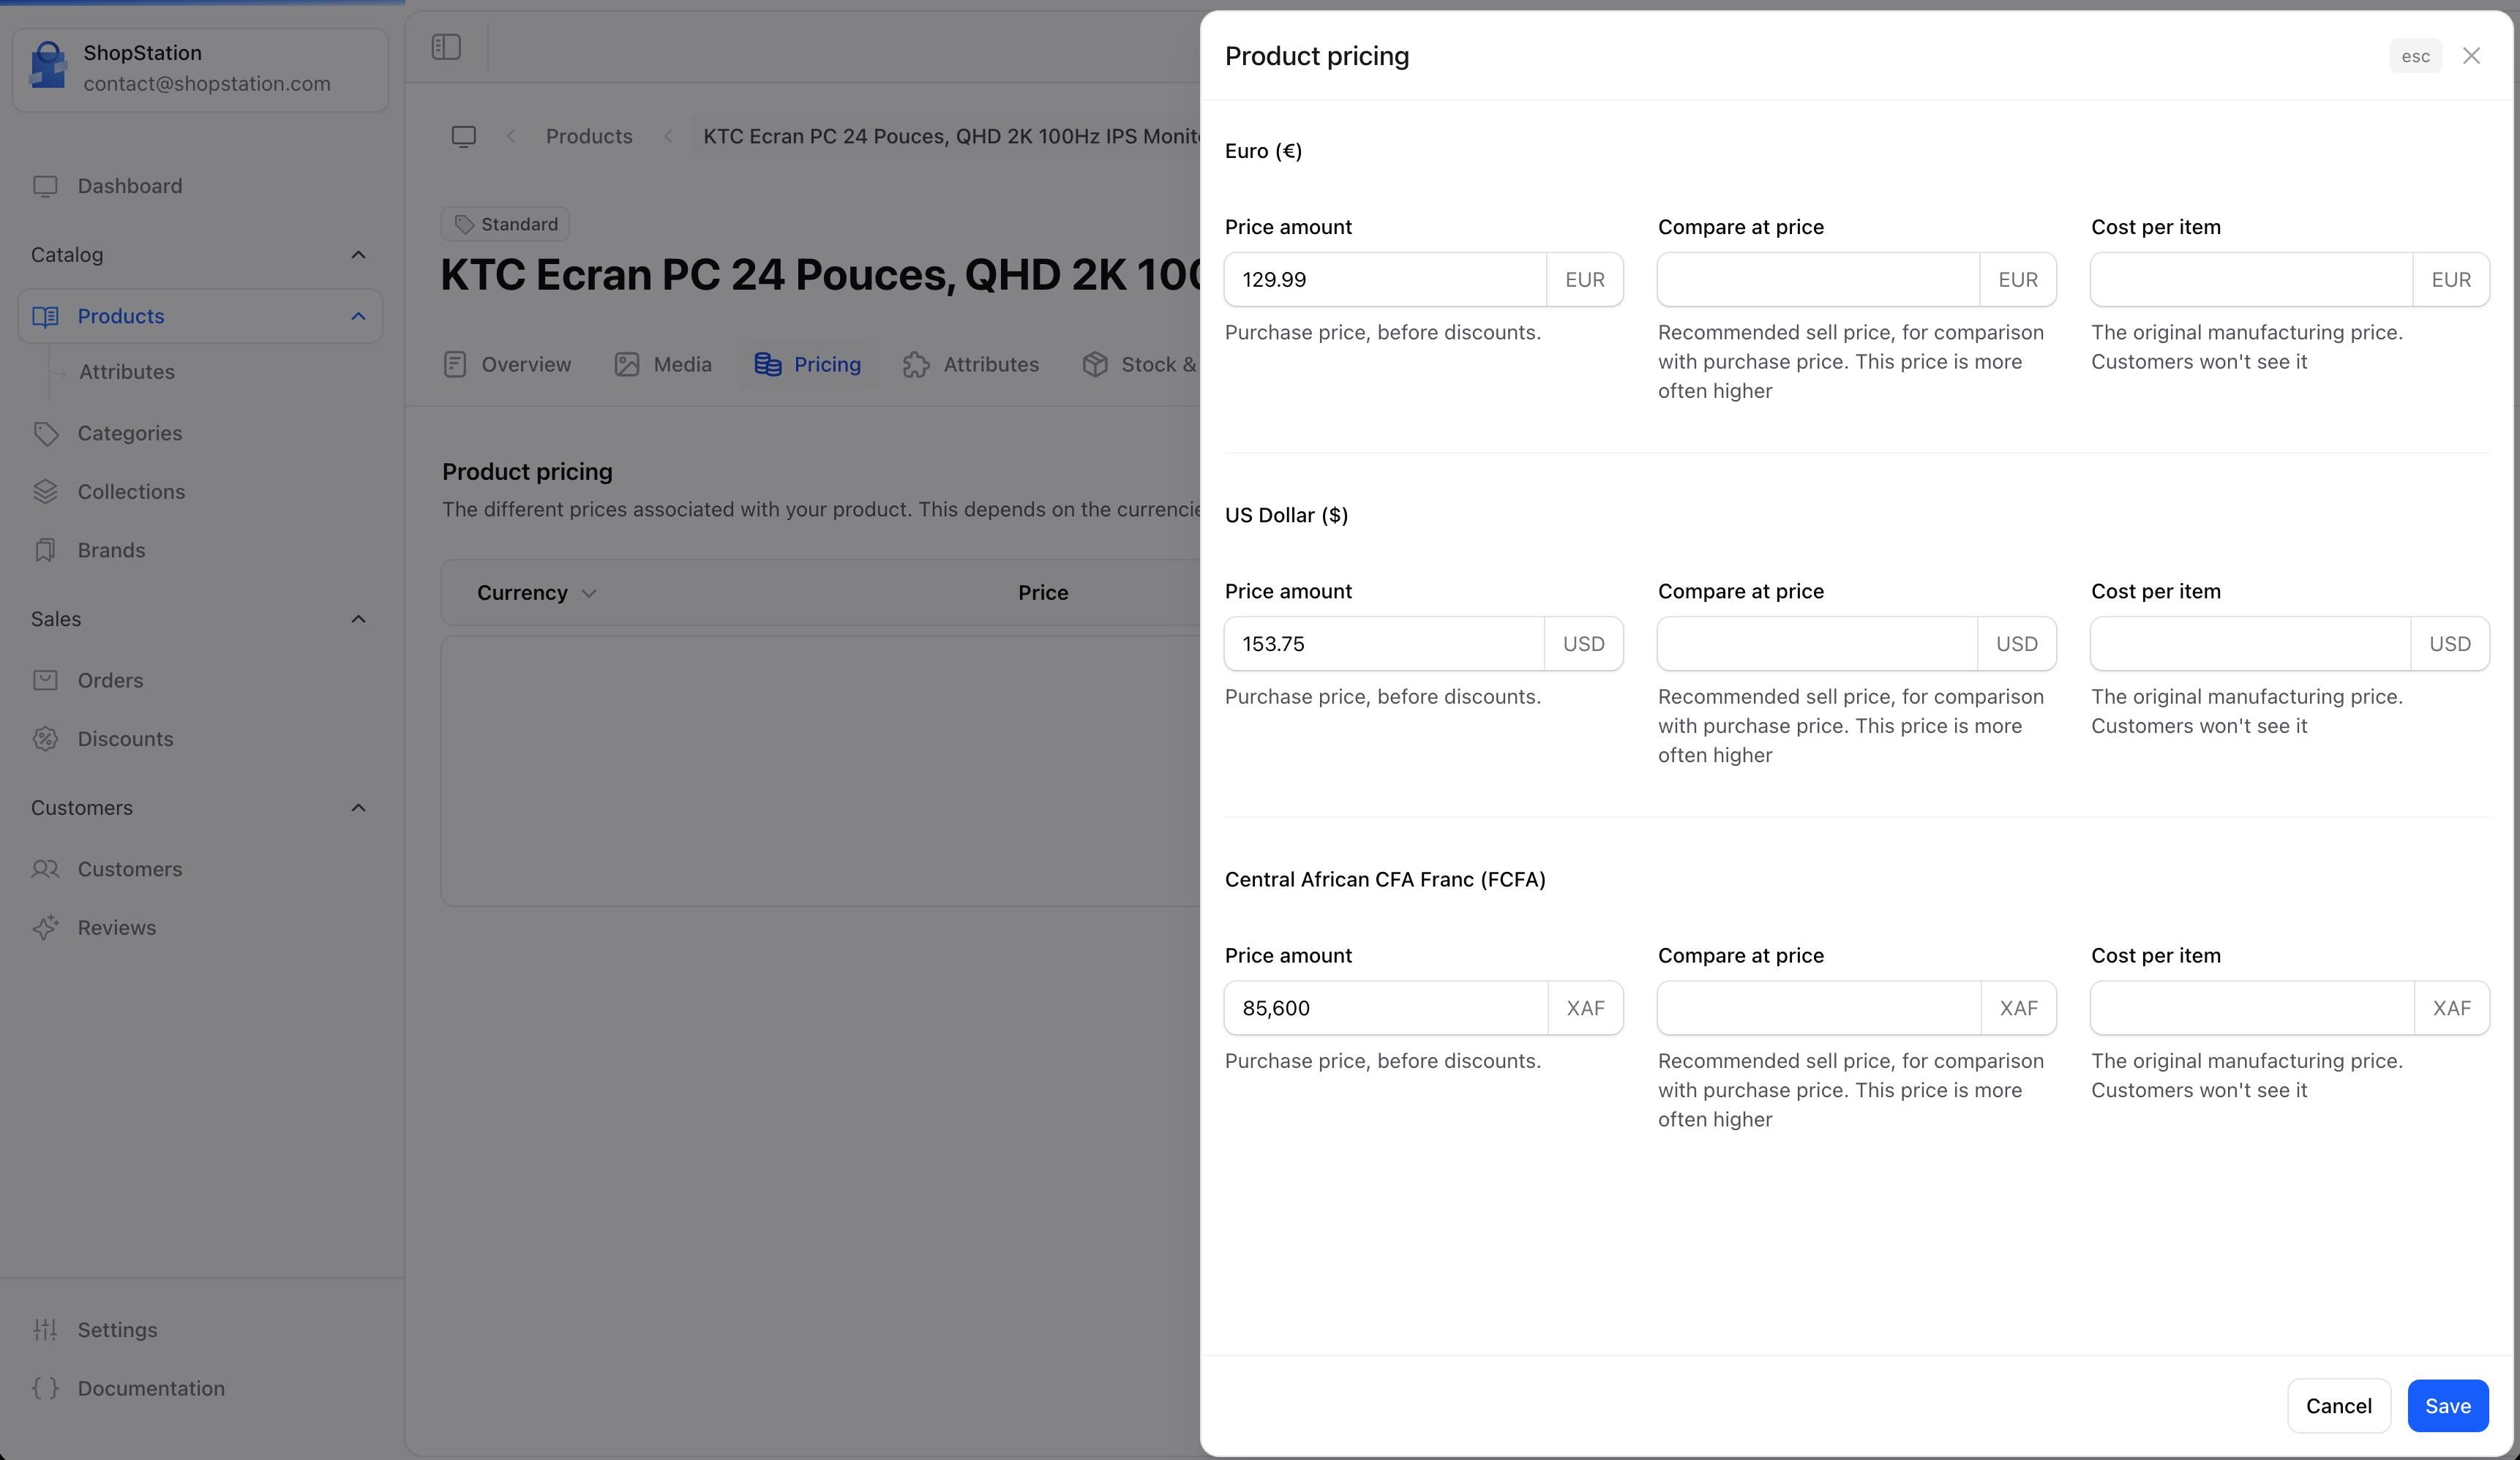
* Each currency has its own set of price fields
* Set appropriate prices for each market (don't just convert; consider local pricing strategies)
* The customer sees the price in their local currency based on your store's currency detection
| Field | Description |
| -------------------- | -------------------------------------------------------------------------------------------------------------------- |
| **Price** | The regular selling price shown to customers |
| **Compare at price** | The original price displayed with a strikethrough to indicate a discount. Leave empty if the product is not on sale. |
| **Cost per item** | Your cost to acquire or produce the item. Used for profit margin calculations and not visible to customers. |
### Multi-Currency Pricing
If you have multiple currencies configured in your store:
* Each currency has its own set of price fields
* Set appropriate prices for each market (don't just convert; consider local pricing strategies)
* The customer sees the price in their local currency based on your store's currency detection
 For variant products, pricing is set at the variant level. The parent product doesn't have its own price. Each variant can have a different price.
### Pricing Strategies
| Strategy | How to configure |
| ------------------ | --------------------------------------------------------------------------- |
| **Fixed price** | Set only the "Price" field |
| **Sale price** | Set "Price" lower than "Compare at price" |
| **Cost-plus** | Fill "Cost per item" to track margins, set "Price" with your desired markup |
| **Anchor pricing** | Set a high "Compare at price" to make the actual price feel like a deal |
## Media Management
Manage your product's visual content, including thumbnail and gallery images.
### Thumbnail
The thumbnail is your product's primary image. It appears in:
* Product listings and search results
* Shopping cart and checkout
* Order confirmations and invoices
### Product Gallery
Additional images shown on the product detail page:
* Upload multiple images for different angles
* Drag and drop to reorder images
* Delete images you no longer need
**Image recommendations:**
* Minimum resolution: 800x800 pixels
* Consistent aspect ratio across products (square works best for most stores)
* Clean white or neutral background for the thumbnail
* Lifestyle and detail shots for gallery images
## SEO Optimization
Optimize your product pages for search engines to drive organic traffic.
For variant products, pricing is set at the variant level. The parent product doesn't have its own price. Each variant can have a different price.
### Pricing Strategies
| Strategy | How to configure |
| ------------------ | --------------------------------------------------------------------------- |
| **Fixed price** | Set only the "Price" field |
| **Sale price** | Set "Price" lower than "Compare at price" |
| **Cost-plus** | Fill "Cost per item" to track margins, set "Price" with your desired markup |
| **Anchor pricing** | Set a high "Compare at price" to make the actual price feel like a deal |
## Media Management
Manage your product's visual content, including thumbnail and gallery images.
### Thumbnail
The thumbnail is your product's primary image. It appears in:
* Product listings and search results
* Shopping cart and checkout
* Order confirmations and invoices
### Product Gallery
Additional images shown on the product detail page:
* Upload multiple images for different angles
* Drag and drop to reorder images
* Delete images you no longer need
**Image recommendations:**
* Minimum resolution: 800x800 pixels
* Consistent aspect ratio across products (square works best for most stores)
* Clean white or neutral background for the thumbnail
* Lifestyle and detail shots for gallery images
## SEO Optimization
Optimize your product pages for search engines to drive organic traffic.
 | Field | Description | Best practice |
| ------------------- | ------------------------------------------------------------ | ----------------------------------------------------------------------------- |
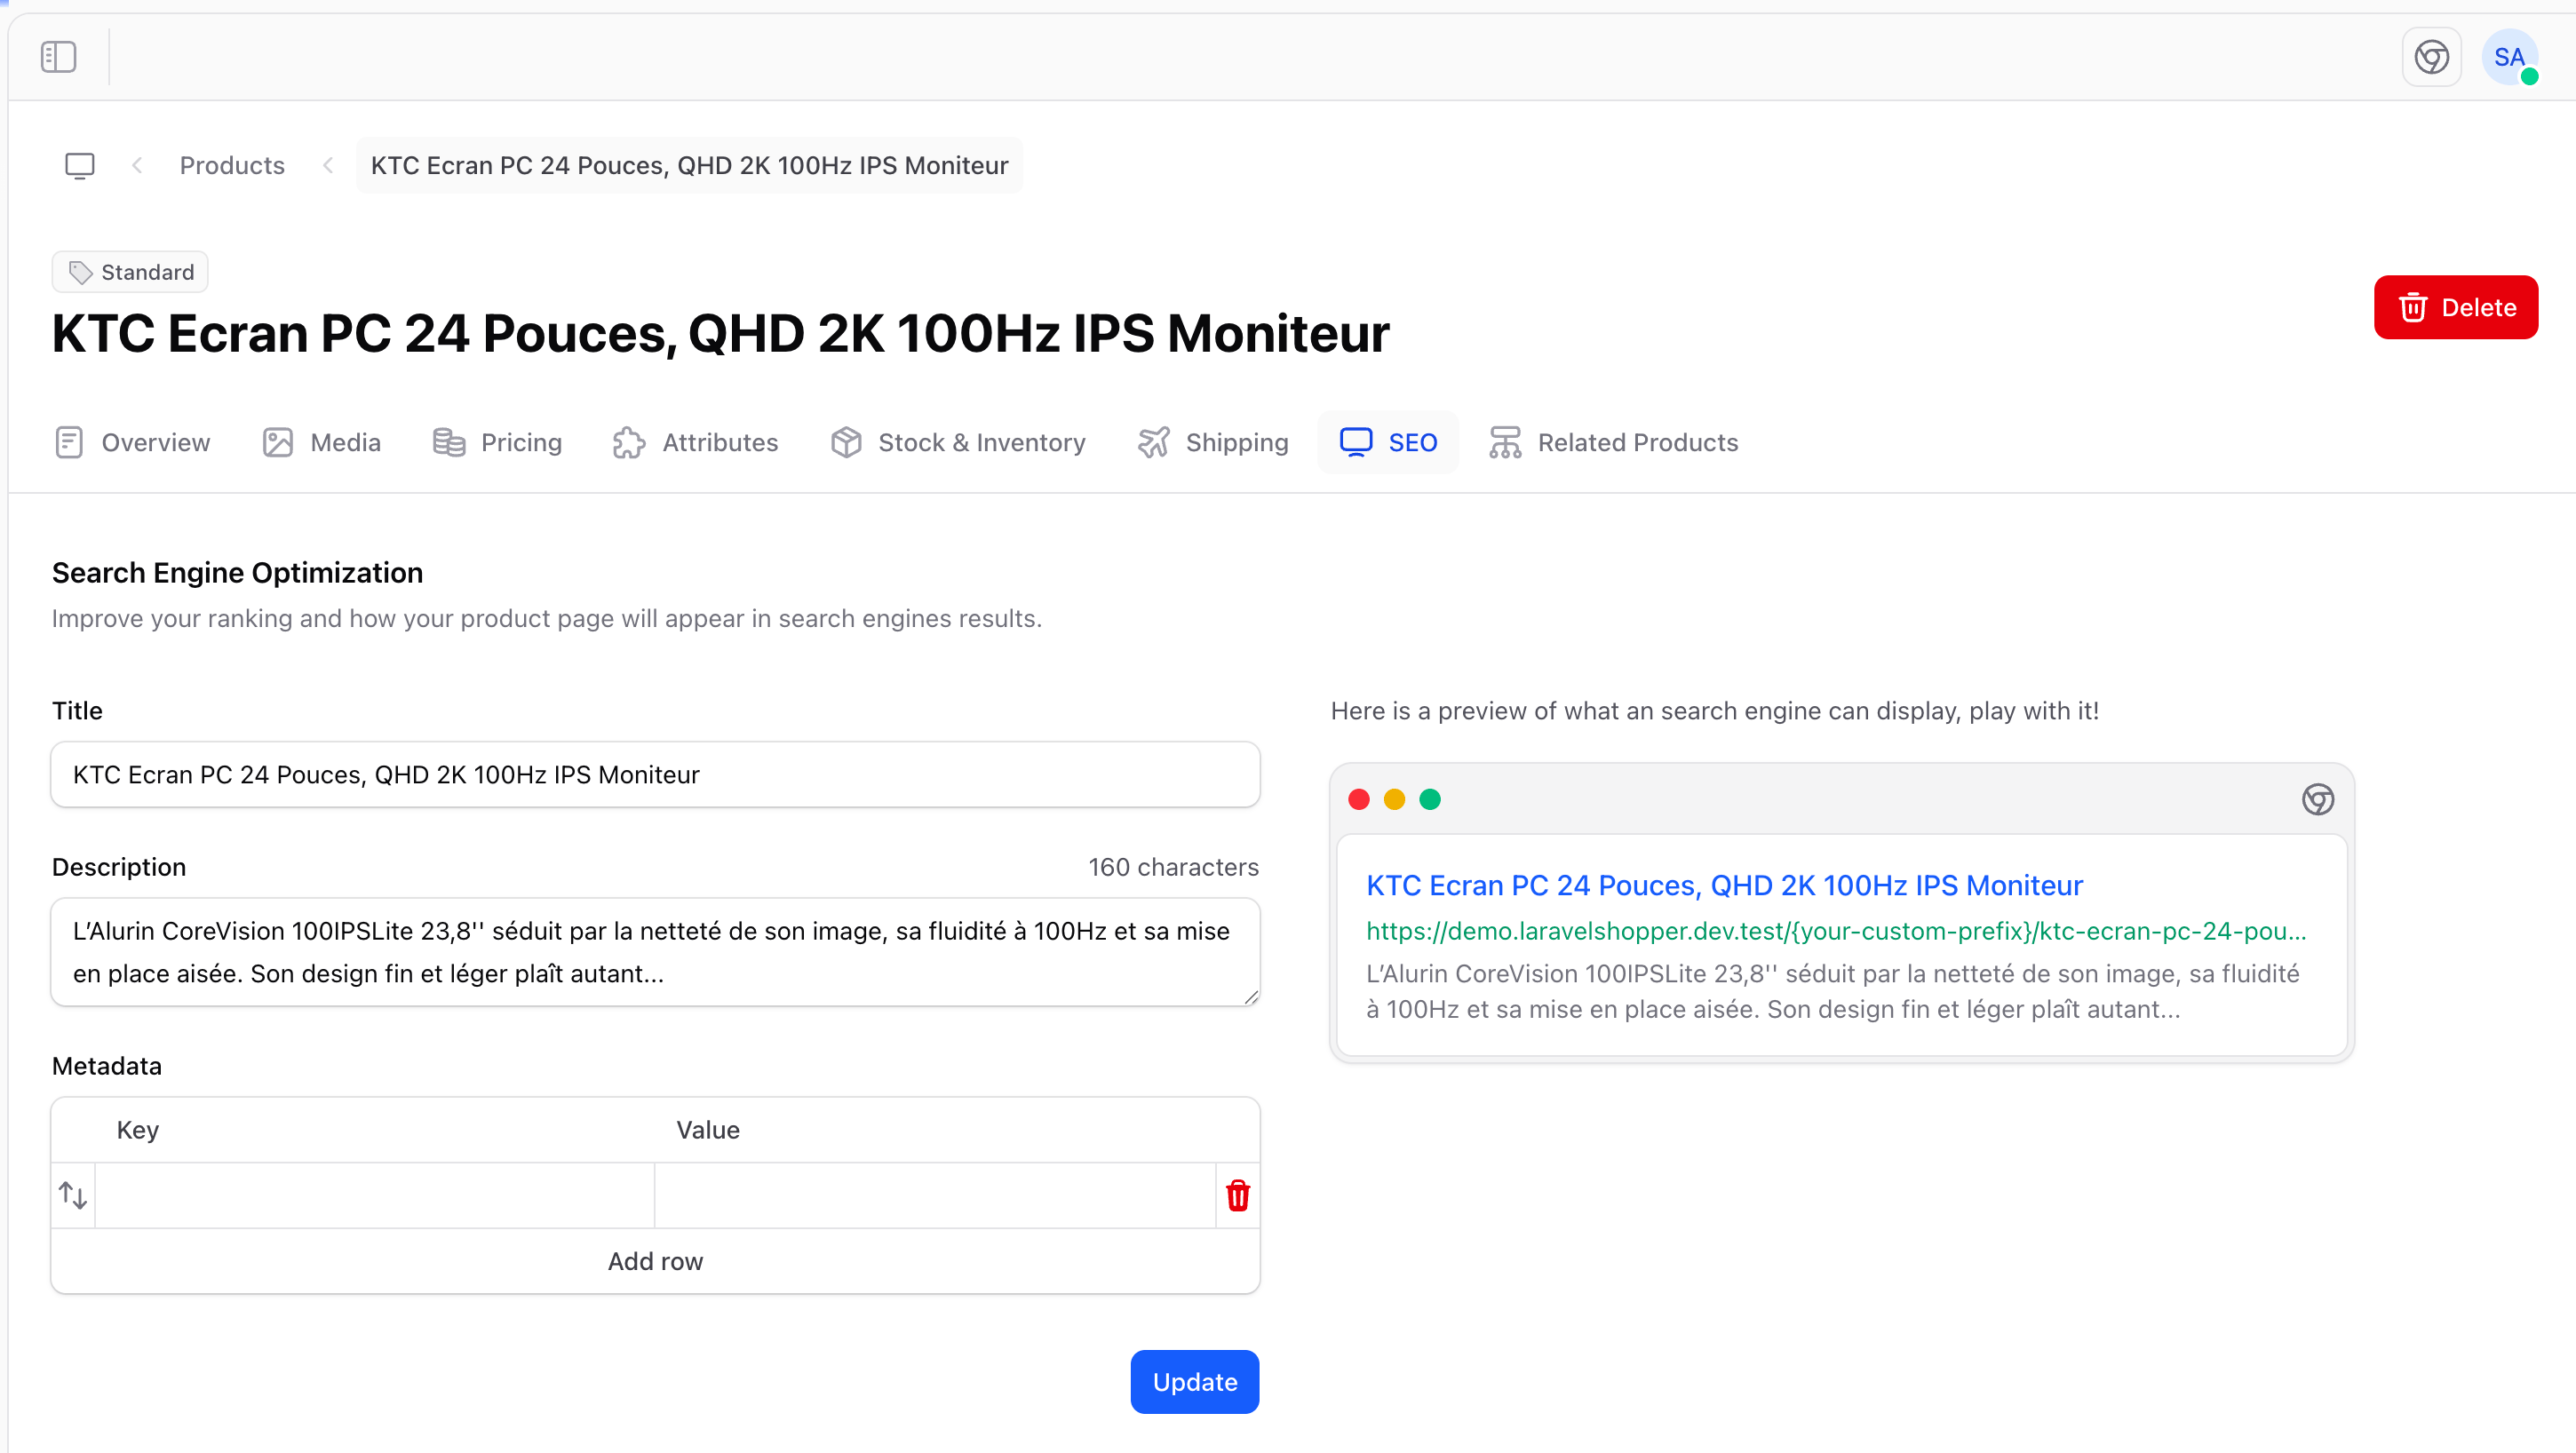
| **SEO Title** | The title shown in search engine results | Keep under 60 characters. Include the product name and a key benefit. |
| **SEO Description** | The meta description shown below the title in search results | Keep under 160 characters. Describe the product and include a call to action. |
| **URL handle** | The URL slug for the product page | Use lowercase, hyphen-separated words. Keep it short and descriptive. |
### SEO Tips
* **Include keywords** naturally in the title and description. Think about what customers search for
* **Be specific**. "Red Leather Crossbody Bag" is better than "Nice Bag"
* **Add a call to action** in the meta description, such as "Shop now", "Free shipping", "Limited edition"
* **Avoid duplicate content**. Each product should have unique SEO text
If left empty, search engines will use your product name as the title and pull text from your description. It's always better to set these explicitly for optimal results.
## Related Products
Link related products to encourage customers to explore more of your catalog and increase average order value.
| Field | Description | Best practice |
| ------------------- | ------------------------------------------------------------ | ----------------------------------------------------------------------------- |
| **SEO Title** | The title shown in search engine results | Keep under 60 characters. Include the product name and a key benefit. |
| **SEO Description** | The meta description shown below the title in search results | Keep under 160 characters. Describe the product and include a call to action. |
| **URL handle** | The URL slug for the product page | Use lowercase, hyphen-separated words. Keep it short and descriptive. |
### SEO Tips
* **Include keywords** naturally in the title and description. Think about what customers search for
* **Be specific**. "Red Leather Crossbody Bag" is better than "Nice Bag"
* **Add a call to action** in the meta description, such as "Shop now", "Free shipping", "Limited edition"
* **Avoid duplicate content**. Each product should have unique SEO text
If left empty, search engines will use your product name as the title and pull text from your description. It's always better to set these explicitly for optimal results.
## Related Products
Link related products to encourage customers to explore more of your catalog and increase average order value.
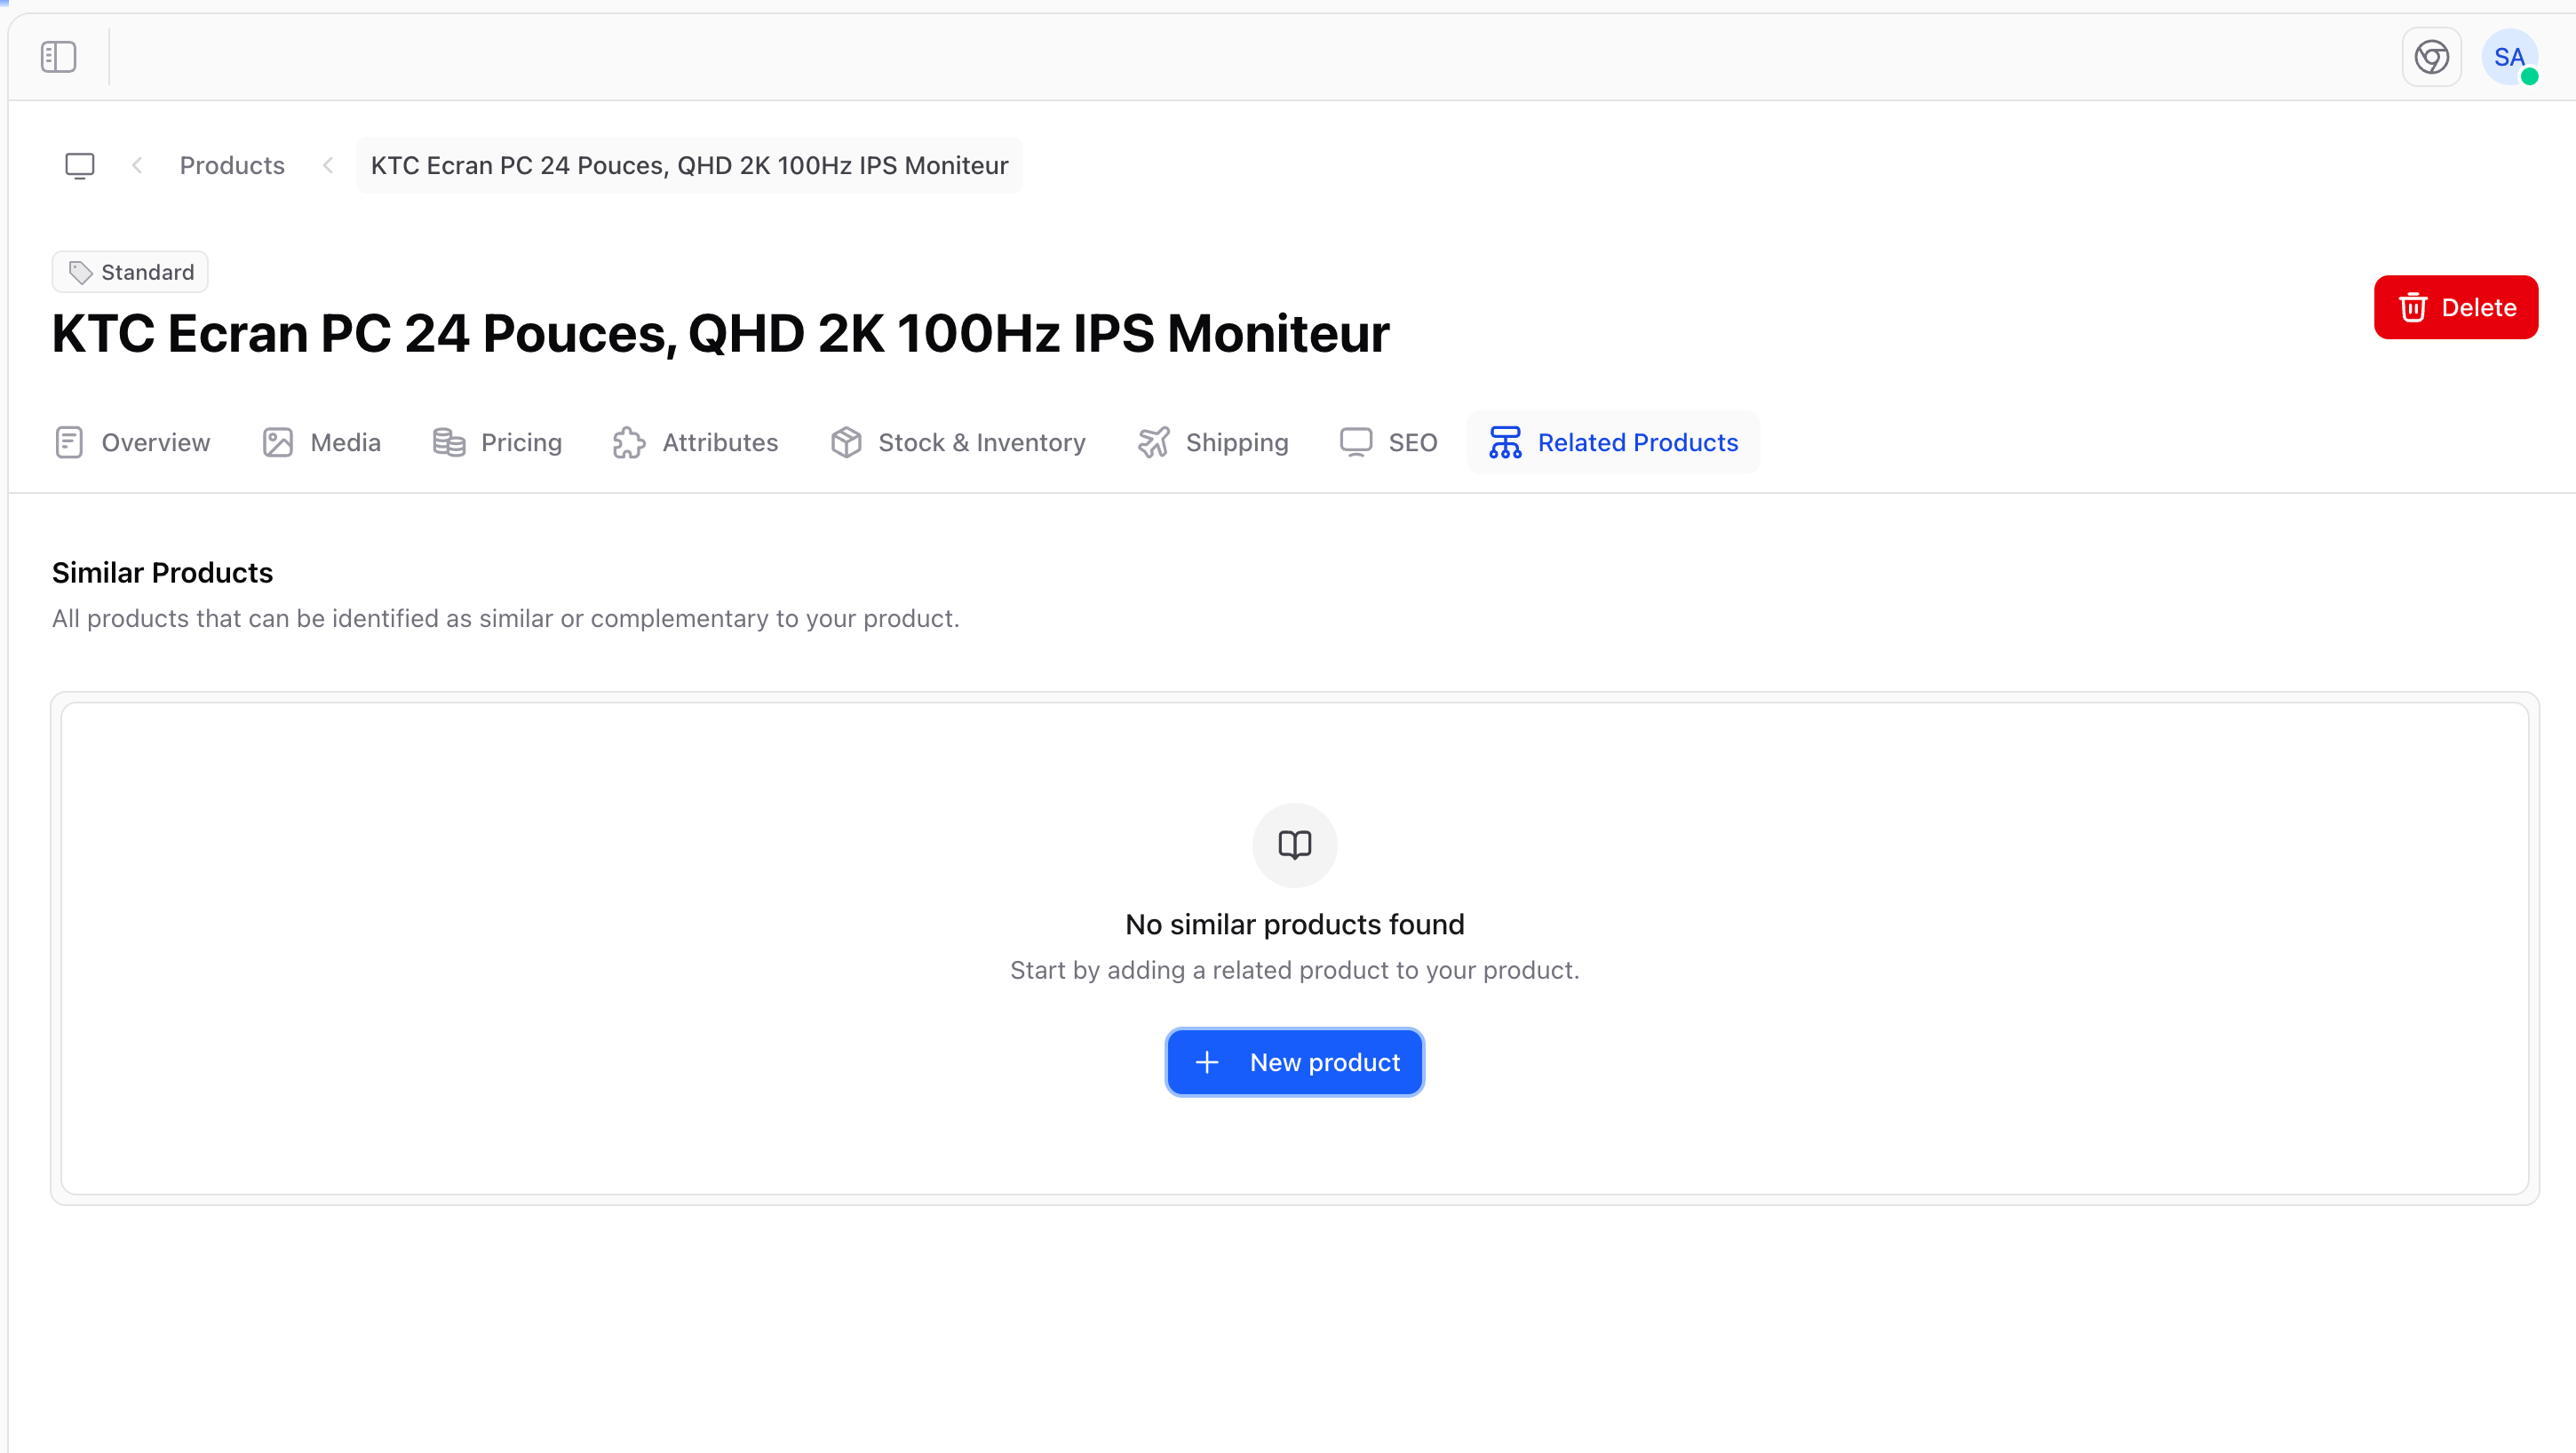 ### Adding Related Products
1. Navigate to the **Related Products** section on your product
2. Click **Add related product**
3. Search for and select products to link
4. Related products appear on the product detail page on your storefront
### When to Use Related Products
| Use case | Example |
| ------------------------------ | ------------------------------------------- |
| **Complementary items** | Shoes → Shoe cleaner, laces, socks |
| **Same category** | Blue dress → Other dresses in similar style |
| **Frequently bought together** | Phone → Phone case, screen protector |
| **Upsell** | Basic model → Premium model of same product |
| **Accessories** | Camera → Lens, tripod, bag |
## Visibility & Publishing
Control when and where your product is visible.
### Visibility Toggle
* **Visible**: Product appears on your storefront and in search results
* **Hidden**: Product exists in the admin but is not shown to customers
Use hidden mode to:
* Prepare products before a launch
* Temporarily remove seasonal items
* Hide products being updated or photographed
### Publication Date
The **Published at** date controls when the product goes live:
* **Past or current date**: Product is immediately available (if visible)
* **Future date**: Product is scheduled and will become available at that date and time
Combine a future publication date with "Visible" to schedule product launches. The product won't appear until the scheduled date.
## Channels
If your store uses multiple sales channels, you can control which channels a product appears on:
* **Web store**. Your main online store
* **Mobile app**. If you have a mobile shopping app
* **POS**. Point of sale / in-store
* **Marketplace**. Third-party marketplace listings
Each product can be assigned to one or more channels.
## Product on Storefront
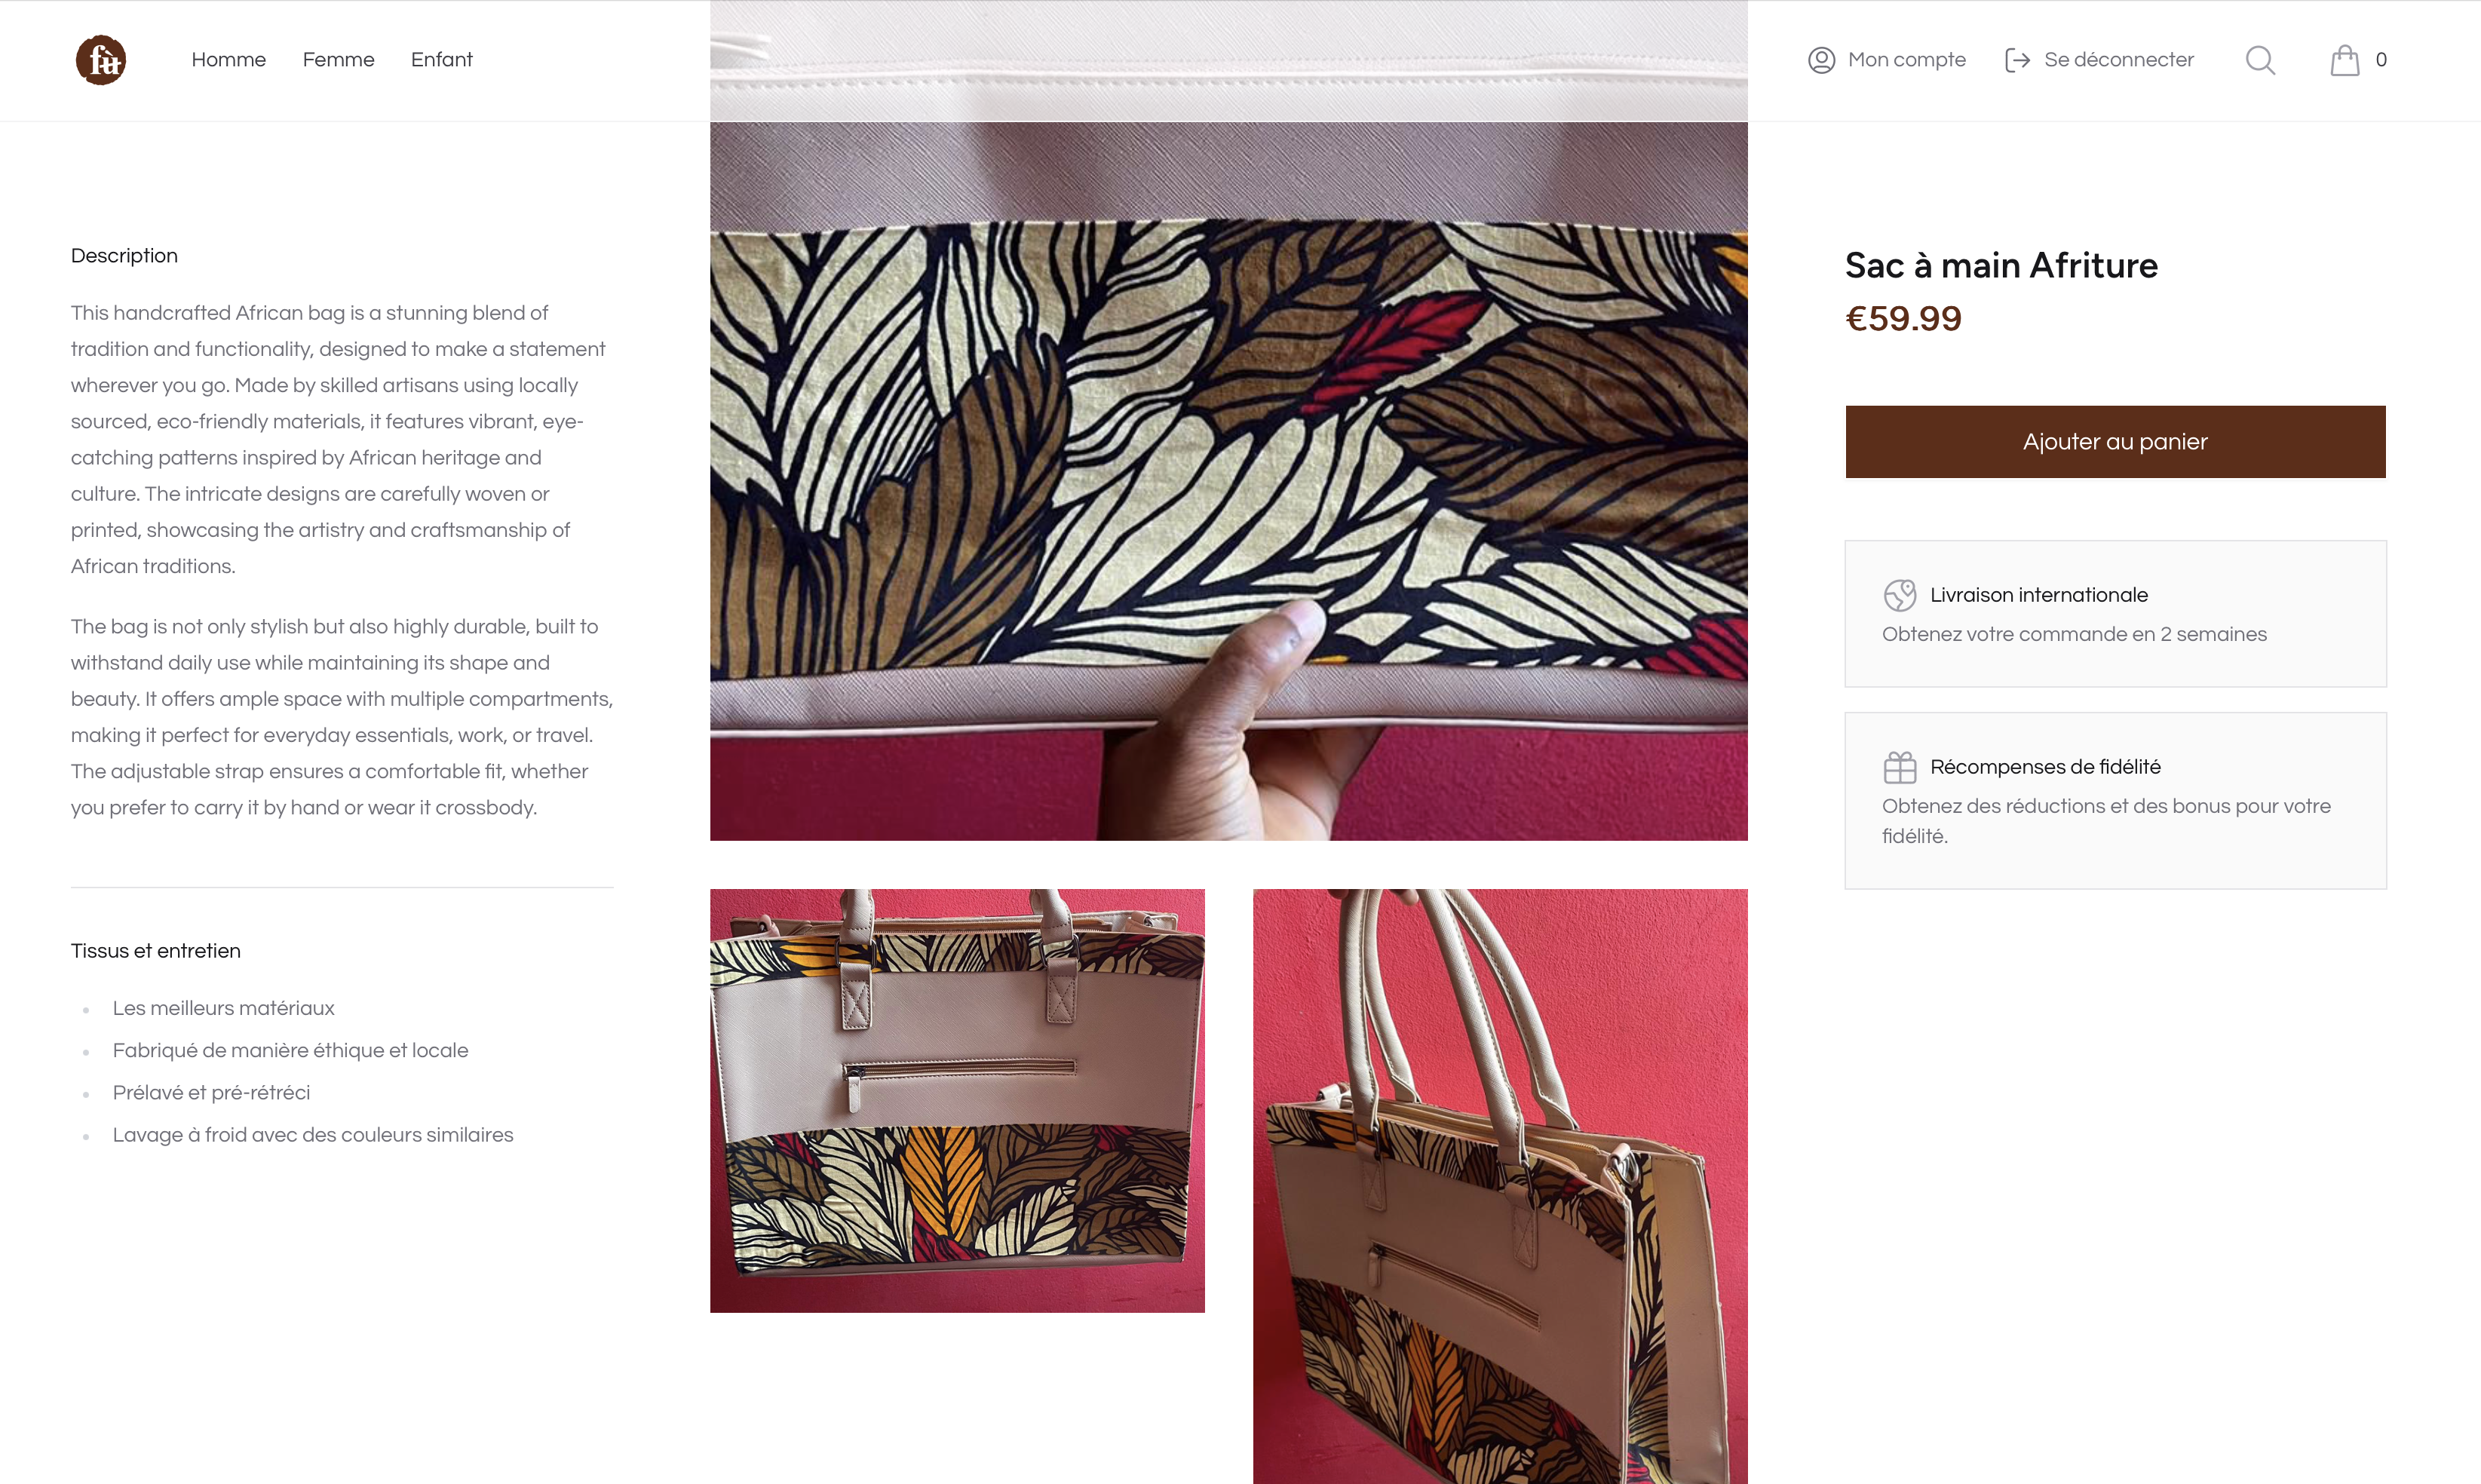
Here's how a fully configured product appears to customers:
### Adding Related Products
1. Navigate to the **Related Products** section on your product
2. Click **Add related product**
3. Search for and select products to link
4. Related products appear on the product detail page on your storefront
### When to Use Related Products
| Use case | Example |
| ------------------------------ | ------------------------------------------- |
| **Complementary items** | Shoes → Shoe cleaner, laces, socks |
| **Same category** | Blue dress → Other dresses in similar style |
| **Frequently bought together** | Phone → Phone case, screen protector |
| **Upsell** | Basic model → Premium model of same product |
| **Accessories** | Camera → Lens, tripod, bag |
## Visibility & Publishing
Control when and where your product is visible.
### Visibility Toggle
* **Visible**: Product appears on your storefront and in search results
* **Hidden**: Product exists in the admin but is not shown to customers
Use hidden mode to:
* Prepare products before a launch
* Temporarily remove seasonal items
* Hide products being updated or photographed
### Publication Date
The **Published at** date controls when the product goes live:
* **Past or current date**: Product is immediately available (if visible)
* **Future date**: Product is scheduled and will become available at that date and time
Combine a future publication date with "Visible" to schedule product launches. The product won't appear until the scheduled date.
## Channels
If your store uses multiple sales channels, you can control which channels a product appears on:
* **Web store**. Your main online store
* **Mobile app**. If you have a mobile shopping app
* **POS**. Point of sale / in-store
* **Marketplace**. Third-party marketplace listings
Each product can be assigned to one or more channels.
## Product on Storefront
Here's how a fully configured product appears to customers:
 ***
***
 ## Common Actions
| Action | How |
| --------------------- | ----------------------------------------- |
| **Edit product info** | Click on the product, modify fields, save |
| **Change visibility** | Toggle the visibility switch |
| **Update stock** | Go to Inventory tab, add/adjust stock |
| **Update pricing** | Go to Pricing tab, modify prices, save |
| **Delete product** | Click delete action (irreversible) |
| **Duplicate product** | Use the duplicate action to create a copy |
Deleting a product is permanent and removes all associated variants, stock history, and pricing. Consider hiding the product instead if you might need it again.
For developer details, see the [Products documentation](/v2/products).
## Common Actions
| Action | How |
| --------------------- | ----------------------------------------- |
| **Edit product info** | Click on the product, modify fields, save |
| **Change visibility** | Toggle the visibility switch |
| **Update stock** | Go to Inventory tab, add/adjust stock |
| **Update pricing** | Go to Pricing tab, modify prices, save |
| **Delete product** | Click delete action (irreversible) |
| **Duplicate product** | Use the duplicate action to create a copy |
Deleting a product is permanent and removes all associated variants, stock history, and pricing. Consider hiding the product instead if you might need it again.
For developer details, see the [Products documentation](/v2/products).