> ## Documentation Index
> Fetch the complete documentation index at: https://docs.laravelshopper.dev/llms.txt
> Use this file to discover all available pages before exploring further.
# Setup Store
> Configure your store's initial settings, address, currencies, and social links.
After installing Shopper and creating your admin user, log in at `/cpanel/login` to start the setup wizard. The wizard collects your store's basic information, address, and social links, then creates your first inventory location and default sales channel.
## Settings Model
Store configuration is managed through key-value pairs in the `Shopper\Core\Models\Setting` model. Each setting has a unique key, an optional display name, and a JSON value.
### Database Schema
| Column | Type | Nullable | Default | Description |
| -------------- | ------- | -------- | ------- | ---------------------------------- |
| `id` | bigint | no | auto | Primary key |
| `key` | string | no | - | Configuration key (unique) |
| `display_name` | string | yes | null | Human-readable label |
| `value` | json | yes | null | Setting value |
| `locked` | boolean | no | false | Whether the setting can be updated |
### Retrieving Settings
By default, to retrieve the value of a key you can use the helper function `shopper_setting()` passing the desired key as parameter
```php theme={null}
shopper_setting('my_key')
```
This value is cached for one day and under the key `shopper-setting-{$key}` by default, but if you want to retrieve each time the latest value you pass the second param `withCache` to **false**
```php theme={null}
shopper_setting('my_key', withCache: false);
```
## Store
When you launch your store the first important thing to do is to fill in the information about this store.
Your customers and the different services you might use need to know the information about your store.
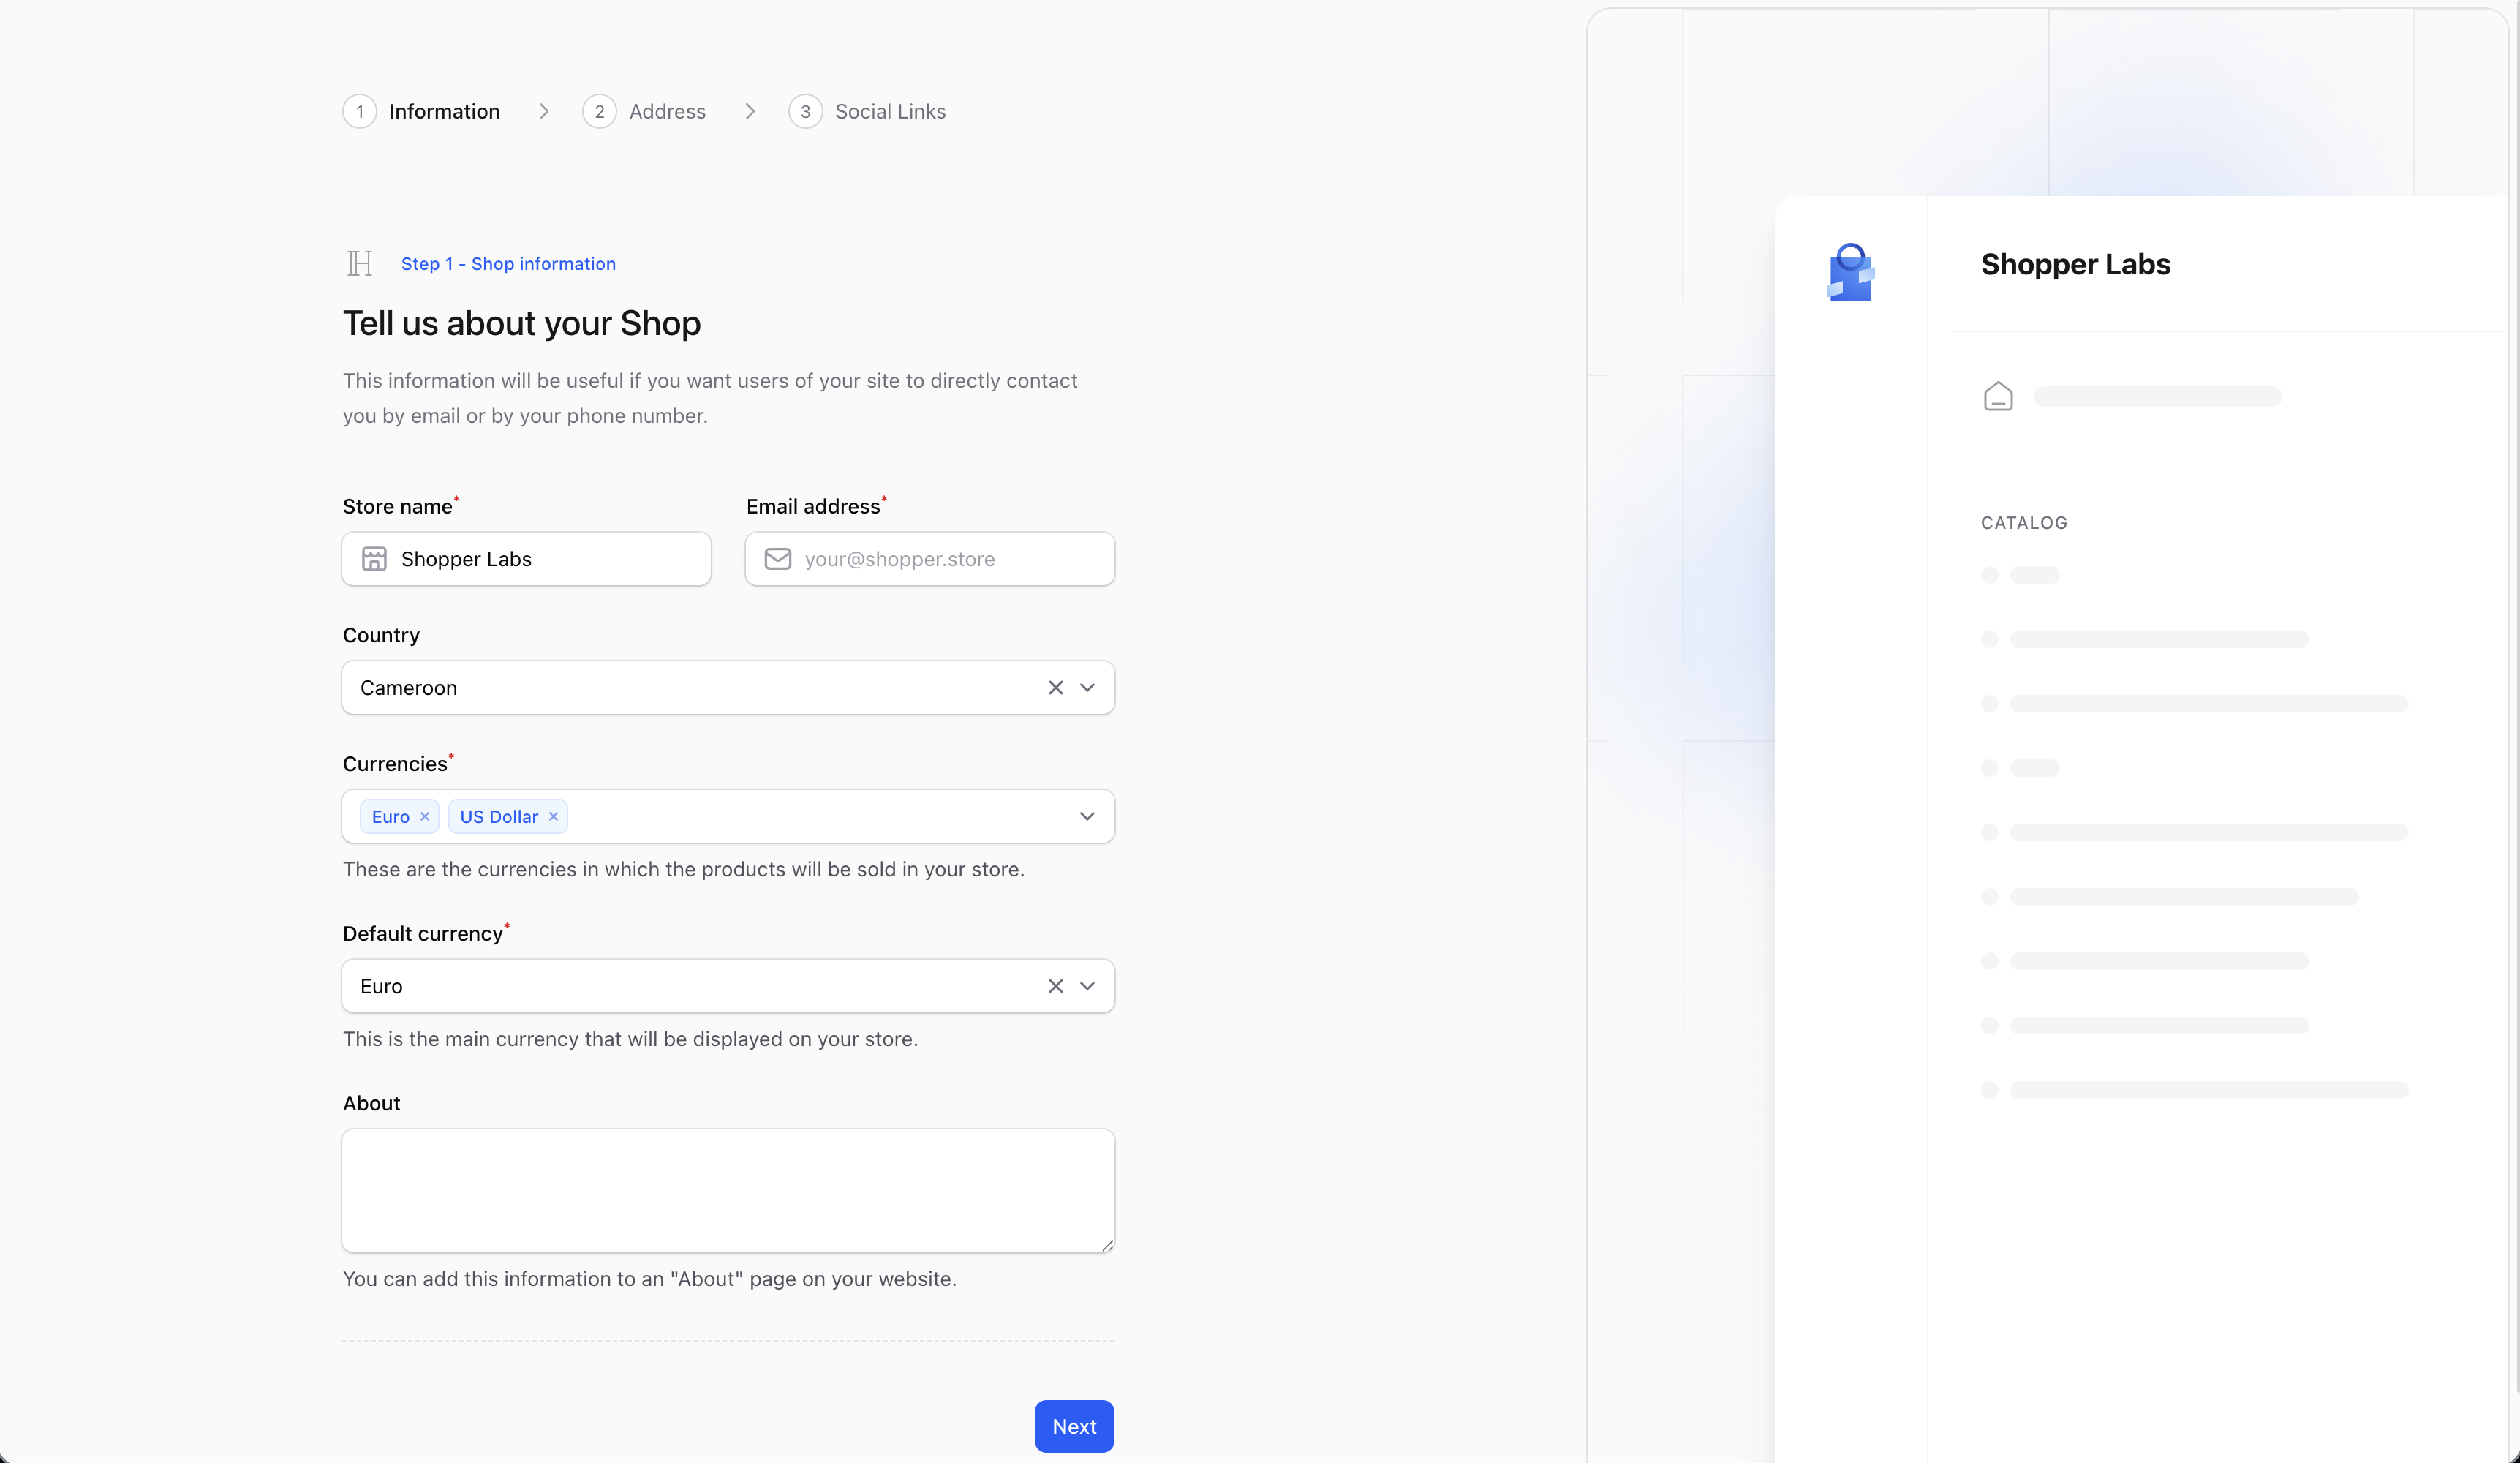 The information stored in this section is available using the following keys:
* `name` the store name,
* `email` the store email
* `currencies` array ids for the store currencies
* `default_currency_id` default currency id of the store
* `country_id` default country location of the store.
* `about` description and information about your store
## Address
Most stores keep their products in different locations around the world. When setting up this configuration you need to
define an address that will be set as the default location for your products.
When shipping an order, the products to be delivered/shipped will start from this location and thus the shipping price can be set according to this.
The information stored in this section is available using the following keys:
* `name` the store name,
* `email` the store email
* `currencies` array ids for the store currencies
* `default_currency_id` default currency id of the store
* `country_id` default country location of the store.
* `about` description and information about your store
## Address
Most stores keep their products in different locations around the world. When setting up this configuration you need to
define an address that will be set as the default location for your products.
When shipping an order, the products to be delivered/shipped will start from this location and thus the shipping price can be set according to this.
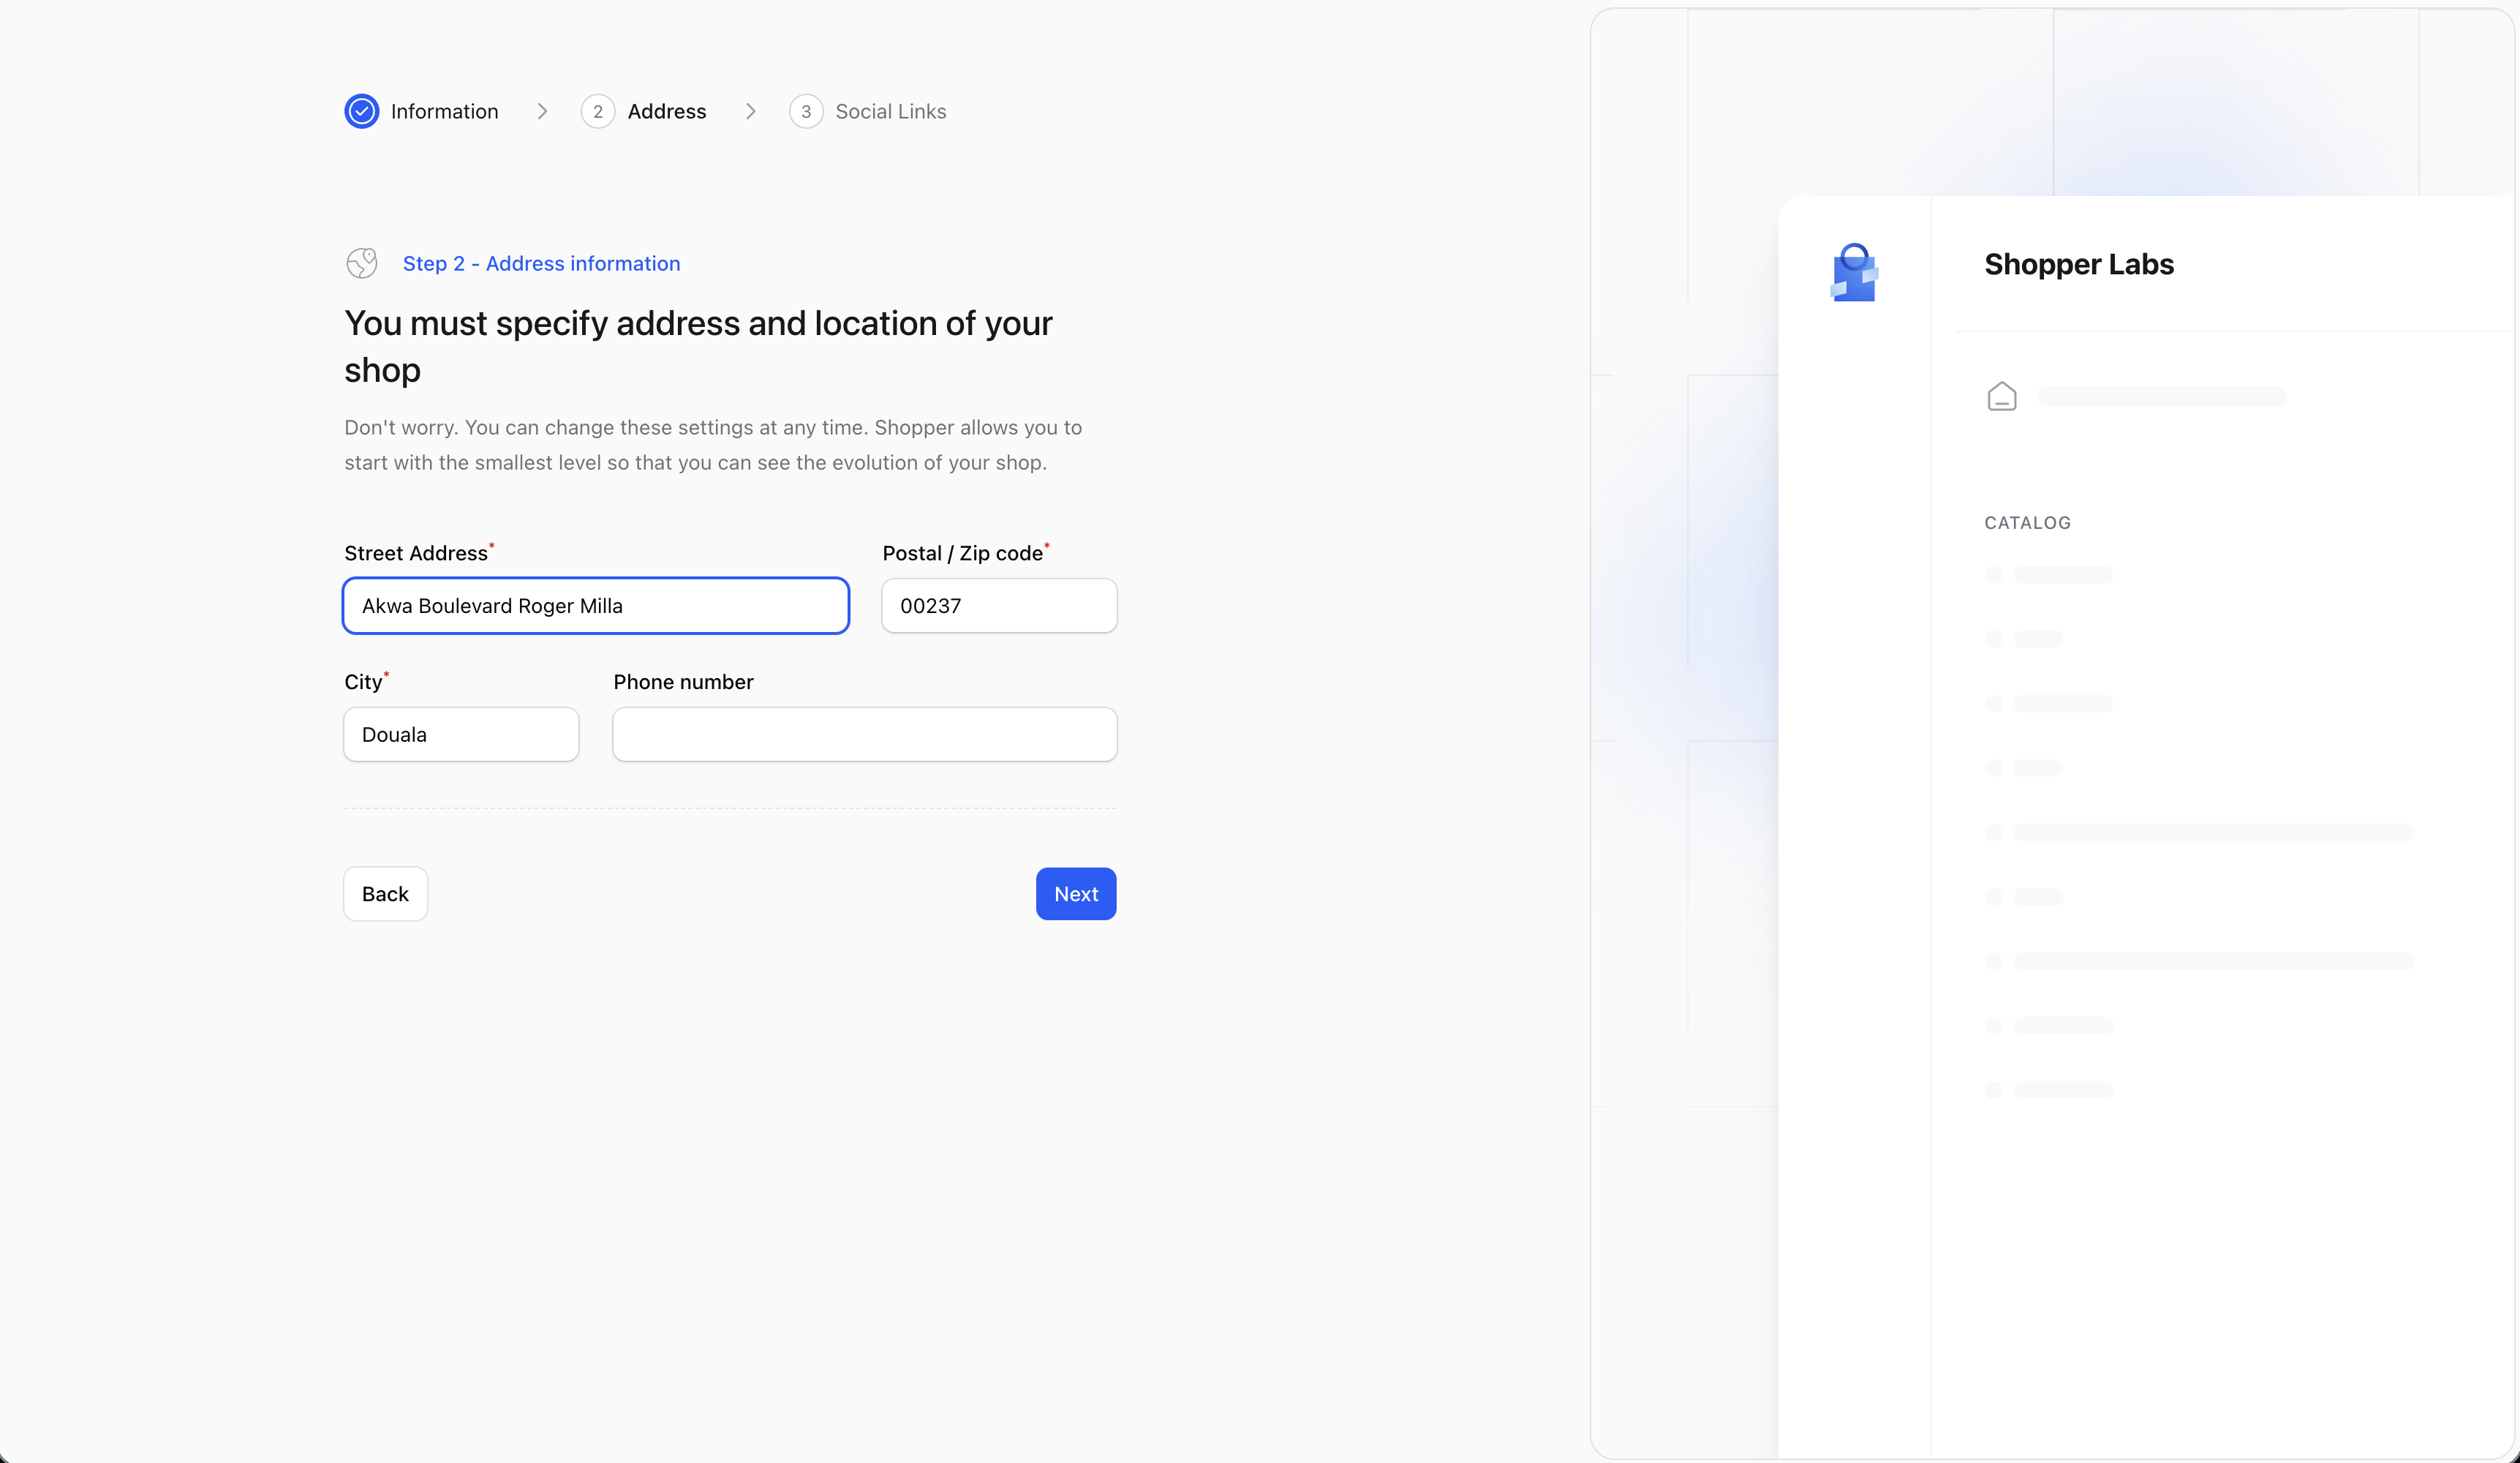 The keys registered in database during this section: `street_address`, `postal_code`, `city`, `phone_number`
## Social Links
If you want your customers to find you easily on social networks, you can fill in all the links directly by putting the full url.
This step is completely optional
The keys registered in database during this section: `street_address`, `postal_code`, `city`, `phone_number`
## Social Links
If you want your customers to find you easily on social networks, you can fill in all the links directly by putting the full url.
This step is completely optional
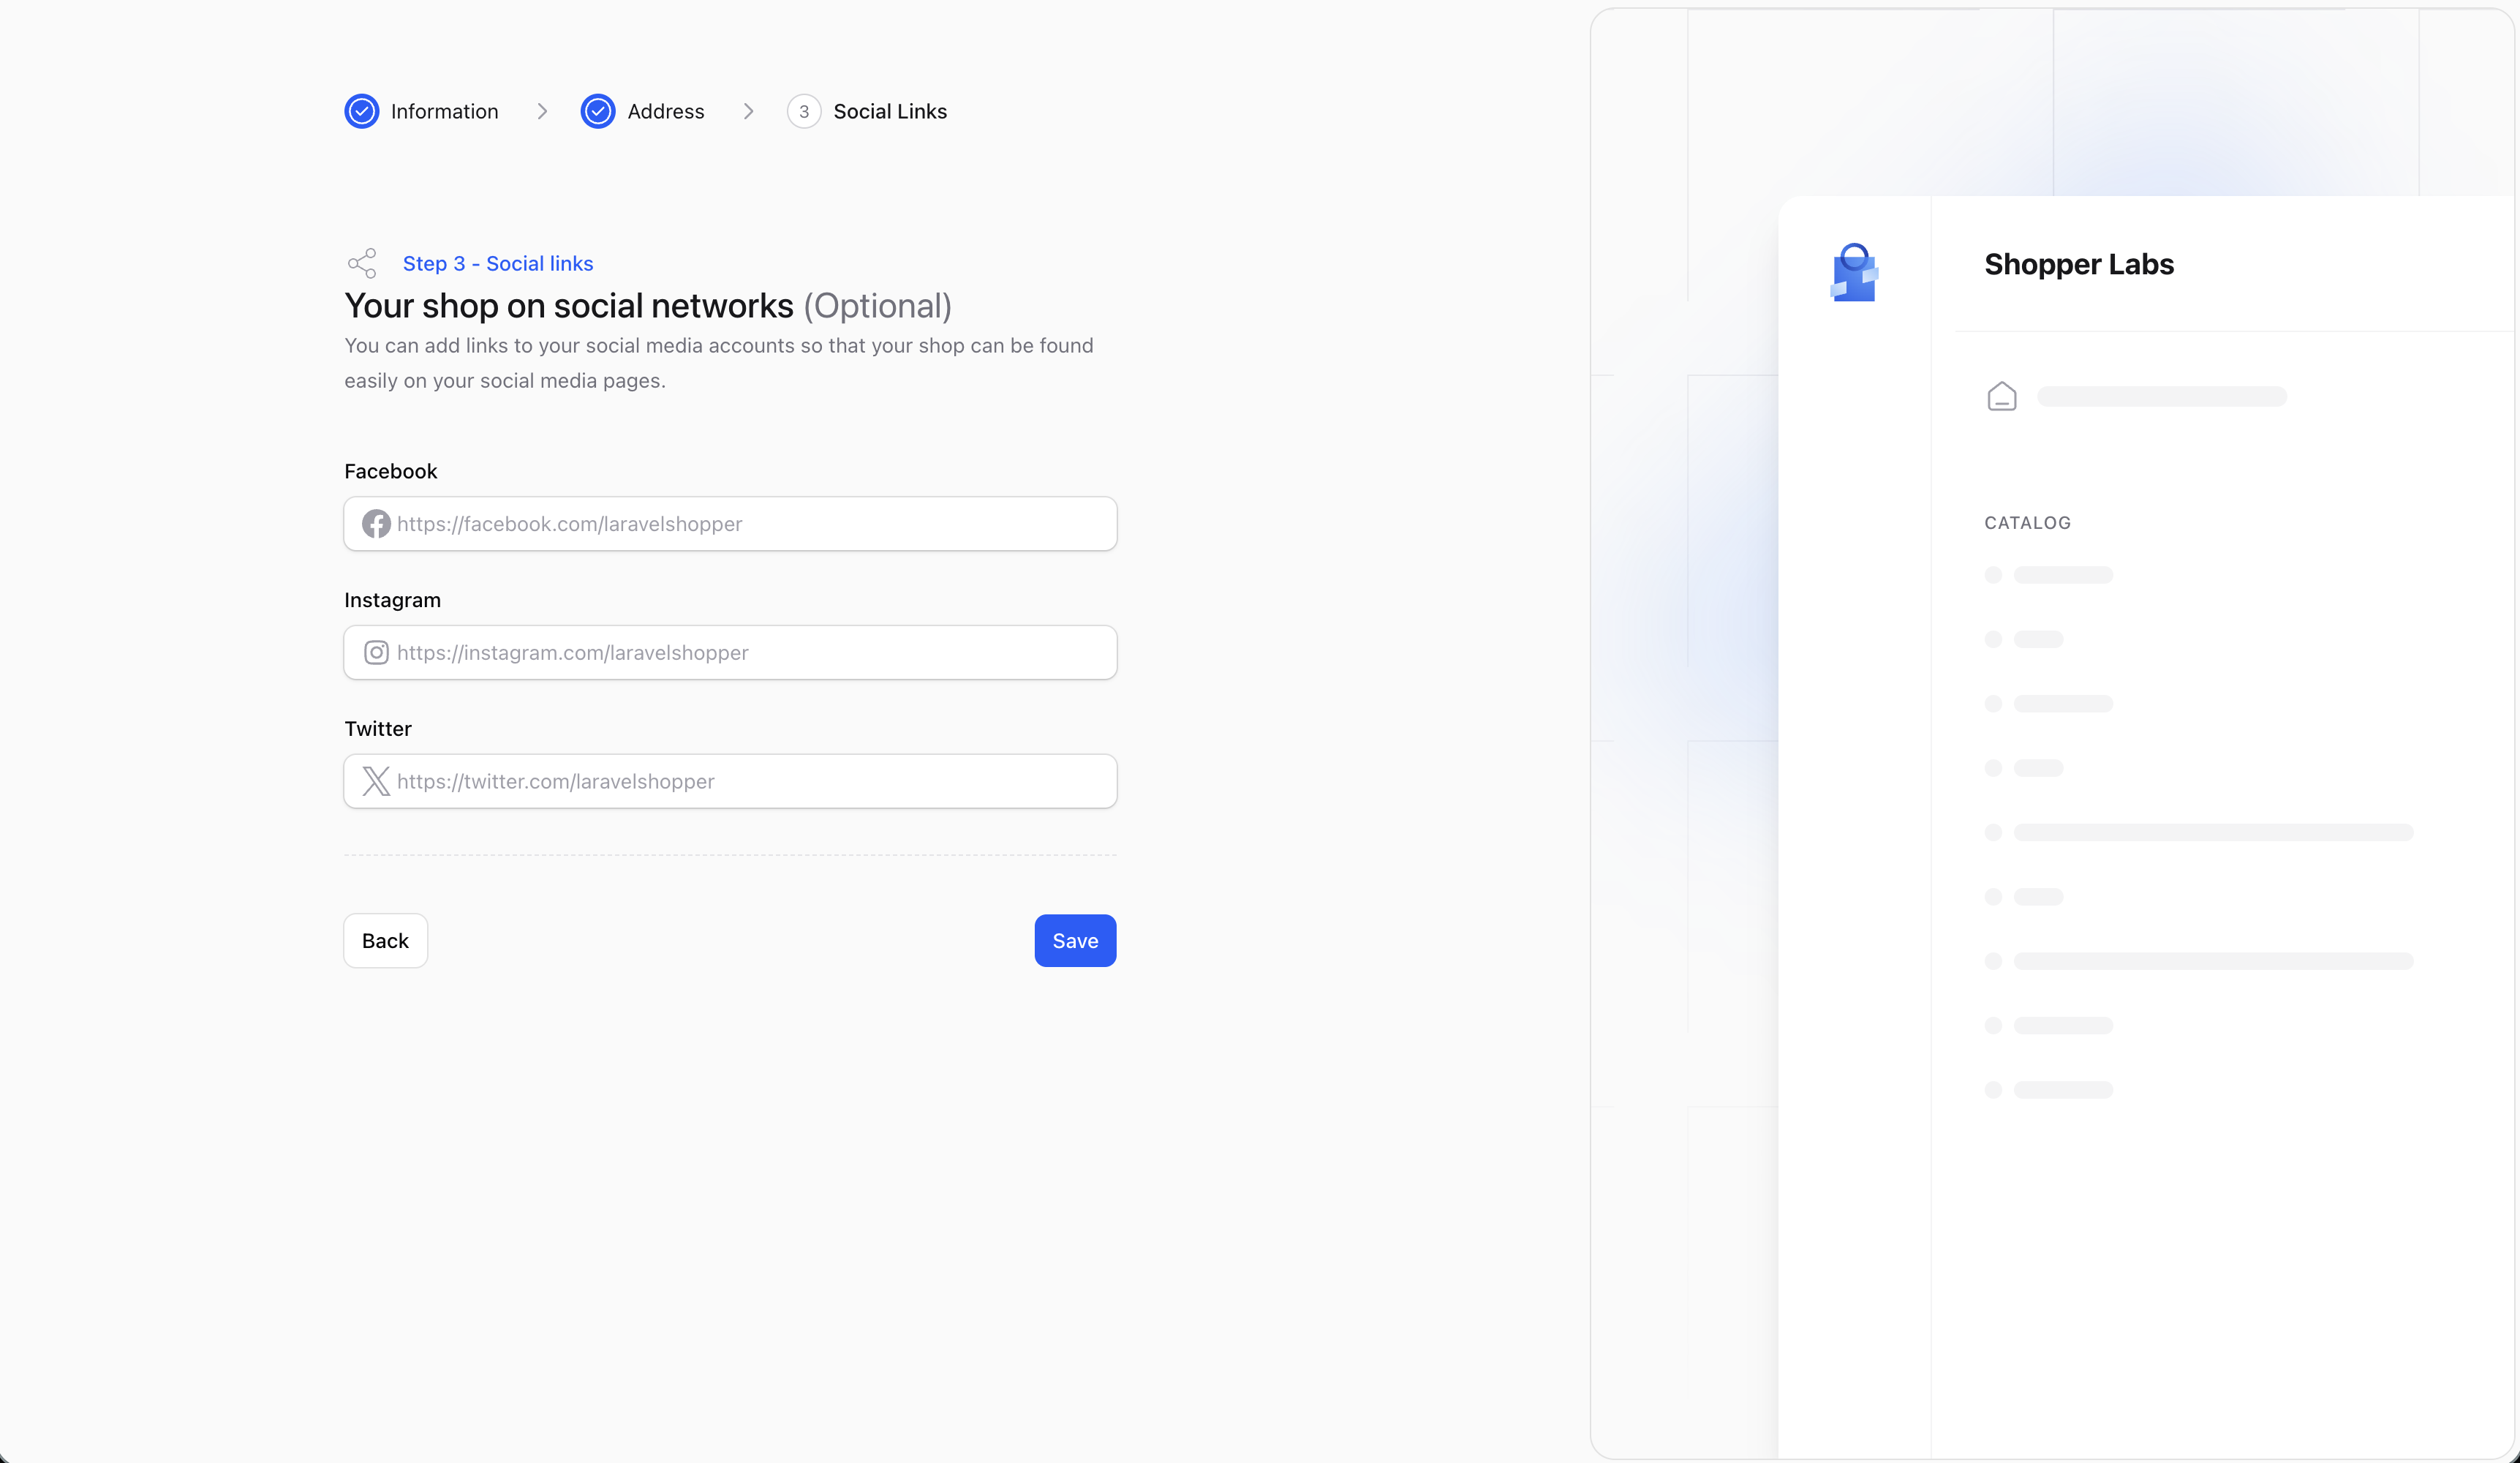 The keys registered in the database during this section: `facebook_link`, `instagram_link` and `twitter_link`.
The Livewire components used during the setup wizard are part of Shopper core and are not customizable. This is a mandatory step before accessing the dashboard.
## Channel
In today's E-commerce the shop site is no longer the only point of sale. Channels represent a single sales channel,
which can be one of the following things:
* Website
* Mobile application
* Cashier in your physical store
* Facebook shop,
* Instagram shop,
* etc
or pretty much anything similar you can imagine. When you set up your store Shopper creates a sales channel at
the same time as your first location with the same address information.
```php theme={null}
Channel::query()->create([
'name' => $name = __('Web Store'),
'slug' => $name,
'url' => env('APP_URL'),
'is_default' => true,
]);
```
This sales channel will be automatically assigned to all products that are added to your site. The implementation of a sales channel management will be done later
## Update setting
You can update your store information when needed, edit your store images, update the complete address, the legal name of your shop, etc.
To edit your shop information:
* From your administration, on the sidebar click on the settings icon at the bottom of the page **Settings > General**
The component used to update store setting of the store is found in the component configuration file `config/shopper/components/setting.php` if published,
It's the `Shopper\Livewire\Pages\Settings\General` component under the key `pages.general`.
```php theme={null}
use Shopper\Livewire\Components;
use Shopper\Livewire\Pages;
return [
'pages' => [
'setting-index' => Pages\Settings\Index::class,
'general' => Pages\Settings\General::class,
'inventory-index' => Pages\Settings\Locations\Index::class,
// ...
];
'components' => [
// ...
],
];
```
The keys registered in the database during this section: `facebook_link`, `instagram_link` and `twitter_link`.
The Livewire components used during the setup wizard are part of Shopper core and are not customizable. This is a mandatory step before accessing the dashboard.
## Channel
In today's E-commerce the shop site is no longer the only point of sale. Channels represent a single sales channel,
which can be one of the following things:
* Website
* Mobile application
* Cashier in your physical store
* Facebook shop,
* Instagram shop,
* etc
or pretty much anything similar you can imagine. When you set up your store Shopper creates a sales channel at
the same time as your first location with the same address information.
```php theme={null}
Channel::query()->create([
'name' => $name = __('Web Store'),
'slug' => $name,
'url' => env('APP_URL'),
'is_default' => true,
]);
```
This sales channel will be automatically assigned to all products that are added to your site. The implementation of a sales channel management will be done later
## Update setting
You can update your store information when needed, edit your store images, update the complete address, the legal name of your shop, etc.
To edit your shop information:
* From your administration, on the sidebar click on the settings icon at the bottom of the page **Settings > General**
The component used to update store setting of the store is found in the component configuration file `config/shopper/components/setting.php` if published,
It's the `Shopper\Livewire\Pages\Settings\General` component under the key `pages.general`.
```php theme={null}
use Shopper\Livewire\Components;
use Shopper\Livewire\Pages;
return [
'pages' => [
'setting-index' => Pages\Settings\Index::class,
'general' => Pages\Settings\General::class,
'inventory-index' => Pages\Settings\Locations\Index::class,
// ...
];
'components' => [
// ...
],
];
```
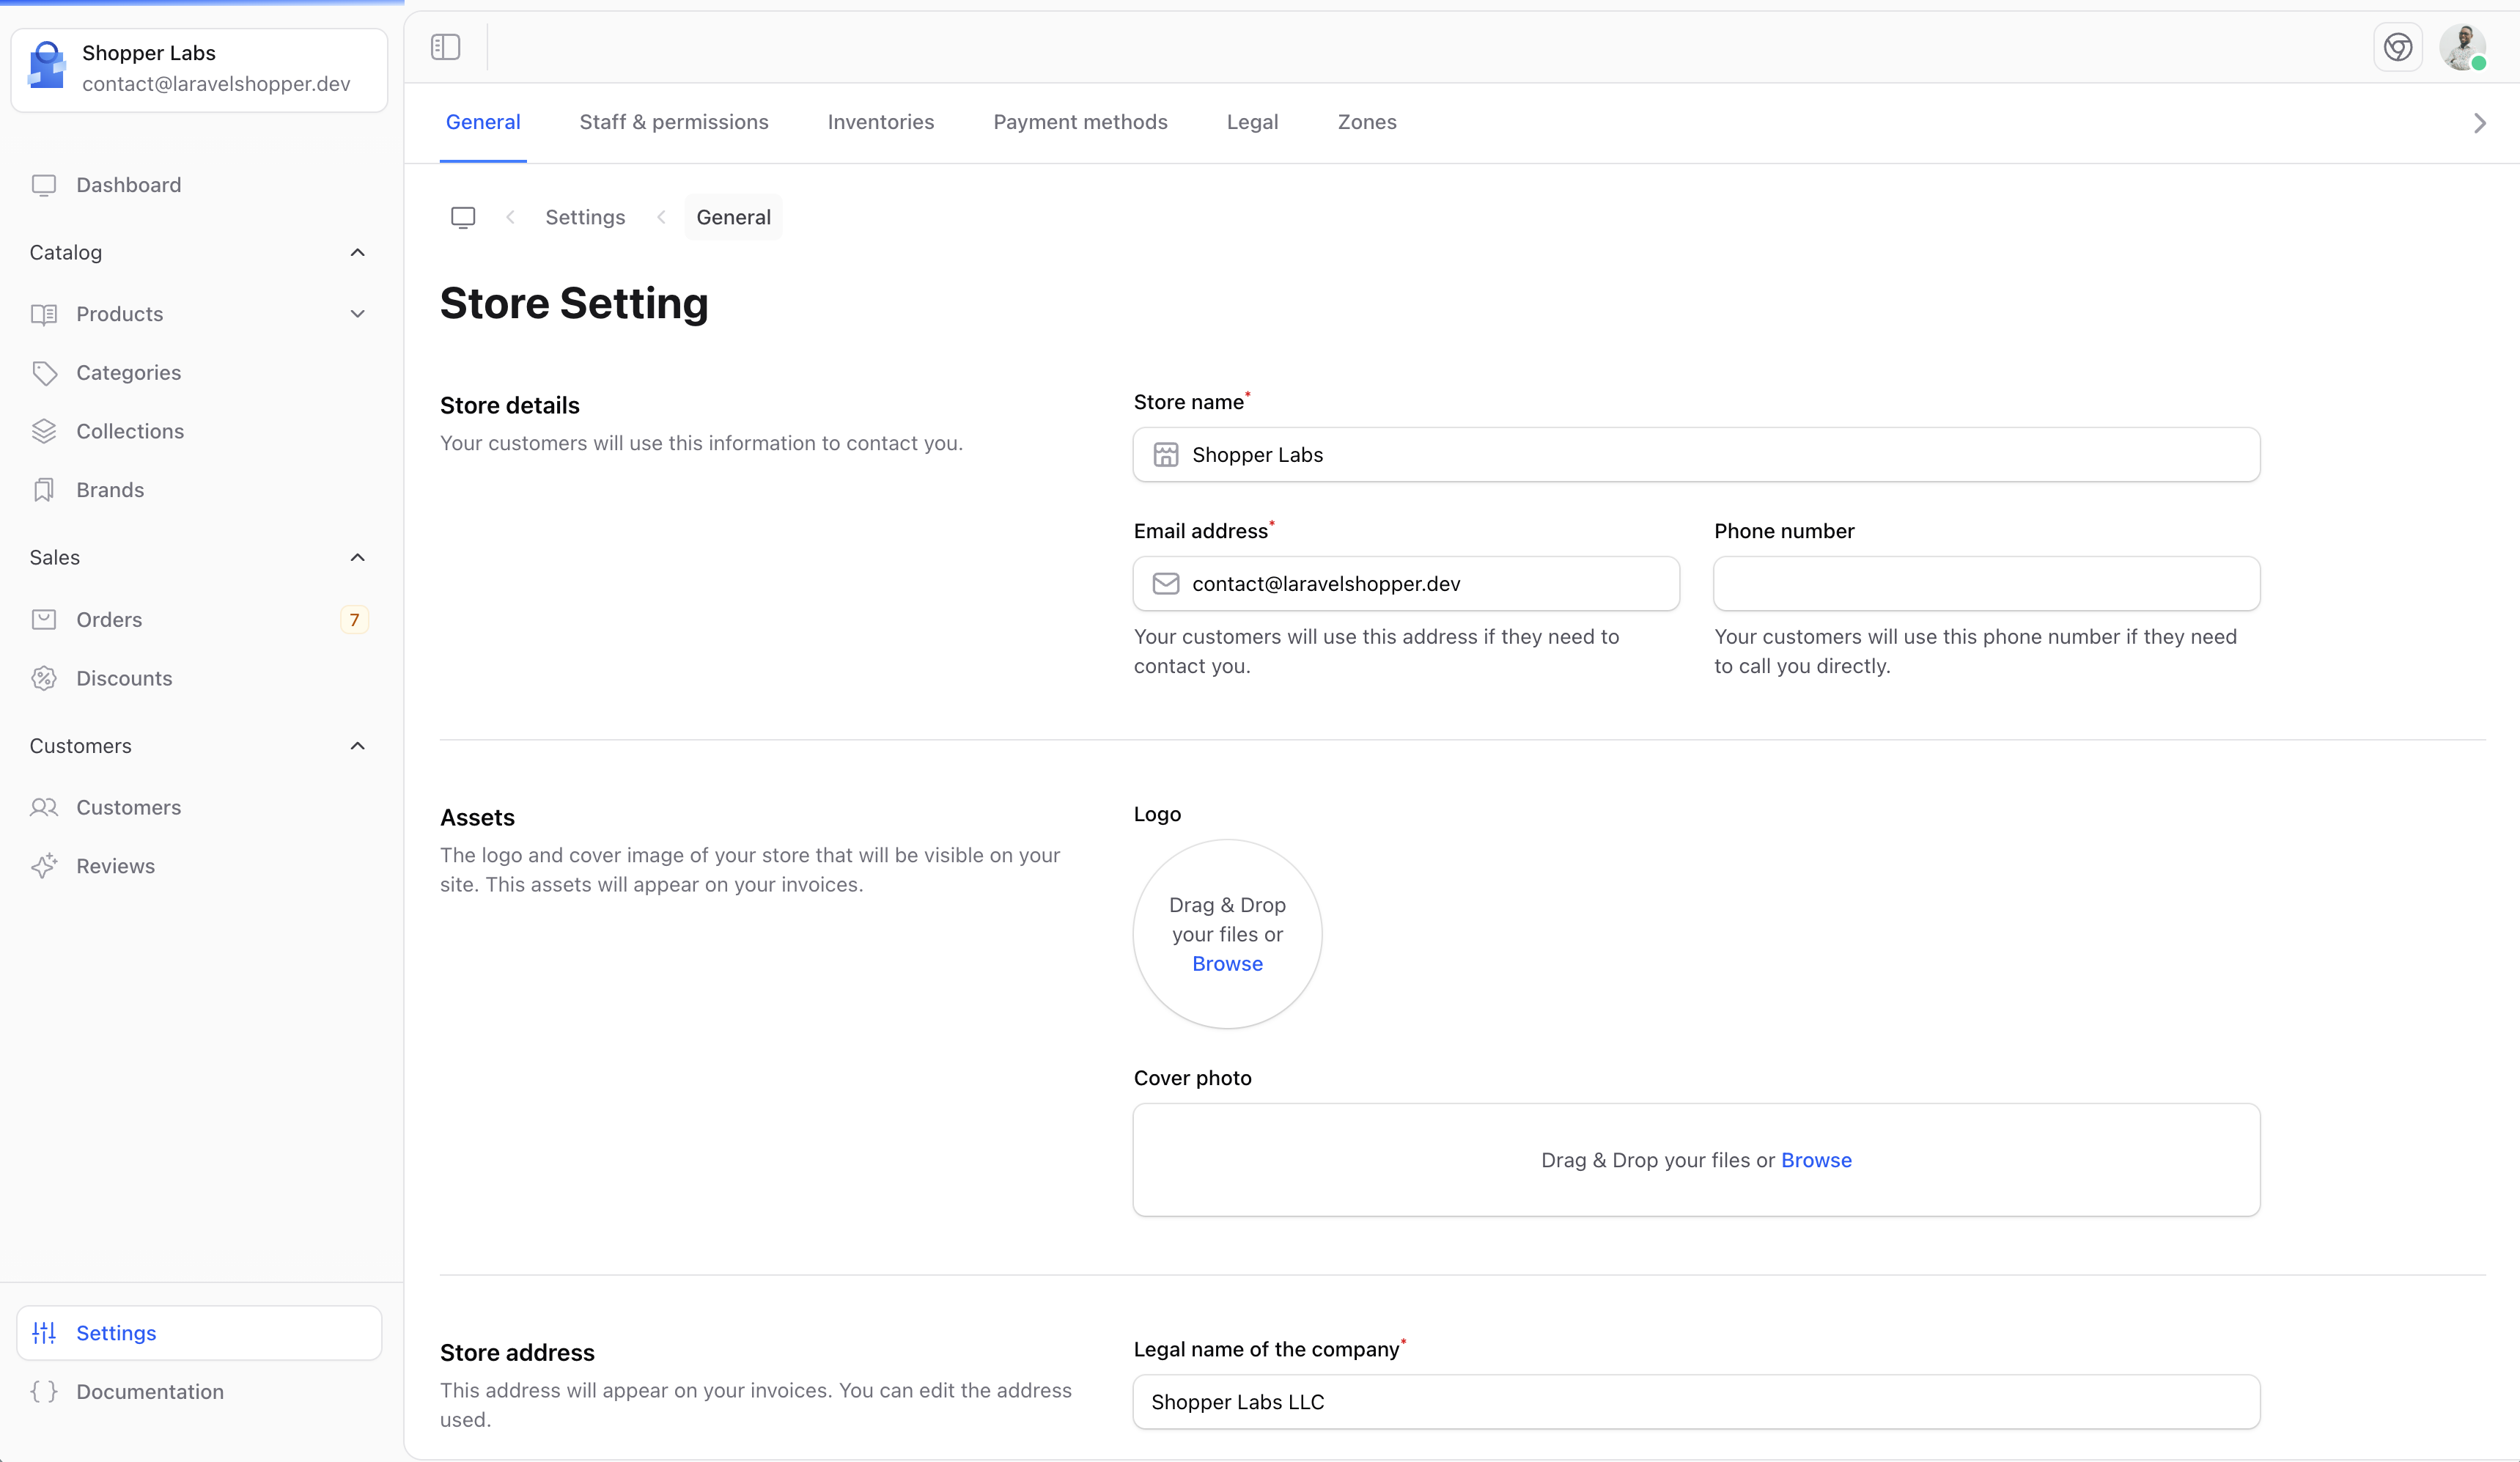 In this interface you will update your store. Don't forget that the model used is the model `Shopper\Core\Models\Setting`.
With the Shopper configuration you can completely change the architecture of this view and the data stored in the database.
In this interface you will update your store. Don't forget that the model used is the model `Shopper\Core\Models\Setting`.
With the Shopper configuration you can completely change the architecture of this view and the data stored in the database.