> ## Documentation Index
> Fetch the complete documentation index at: https://docs.laravelshopper.dev/llms.txt
> Use this file to discover all available pages before exploring further.
# Customization
This is documentation for Shopper v1, which is no longer maintained. Please refer to the [v2 docs](/v2) for the latest information.
Once you have installed Shopper, you need to set up a store to serve as your first location. After creating a new user, you need to login via the url `/shopper/login`. After logging in you need to fill in the required information to access the Shopper dashboard
 Defines your shop’s address country and state, where you are based as a seller. It determines default tax rates and customer locations.
## Global
All thoses informations is stored using the **Setting** Model which is located `\Shopper\Core\Models\Setting`
```php theme={null}
namespace Shopper\Core\Models;
use Illuminate\Database\Eloquent\Model;
class Setting extends Model
{
/**
* The attributes that are mass assignable.
*
* @var array
*/
protected $fillable = [
'display_name',
'key',
'value',
'locked',
];
}
```
### Fields
| Name | Type | Notes |
| -------------- | ------- | ------------------------------------------------------------------------------------------------ |
| `id` | autoinc | |
| `key` | string | Unique, the configuration key that will be used to retrieve this information. |
| `display_name` | string | Nullable, represents the display name for the key that has been set for better reading |
| `value` | json | Nullable, represents the value of the key that will be displayed when the parameter is requested |
| `locked` | boolean | default is false (0), allows to define if this parameter can be updated |
### Component
Shopper is made of several Livewire components, to make the configuration easier and more adaptable to any kind of system.
The component used to manage the configuration and customization of the store is found in the component configuration file `config/shopper/components.php`.
So you can replace it and configure your store the way you want. Yes it's magic 🎩
### Retrieving setting
By default to retrieve the value of a key you can use the helper function `shopper_setting()` passing the desired key as parameter
```php theme={null}
shopper_setting('my_key')
```
This value is cached for one day and under the key `shopper-setting-{$key}`
## Store
When you launch your store the first important thing to do is to fill in the information about this store.
Your customers and the different services you might use need to know the information about your store.
Defines your shop’s address country and state, where you are based as a seller. It determines default tax rates and customer locations.
## Global
All thoses informations is stored using the **Setting** Model which is located `\Shopper\Core\Models\Setting`
```php theme={null}
namespace Shopper\Core\Models;
use Illuminate\Database\Eloquent\Model;
class Setting extends Model
{
/**
* The attributes that are mass assignable.
*
* @var array
*/
protected $fillable = [
'display_name',
'key',
'value',
'locked',
];
}
```
### Fields
| Name | Type | Notes |
| -------------- | ------- | ------------------------------------------------------------------------------------------------ |
| `id` | autoinc | |
| `key` | string | Unique, the configuration key that will be used to retrieve this information. |
| `display_name` | string | Nullable, represents the display name for the key that has been set for better reading |
| `value` | json | Nullable, represents the value of the key that will be displayed when the parameter is requested |
| `locked` | boolean | default is false (0), allows to define if this parameter can be updated |
### Component
Shopper is made of several Livewire components, to make the configuration easier and more adaptable to any kind of system.
The component used to manage the configuration and customization of the store is found in the component configuration file `config/shopper/components.php`.
So you can replace it and configure your store the way you want. Yes it's magic 🎩
### Retrieving setting
By default to retrieve the value of a key you can use the helper function `shopper_setting()` passing the desired key as parameter
```php theme={null}
shopper_setting('my_key')
```
This value is cached for one day and under the key `shopper-setting-{$key}`
## Store
When you launch your store the first important thing to do is to fill in the information about this store.
Your customers and the different services you might use need to know the information about your store.
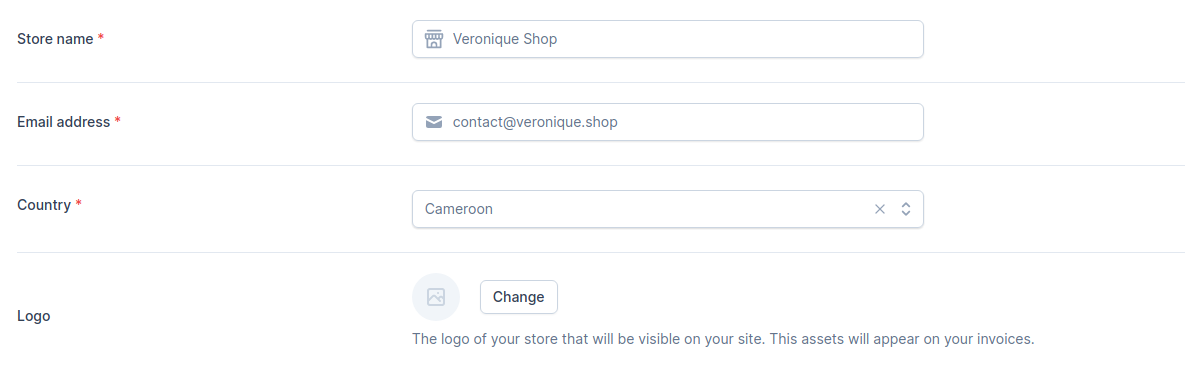 The information stored in this section is available using the following keys: `shop_name` for the store name, `shop_email` for the email and `shop_country_id` for the Country.
## Currency
Choose the default currency for the store. Only one may be selected.
The information stored in this section is available using the following keys: `shop_name` for the store name, `shop_email` for the email and `shop_country_id` for the Country.
## Currency
Choose the default currency for the store. Only one may be selected.
 For currency configurations we use the [moneyphp/money](https://github.com/moneyphp/money) package. At the moment, the formatter does it automatically depending on the currency.
As you may have noticed in the code, there is also a helper that returns the currency you registered `shopper_currency()`. This will return the currency configured in your admin panel: **USD**, **XAF**, **EUR**, etc
## Location
Most stores keep their products in different locations around the world. When setting up this configuration you need to define a location that will be set as the default location for your products.
When shipping an order, the products to be delivered/shipped will start from this location and thus the shipping price can be set according to this.
For currency configurations we use the [moneyphp/money](https://github.com/moneyphp/money) package. At the moment, the formatter does it automatically depending on the currency.
As you may have noticed in the code, there is also a helper that returns the currency you registered `shopper_currency()`. This will return the currency configured in your admin panel: **USD**, **XAF**, **EUR**, etc
## Location
Most stores keep their products in different locations around the world. When setting up this configuration you need to define a location that will be set as the default location for your products.
When shipping an order, the products to be delivered/shipped will start from this location and thus the shipping price can be set according to this.
 You must fill in the address of your location. You can specify GPS coordinates if you want customers to be able to geolocate you on a map with this information.
Shopper uses mapbox to display this map. To configure your map you can go to the [mapbox documentation](https://docs.mapbox.com/mapbox-gl-js/api/).
You must fill in the address of your location. You can specify GPS coordinates if you want customers to be able to geolocate you on a map with this information.
Shopper uses mapbox to display this map. To configure your map you can go to the [mapbox documentation](https://docs.mapbox.com/mapbox-gl-js/api/).
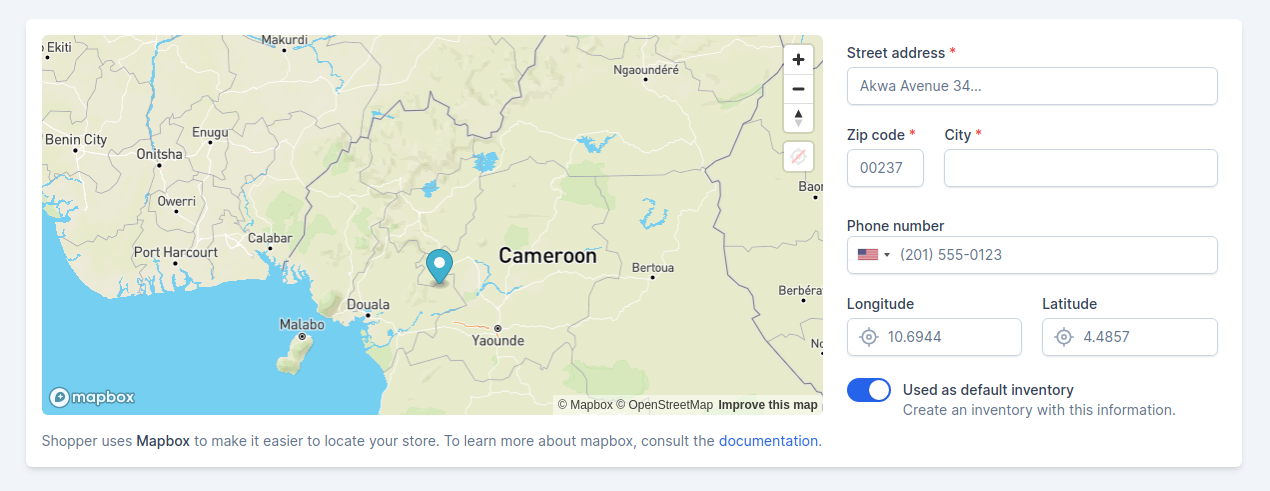 The keys registered in the database during this section: `shop_street_address`, `shop_zipcode`, `shop_city`, `shop_phone_number`, `shop_lng` and `shop_lat`.
If you modify the Livewire component that takes care of registering those information you can also decide to change the name of its keys.
## Channel
In today's E-commerce the shop site is no longer the only point of sale.
Channels represent a single sales channel, which can be one of the following things:
* Website
* Mobile application
* Cashier in your physical store
* Facebook shop,
* Instagram shop,
* etc
or pretty much anything similar you can imagine.
By default when you set up your store Shopper creates a sales channel at the same time as your first location with the same location information.
```php theme={null}
(new ChannelRepository())->create([
'name' => $name = __('Web Store'),
'slug' => $name,
'url' => env('APP_URL'),
'is_default' => true,
]);
```
This sales channel will be automatically assigned to all products that are added to your site. The implementation of a sales channel management will be done later
## Social Links
If you want your customers to find you easily on social networks, you can fill in all the links directly by putting the full url.
This step is completely optional
The keys registered in the database during this section: `shop_street_address`, `shop_zipcode`, `shop_city`, `shop_phone_number`, `shop_lng` and `shop_lat`.
If you modify the Livewire component that takes care of registering those information you can also decide to change the name of its keys.
## Channel
In today's E-commerce the shop site is no longer the only point of sale.
Channels represent a single sales channel, which can be one of the following things:
* Website
* Mobile application
* Cashier in your physical store
* Facebook shop,
* Instagram shop,
* etc
or pretty much anything similar you can imagine.
By default when you set up your store Shopper creates a sales channel at the same time as your first location with the same location information.
```php theme={null}
(new ChannelRepository())->create([
'name' => $name = __('Web Store'),
'slug' => $name,
'url' => env('APP_URL'),
'is_default' => true,
]);
```
This sales channel will be automatically assigned to all products that are added to your site. The implementation of a sales channel management will be done later
## Social Links
If you want your customers to find you easily on social networks, you can fill in all the links directly by putting the full url.
This step is completely optional
 The keys registered in the database during this section: `shop_facebook_link`, `shop_instagram_link` and `shop_twitter_link`.
## Update setting
You can update your store information when needed, edit your store images, update the complete address, the legal name of your shop, etc.
Shopper at the moment doesn't manage several currencies so you must select with what currency you will sell on your site.
To edit your shop information, you must:
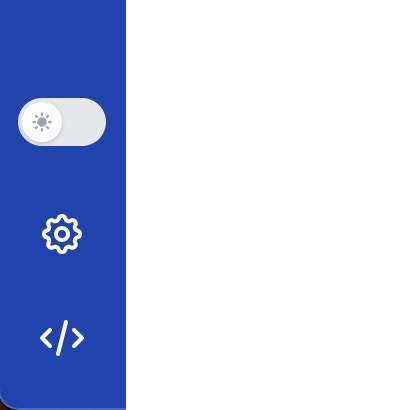
* From your administration, on the blue sidebar click on the settings icon at the bottom of the page **Settings > General**
The keys registered in the database during this section: `shop_facebook_link`, `shop_instagram_link` and `shop_twitter_link`.
## Update setting
You can update your store information when needed, edit your store images, update the complete address, the legal name of your shop, etc.
Shopper at the moment doesn't manage several currencies so you must select with what currency you will sell on your site.
To edit your shop information, you must:
* From your administration, on the blue sidebar click on the settings icon at the bottom of the page **Settings > General**
 The component used to update store setting of the store is found in the component configuration file `config/shopper/components.php`, It's the `Shopper\Framework\Http\Livewire\Settings\General` component.
```php theme={null}
use Shopper\Http\Livewire\Components;
return [
'livewire' => [
'settings.inventories.create' => Components\Settings\Inventories\Create::class,
'settings.inventories.edit' => Components\Settings\Inventories\Edit::class,
'settings.general' => Components\Settings\General::class,
'settings.legal.privacy' => Components\Settings\Legal\Privacy::class,
'settings.legal.refund' => Components\Settings\Legal\Refund::class,
];
];
```
The component used to update store setting of the store is found in the component configuration file `config/shopper/components.php`, It's the `Shopper\Framework\Http\Livewire\Settings\General` component.
```php theme={null}
use Shopper\Http\Livewire\Components;
return [
'livewire' => [
'settings.inventories.create' => Components\Settings\Inventories\Create::class,
'settings.inventories.edit' => Components\Settings\Inventories\Edit::class,
'settings.general' => Components\Settings\General::class,
'settings.legal.privacy' => Components\Settings\Legal\Privacy::class,
'settings.legal.refund' => Components\Settings\Legal\Refund::class,
];
];
```
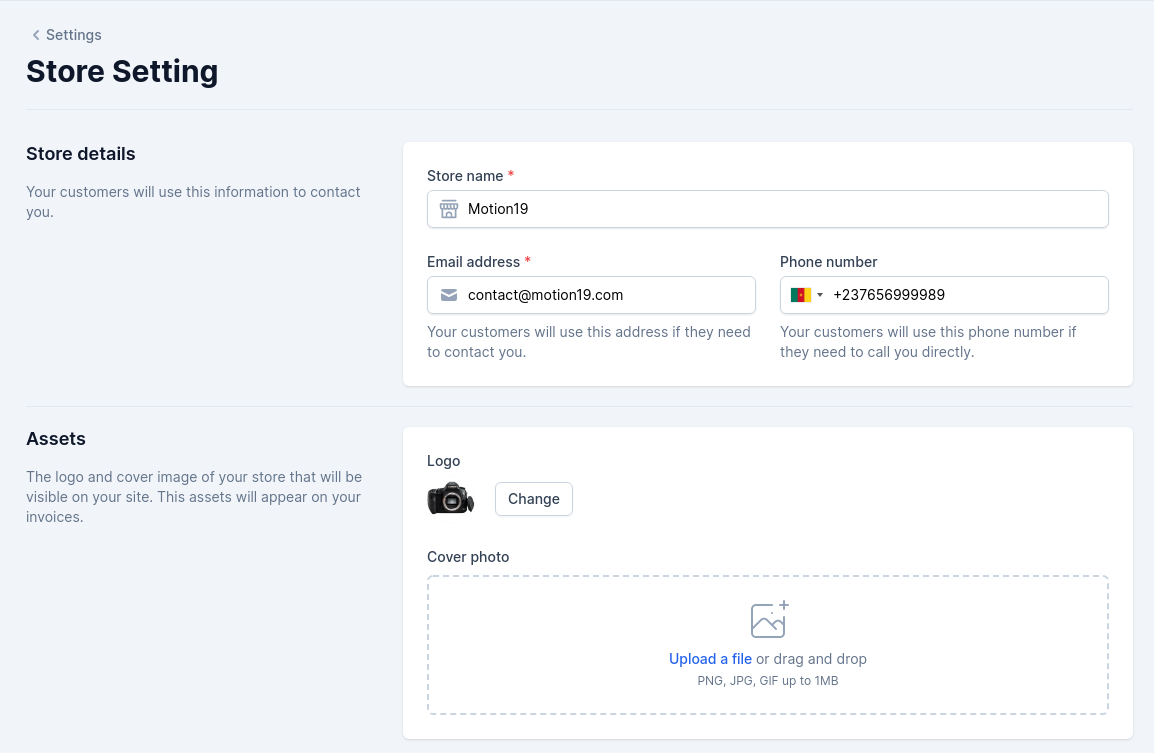 In this interface you will update your store. Don't forget that the model used is the model `Shopper\Models\Setting`.
With the Shopper configuration you can completely change the architecture of this view and the data stored in the database.
In this interface you will update your store. Don't forget that the model used is the model `Shopper\Models\Setting`.
With the Shopper configuration you can completely change the architecture of this view and the data stored in the database.